StarTech.com ST7C51224 Käyttöohje
StarTech.com USB-keskitin ST7C51224
Lue alta 📖 käyttöohje suomeksi merkille StarTech.com ST7C51224 (2 sivua) kategoriassa USB-keskitin. Tämä opas oli hyödyllinen 56 henkilölle ja sai 4.3 tähden keskimäärin 6 käyttäjältä
Sivu 1/2
Quick-Start Guide
To view manuals, FAQs, videos, drivers, downloads, technical drawings, and more, visit www.startech.com/support.
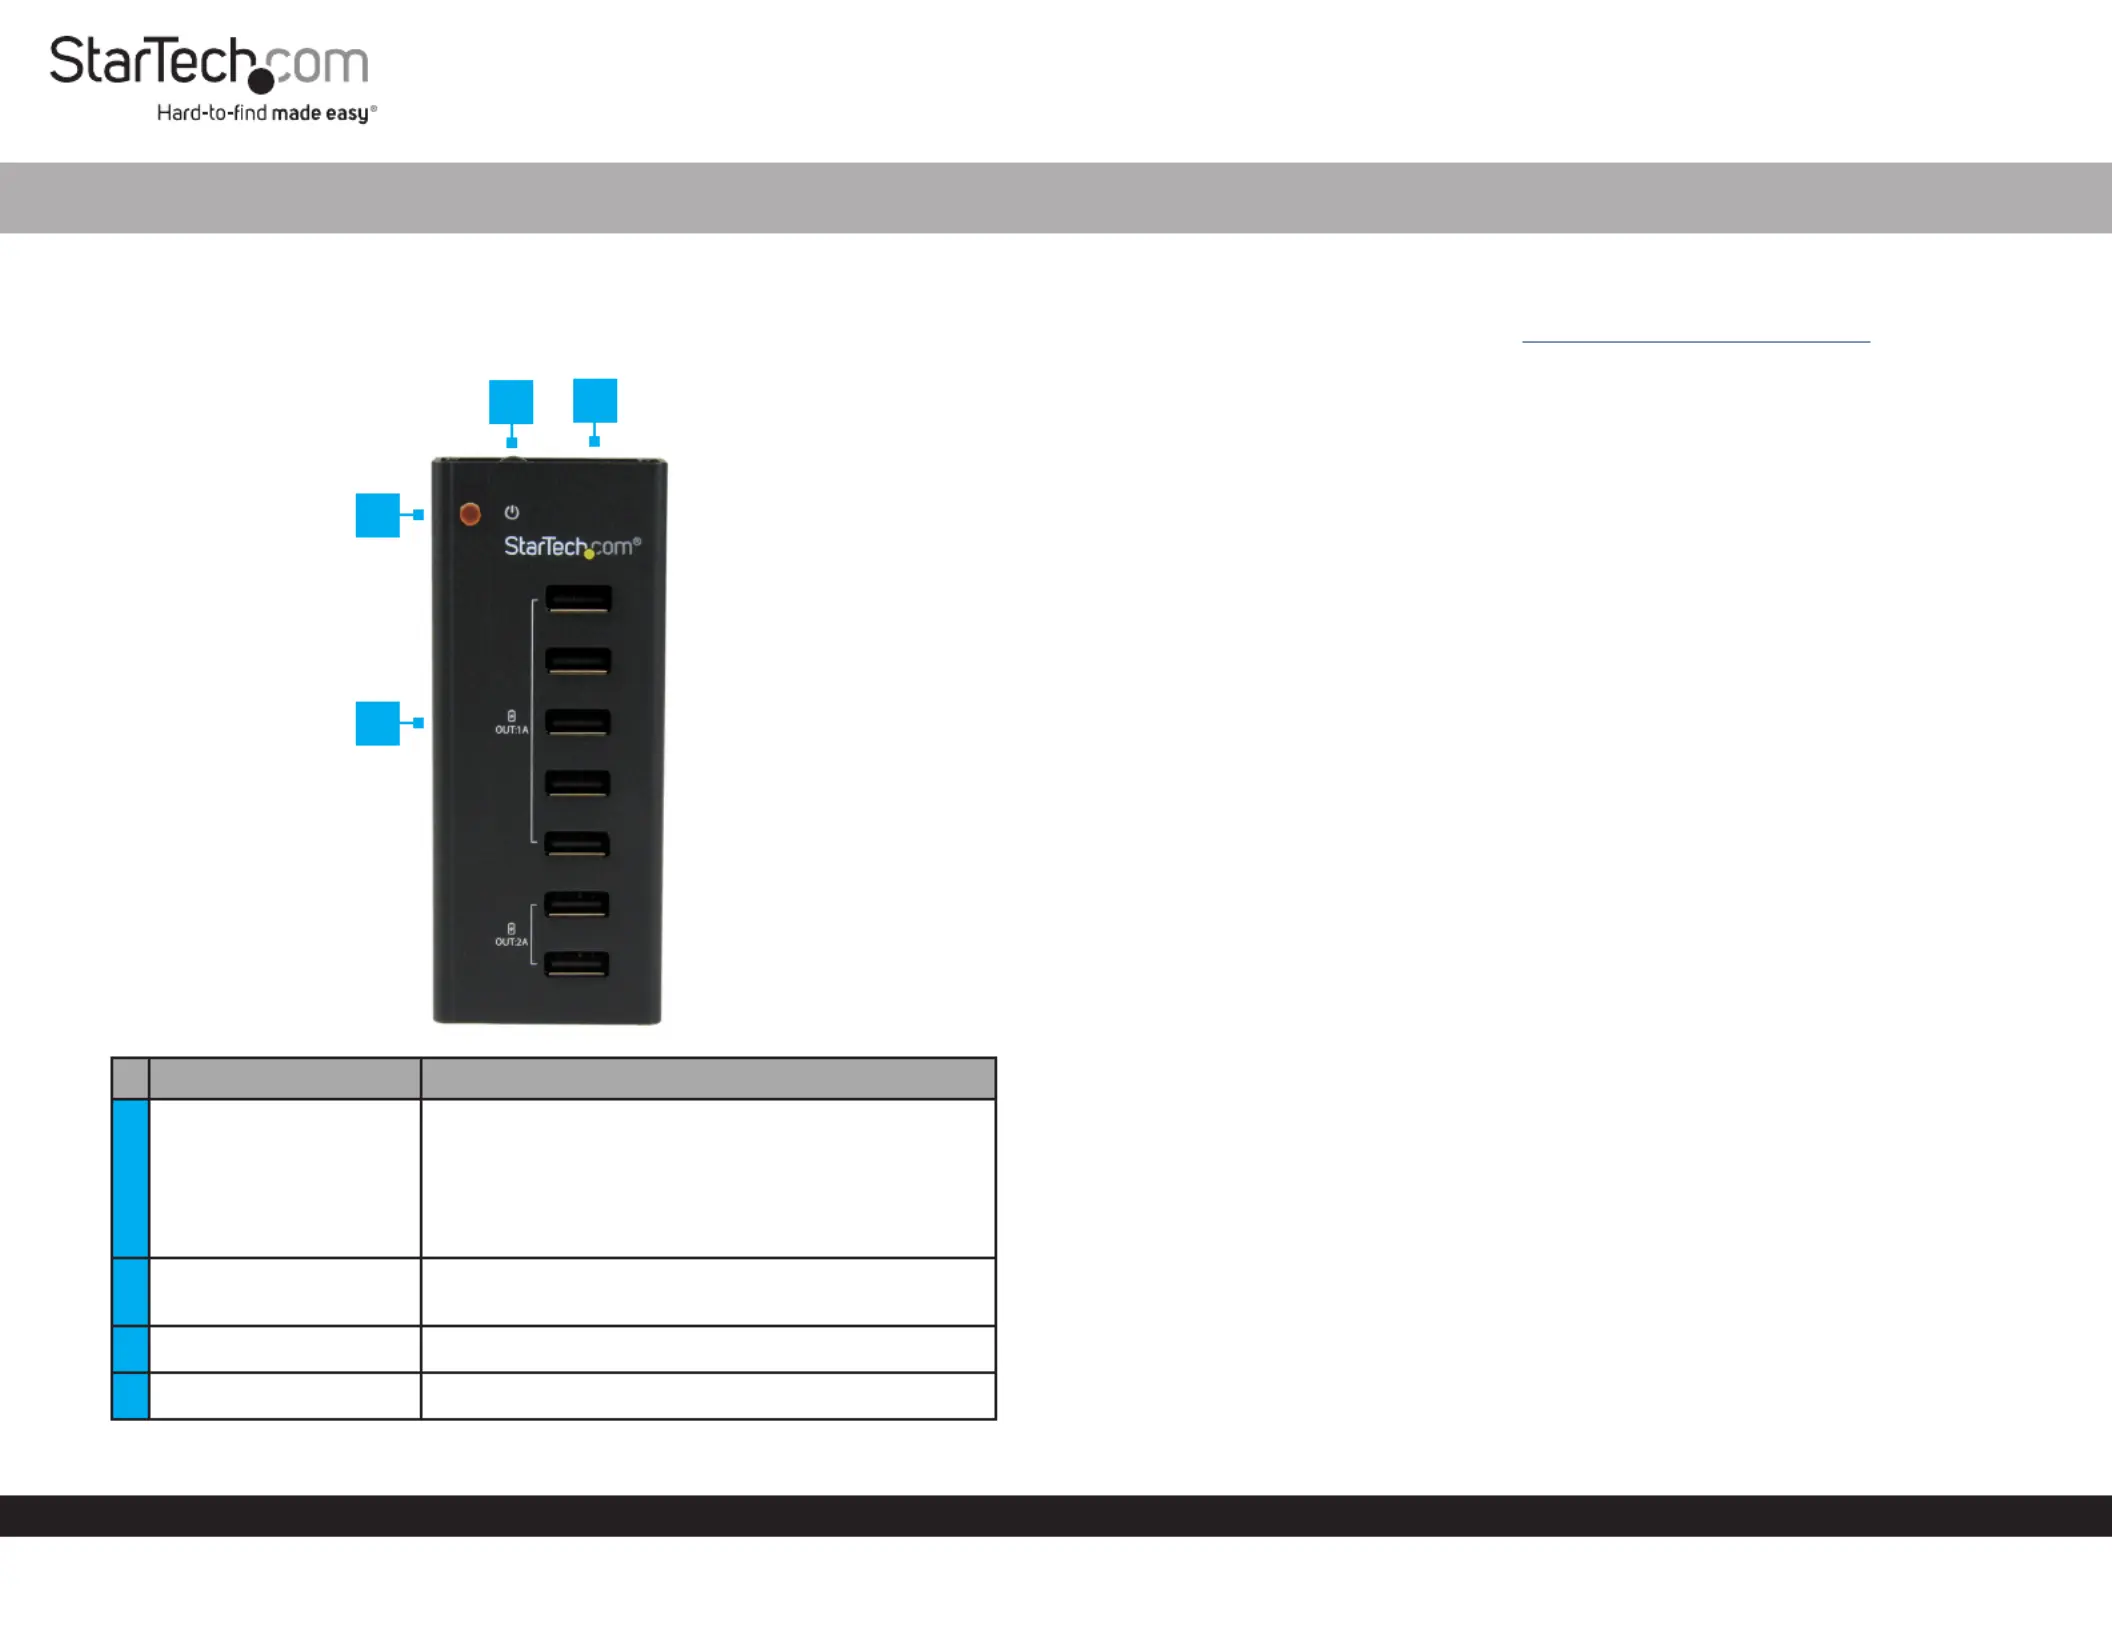
Product Diagram (ST7C51224)
Port/LEDFunction
1USB-A Ports (7)
• Used to charge multiple .Devices
Note: 2A Devices can be charged using a
USB-A (1A) Port1A Devices, and can be
charged in the however, the USB-A (2A) Port,
charging time will be aected.
2Power LED
• Solid red indicates that the is Charging Hub
receiving power.
3 Power Button• Used to turn the On or O.Charging Hub
4DC IN 12V• Used to power the .Charging Hub
7 Port USB Dedicated Charging Station |5 x 1A | 2 x 2A
3
Requirements
For the latest requirements, please visit .www.startech.com/ST7C51224
Installation
Notes: The features a chipset that can detect the required charging Charging Hub
mode of a device, and switch to the proper mode for full-speed charging (e.g. If an
Apple device is connected, it will automatically charge to Apple charging mode
specications).
When charging multiple devices, the may become warm to the touch, Charging Hub
this is normal and will not harm the connected .Device(s)
1. Connect the to an and to the Power AdapterAC Electrical Outlet DC IN 12V Port
on the. Charging Hub
2. Press the to turn the On. Wait until the is Power ButtonCharging HubPower LED
solid before connecting any devices for charging.
3. Connect your device(s) to the corresponding on the USB-A Port (1A or 2A)
Charging HubDevice(s), according to the charging requirements of the connected :
• 1A:
• Voltage at the common collector (VCC) = 5V
• Ground (GND) = 5V
• D+ = 2.0V
• D- = 2.7V
• 2A:
• Voltage at the common collector (VCC) = 5V
• Ground (GND) = 5V
• D+ = 2.7V
• D- = 2.0V
Installing the Mounting Brackets (Optional)
1. Align the on the with the four Mounting HolesMounting BracketMounting Holes
on the back of the .Charging Hub
2. Insert the (x4) through the and into the Bracket ScrewsMounting Bracket
Mounting Holes Charging Hubon the back of the.
3. Tighten the using a , be careful not to Mounting ScrewsPhillips Head Screwdriver
over-tighten.
4
2
1
Tuotetiedot
| Merkki: | StarTech.com |
| Kategoria: | USB-keskitin |
| Malli: | ST7C51224 |
Tarvitsetko apua?
Jos tarvitset apua merkille StarTech.com ST7C51224 esitä kysymys alla ja muut käyttäjät vastaavat sinulle
USB-keskitin StarTech.com Käyttöohjeet

2 Helmikuuta 2025
5 Joulukuuta 2024
5 Joulukuuta 2024
5 Joulukuuta 2024
5 Joulukuuta 2024
5 Joulukuuta 2024
5 Joulukuuta 2024
5 Joulukuuta 2024
5 Joulukuuta 2024
5 Joulukuuta 2024
USB-keskitin Käyttöohjeet
Viimeisimmät USB-keskitin Käyttöohjeet
20 Helmikuuta 2025
20 Helmikuuta 2025
12 Helmikuuta 2025
11 Helmikuuta 2025
11 Helmikuuta 2025
11 Helmikuuta 2025
11 Helmikuuta 2025
11 Helmikuuta 2025
11 Helmikuuta 2025
11 Helmikuuta 2025