SoundTube XT850-LED Käyttöohje
Lue alta 📖 käyttöohje suomeksi merkille SoundTube XT850-LED (2 sivua) kategoriassa Kaiutin. Tämä opas oli hyödyllinen 38 henkilölle ja sai 4.3 tähden keskimäärin 2 käyttäjältä
Sivu 1/2
Install Instructions For:
1.435.647.9555
|| 800.647.TUBE
www.soundtube.com
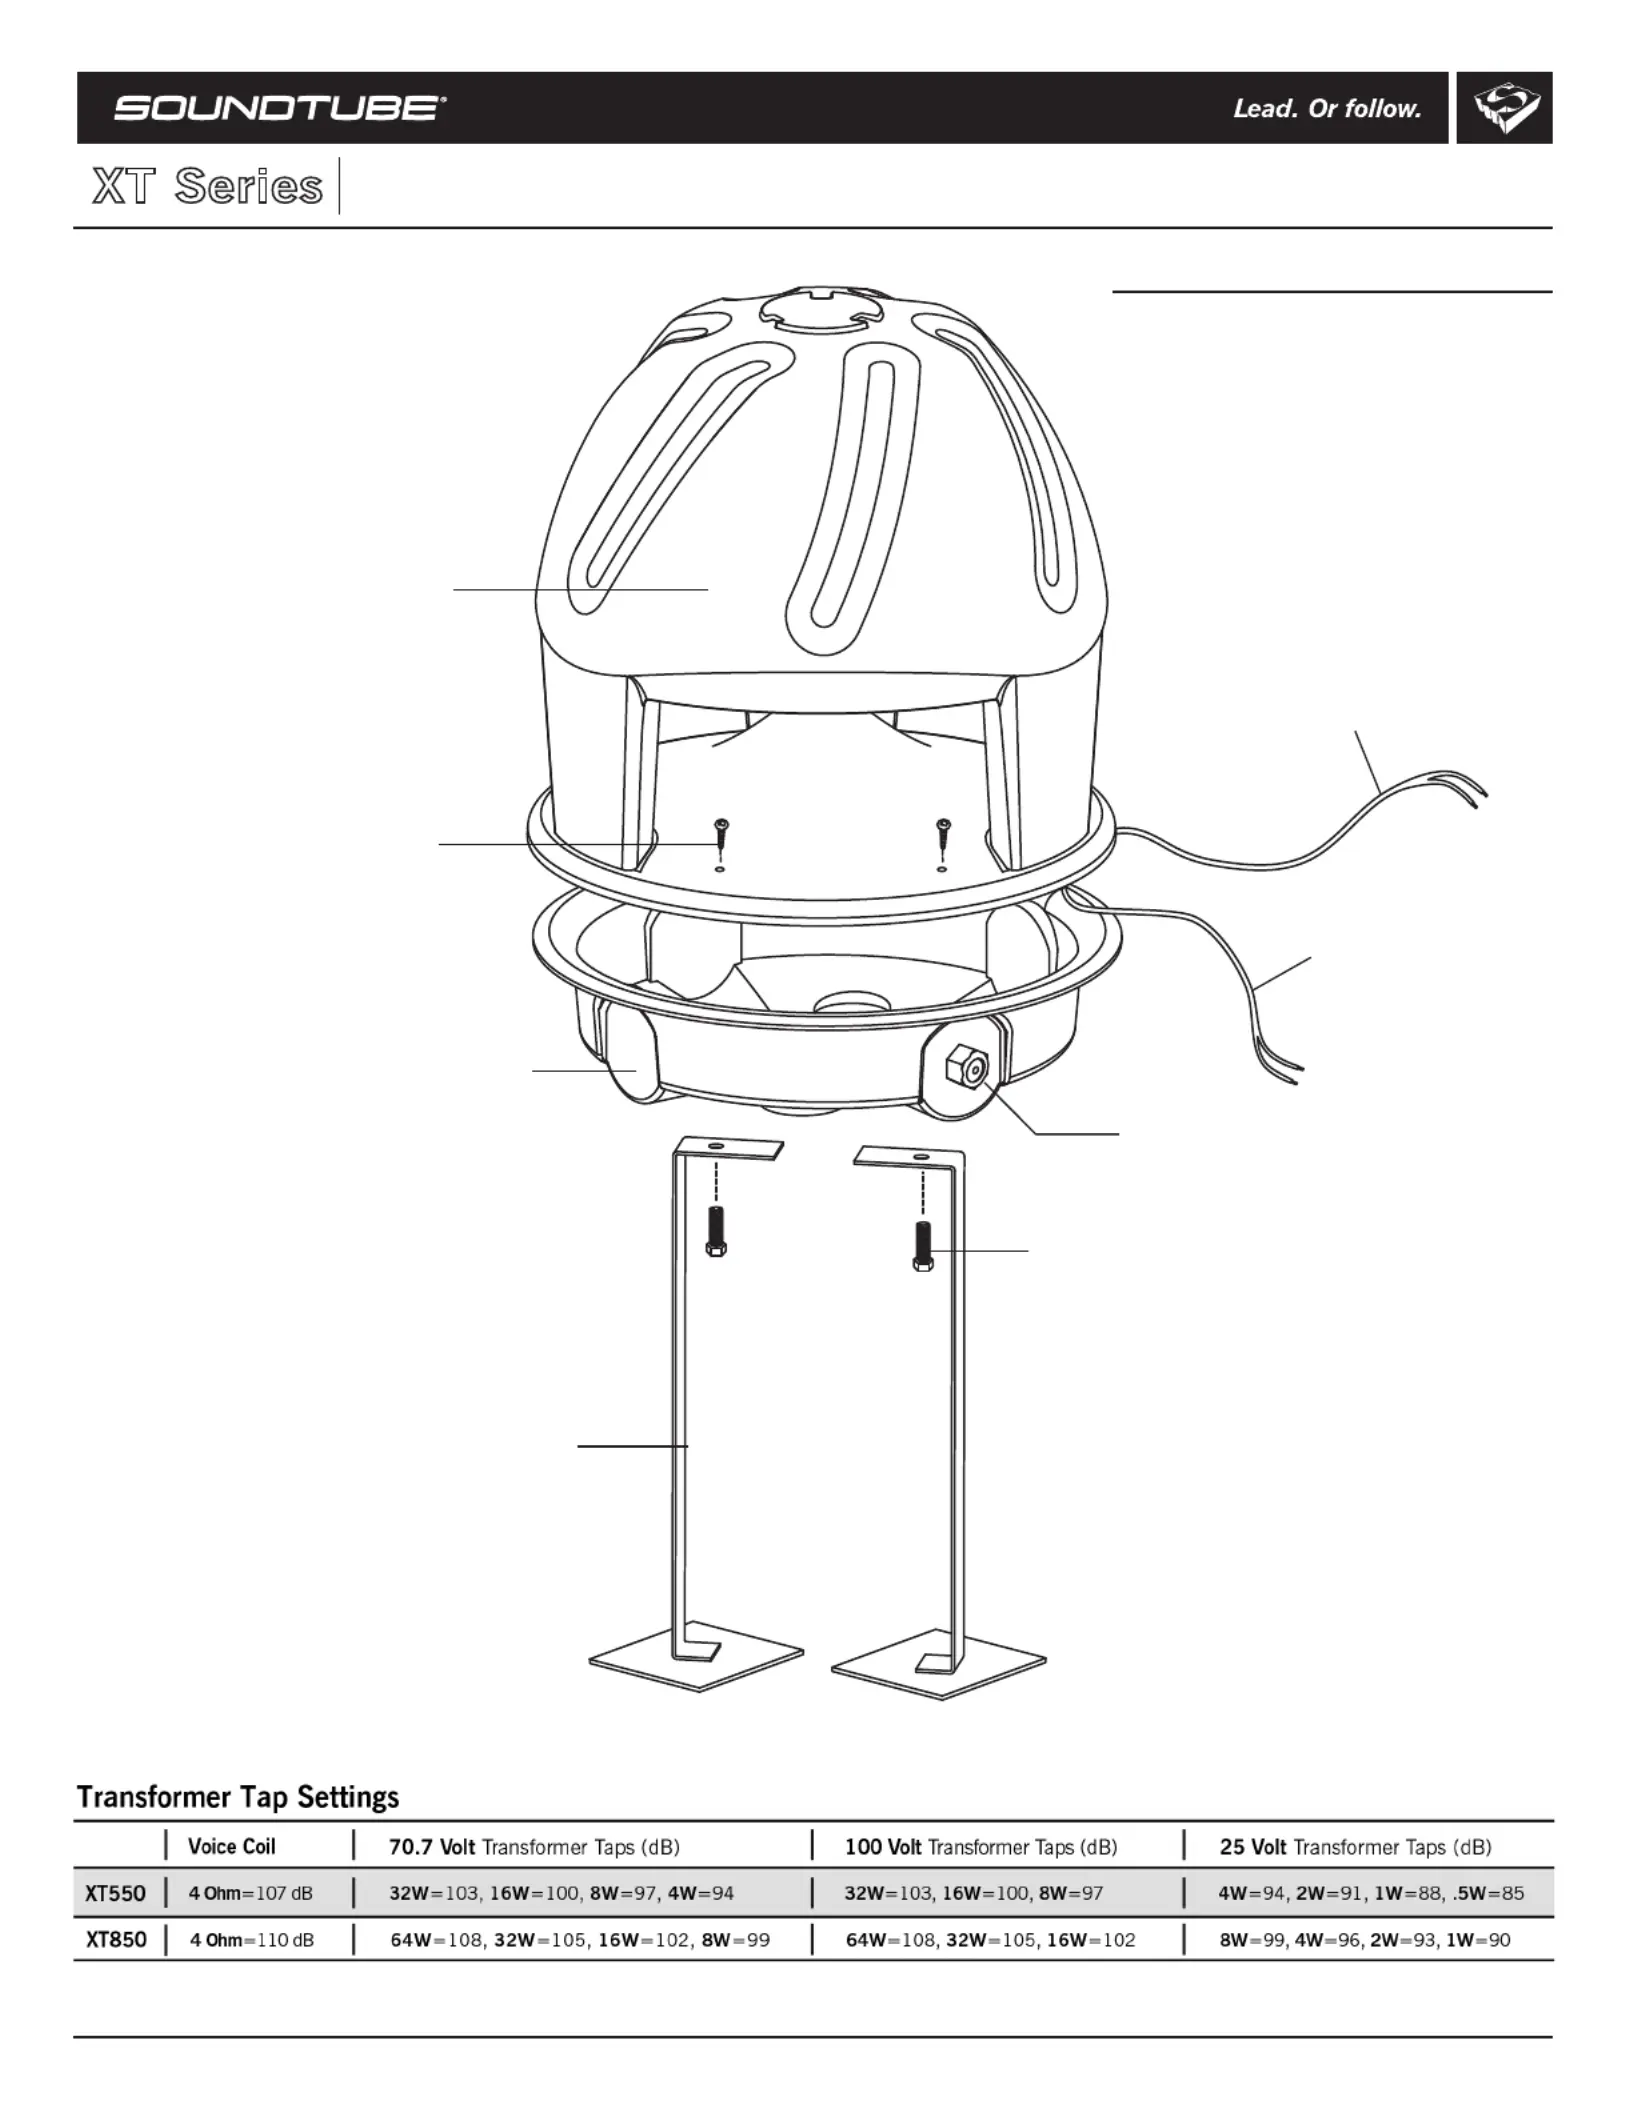
XT Series
© 2020 SoundTube Entertainment, Inc. All rights reserved. PN INS-XT Rev 06.22.22
#8 Stainless-steel
square-drive screw (x6)
Speaker enclosure
Liquid-tight strain relief
Speaker base
Speaker Wire leads
LED Wire leads
.75" 1/4-20 Stainless-steel bolt
In-ground/security bracket
Box contents
1 In-ground speaker
1 Anti-theft device (2 pieces)
1 Liquid-tight compression fitting
1 Square drive bit
4 Wire nuts
6 #8 stainless-steel square-drive screws
2 .75" 1/4-20 Stainless-steel bolts
XT850-LED
Tuotetiedot
| Merkki: | SoundTube |
| Kategoria: | Kaiutin |
| Malli: | XT850-LED |
Tarvitsetko apua?
Jos tarvitset apua merkille SoundTube XT850-LED esitä kysymys alla ja muut käyttäjät vastaavat sinulle
Kaiutin SoundTube Käyttöohjeet

21 Helmikuuta 2025
28 Tammikuuta 2025
28 Tammikuuta 2025
28 Tammikuuta 2025
28 Tammikuuta 2025
10 Tammikuuta 2025
10 Tammikuuta 2025
10 Tammikuuta 2025
10 Tammikuuta 2025
10 Tammikuuta 2025
Kaiutin Käyttöohjeet
Viimeisimmät Kaiutin Käyttöohjeet
8 Huhtikuuta 2025
8 Huhtikuuta 2025
8 Huhtikuuta 2025
7 Huhtikuuta 2025
7 Huhtikuuta 2025
7 Huhtikuuta 2025
5 Huhtikuuta 2025
3 Huhtikuuta 2025
3 Huhtikuuta 2025
3 Huhtikuuta 2025