SoundTube SM52-EZ Käyttöohje
Lue alta 📖 käyttöohje suomeksi merkille SoundTube SM52-EZ (2 sivua) kategoriassa Kaiutin. Tämä opas oli hyödyllinen 31 henkilölle ja sai 5.0 tähden keskimäärin 5 käyttäjältä
Sivu 1/2
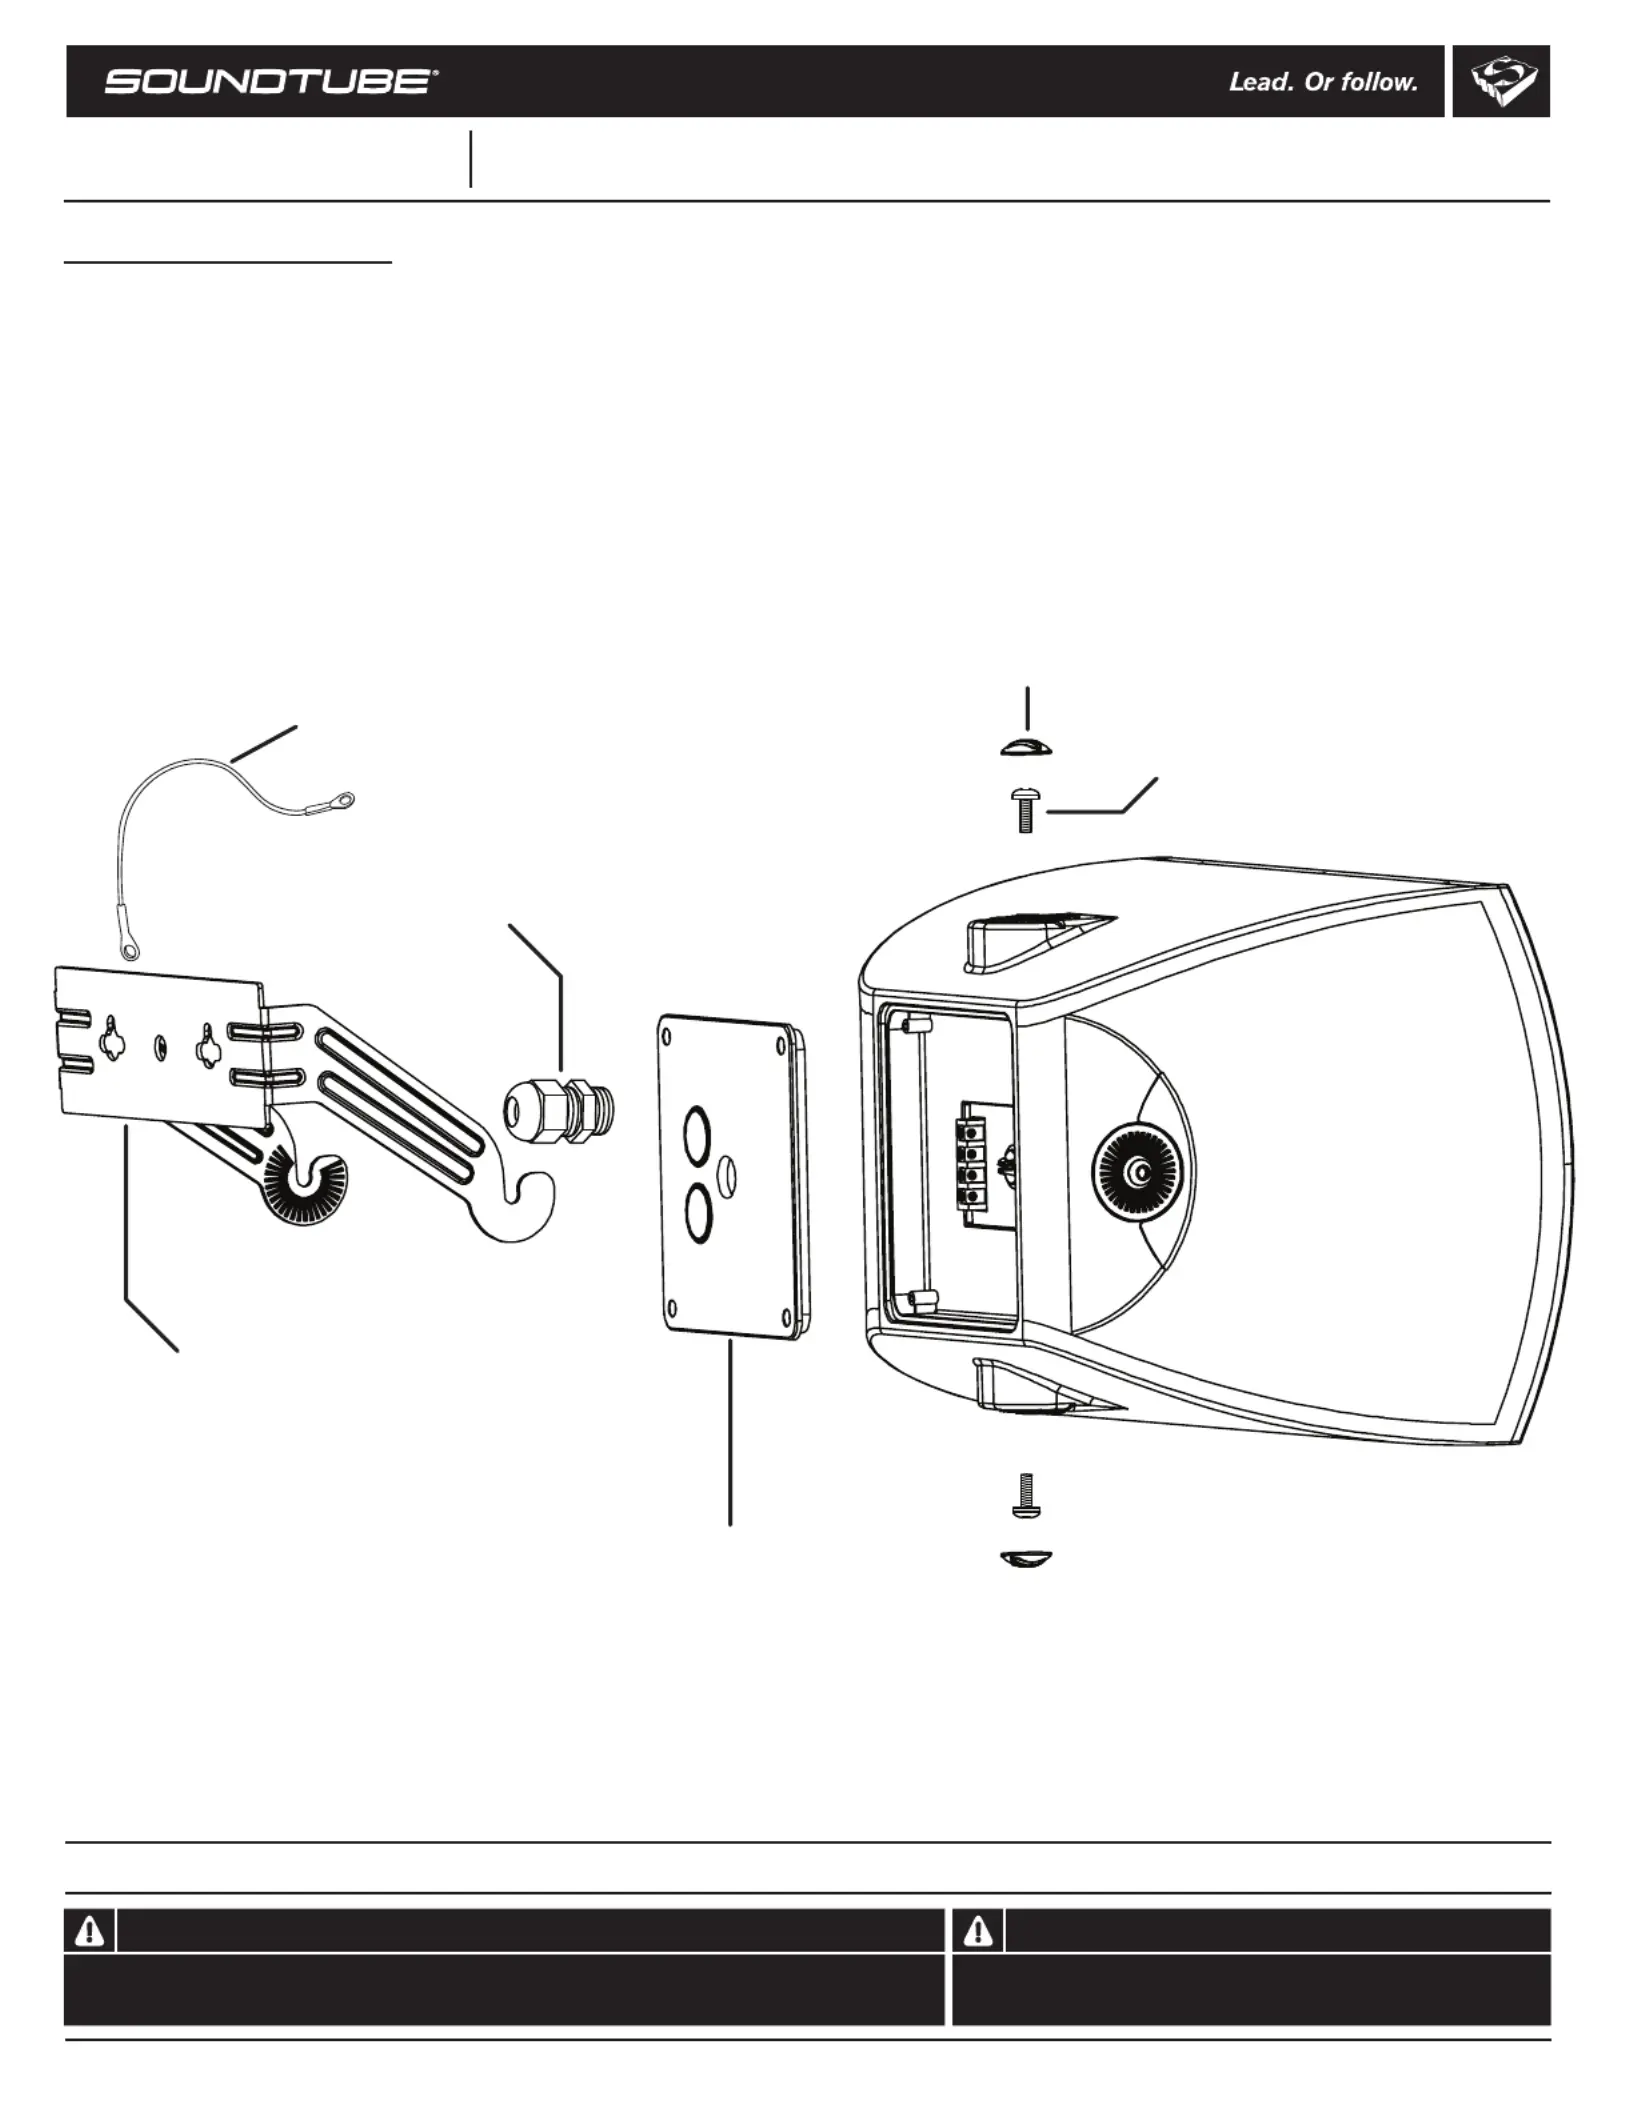
Box contents
© 2023 SoundTuEnrnbe tetaiment, I. nc Allrihtgs reserved. PNINS-SM -EZ R ev5-24-2023
Install Instrtioucns For:
SM52-EZ-BK, SM52-EZ-WH, SM52-EZ-WX-BK, SM52-EZ-WX-WH,
SM82-EZ-II-BK, SM82-EZ-II-WH, SM82-EZ-II-WX-BK & SM82-EZ-II-WX-WH
Do not spec or install speaker near support beam, ventilation duct or
other structure that may interfere with speaker function or dispersion.
Warning
SoundTube speakers must be installed by a professional audio installer/contractor. For safety and for
optimum audio performance, installer must follow all directions issued by SoundTube Entertainment.
U- bet rack
Back plate
SM-EZ
Series
913.663.5600
|
www.soundtube.com
Safety cable
U-bracket screw
Screw cap
Warning
1 Speaker
1 U-bracket
3 U-bracket screws
2 Screw caps
1 Allen wrench
1 Back plate
1 Port plug
1 Safety cable
1 Strain relief bushing
Strain relief bushing
Tuotetiedot
| Merkki: | SoundTube |
| Kategoria: | Kaiutin |
| Malli: | SM52-EZ |
Tarvitsetko apua?
Jos tarvitset apua merkille SoundTube SM52-EZ esitä kysymys alla ja muut käyttäjät vastaavat sinulle
Kaiutin SoundTube Käyttöohjeet

21 Helmikuuta 2025
28 Tammikuuta 2025
28 Tammikuuta 2025
28 Tammikuuta 2025
28 Tammikuuta 2025
10 Tammikuuta 2025
10 Tammikuuta 2025
10 Tammikuuta 2025
10 Tammikuuta 2025
10 Tammikuuta 2025
Kaiutin Käyttöohjeet
Viimeisimmät Kaiutin Käyttöohjeet
8 Huhtikuuta 2025
8 Huhtikuuta 2025
8 Huhtikuuta 2025
7 Huhtikuuta 2025
7 Huhtikuuta 2025
7 Huhtikuuta 2025
5 Huhtikuuta 2025
3 Huhtikuuta 2025
3 Huhtikuuta 2025
3 Huhtikuuta 2025