SoundTube SM500i-II Käyttöohje
Lue alta 📖 käyttöohje suomeksi merkille SoundTube SM500i-II (2 sivua) kategoriassa Kaiutin. Tämä opas oli hyödyllinen 33 henkilölle ja sai 4.0 tähden keskimäärin 4 käyttäjältä
Sivu 1/2
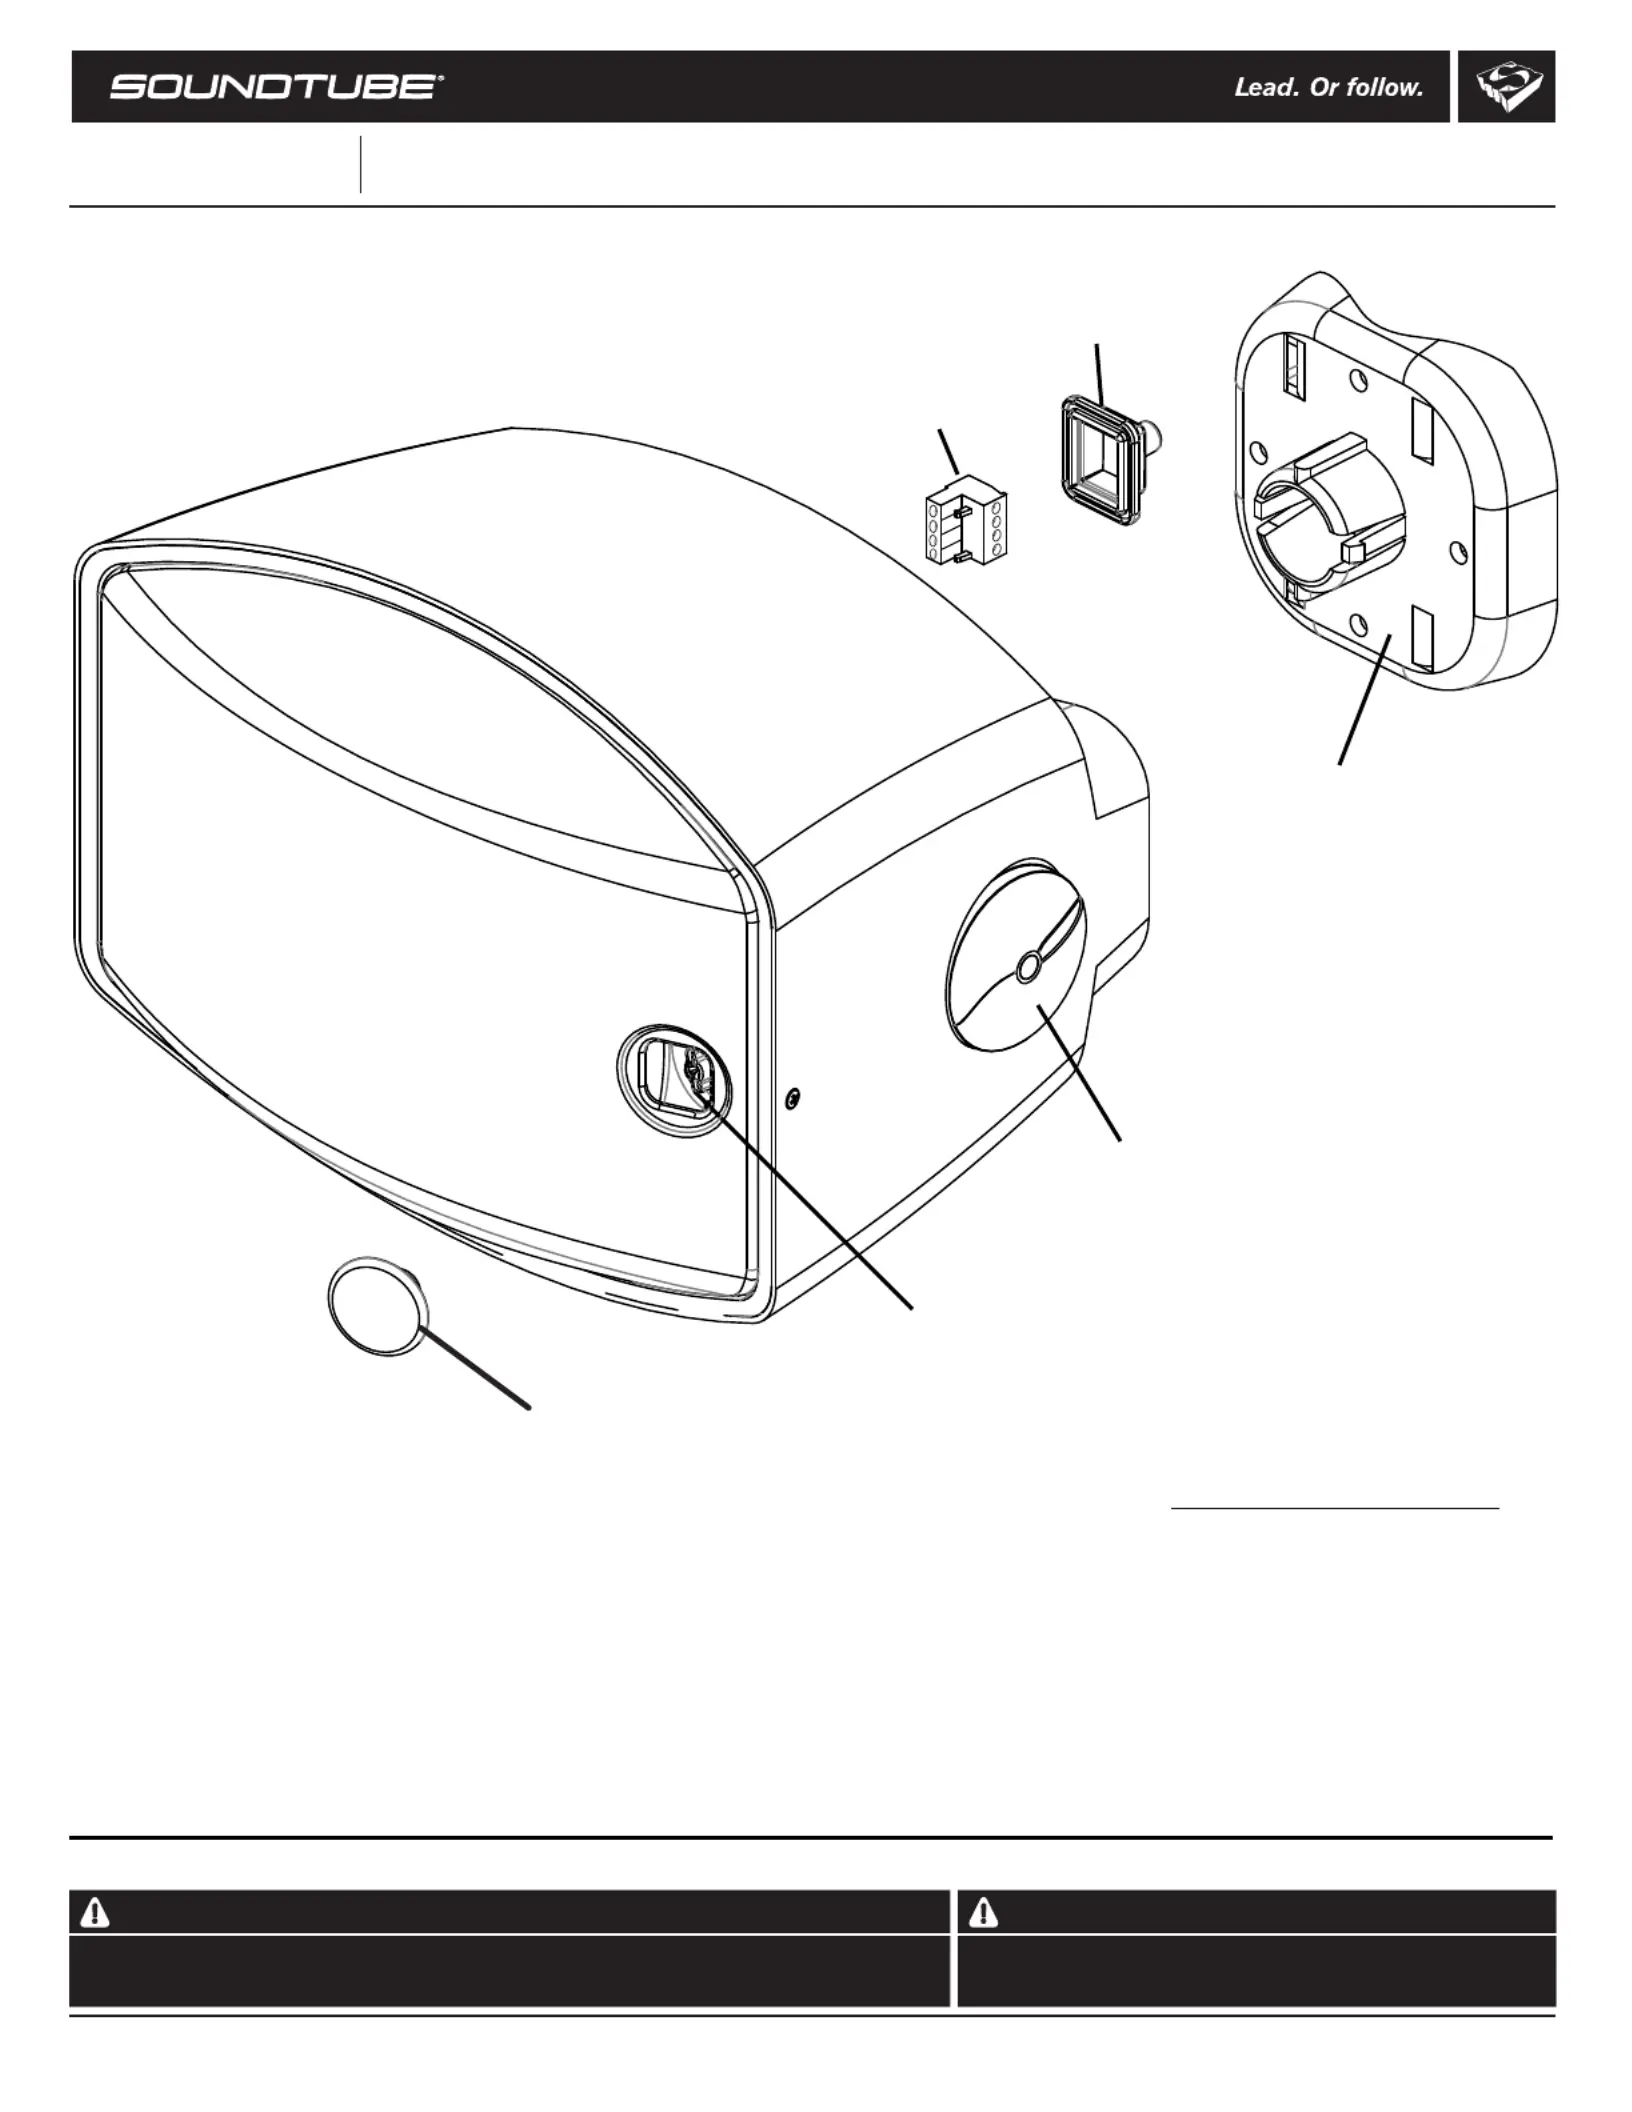
Box contents
1 Speaker
1 Terminal weather boot
1 Mounting bracket
1 Safety cable
1 Safety cable anchor screws
1 Euroblock connector
1 Grille-mounted tap switch cover
© 2011 SoundTube Entertainmt, Inc. enAll rights reserved. PN INS-SM5 rev 11.30.11
Install Instructions For:
SM500i-II, SM500i-II-WX, SM590i-II, SM590i-II-WX speaker
1.435.647.9555
|
800.647.TUBE
|
www.soundtube.com
Do not spec or install speaker near support beam, ventilation duct or
other structure that may interfere with speaker function or dispersion.
gninraWgninraW
SoundTube sars must be insd by a pressional auo inaller/contractor. For saty and for peketalleofdistfe
optimum audio performae, insller must ow l direons issued by SoundTube Eerinment.nctafollalctintta
SM5 Series
SM500i-, IISXM500-Wi-II, Si-M590II, SAM590i-II-WX UL1480 (UEY) planned
1 Allen hex key
Terminal
weather boot
Clamp knob
Euroblock conntoecr
Grillmoe-unted
tap switch cover
Mounting bracket
Tap switch
1
M3x4mm security screw
Tuotetiedot
| Merkki: | SoundTube |
| Kategoria: | Kaiutin |
| Malli: | SM500i-II |
Tarvitsetko apua?
Jos tarvitset apua merkille SoundTube SM500i-II esitä kysymys alla ja muut käyttäjät vastaavat sinulle
Kaiutin SoundTube Käyttöohjeet

21 Helmikuuta 2025
28 Tammikuuta 2025
28 Tammikuuta 2025
28 Tammikuuta 2025
28 Tammikuuta 2025
10 Tammikuuta 2025
10 Tammikuuta 2025
10 Tammikuuta 2025
10 Tammikuuta 2025
10 Tammikuuta 2025
Kaiutin Käyttöohjeet
Viimeisimmät Kaiutin Käyttöohjeet
8 Huhtikuuta 2025
8 Huhtikuuta 2025
8 Huhtikuuta 2025
7 Huhtikuuta 2025
7 Huhtikuuta 2025
7 Huhtikuuta 2025
5 Huhtikuuta 2025
3 Huhtikuuta 2025
3 Huhtikuuta 2025
3 Huhtikuuta 2025