Kramer WP-3H2 Käyttöohje
Kramer Ei luokiteltu WP-3H2
Lue alta 📖 käyttöohje suomeksi merkille Kramer WP-3H2 (1 sivua) kategoriassa Ei luokiteltu. Tämä opas oli hyödyllinen 37 henkilölle ja sai 4.3 tähden keskimäärin 2 käyttäjältä
Sivu 1/1
WP-3H2Panel Set Quick Start
P/N:
2900-301250QS
Rev:
1
Scan for full manual
WP- Panel Set Quick Start Guide 3H2
This guide helps you install and use your WP-3H2Panel Setfor the first time.
Step 1: Check what’s in the box
1 faceplate
1 UK frame
1 EU frame or 1 US Frame
1 Quick start guide
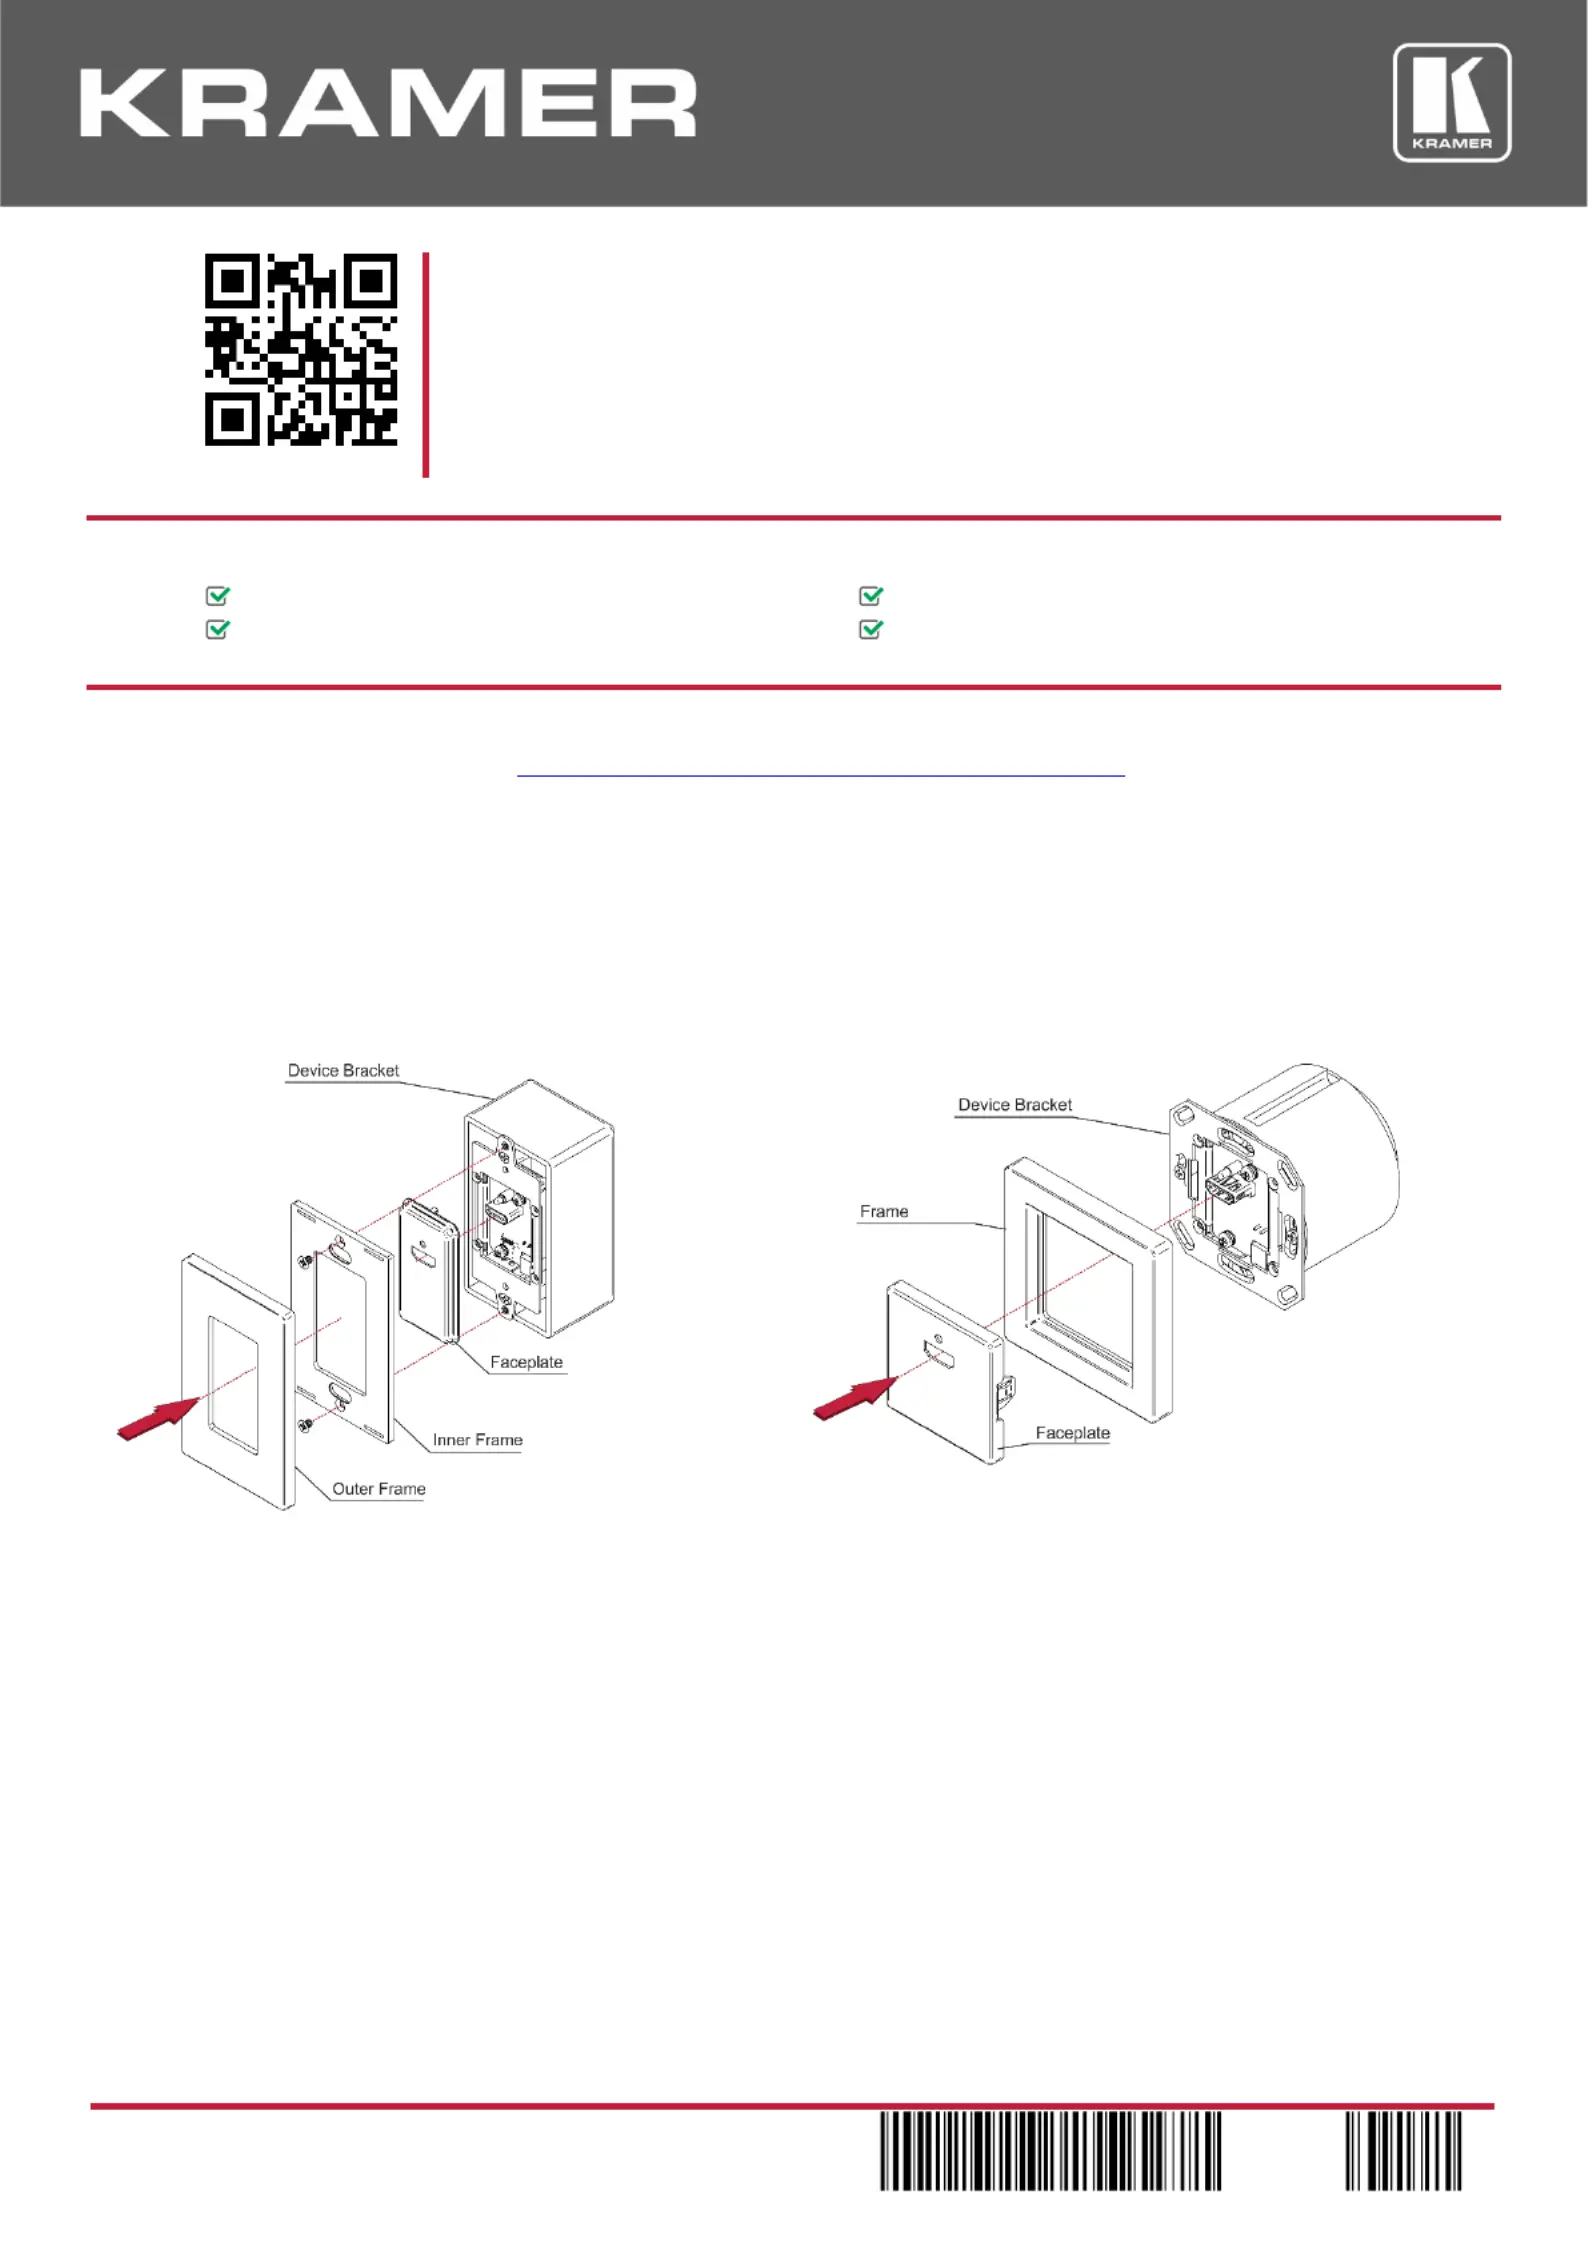
Step 2: Install the -3H2 Panel Set WP
After mounting the device (see ) attach the frame to the www.kramerav.com/downloads/WP-3H2 EU PANEL SET
device and then click in the faceplate as follows :
To install the US Version:
1. Attach the faceplate to the device bracket.
2. Separate the outer frame from the inner frame.
3. Screw the inner frame onto the device using the 2 inner
frame screws.
4. Snap the outer frame onto the mounted inner frame
To install European Version:
1. Attach the frame to the device bracket.
2. Snap the faceplate into the frame.
We recommend that you use any of the following standard 1 Gang in-wall junction boxes (or their equivalent):
•: 1 Gang US electrical junction boxes.US-D
•: 1 Gang in-wall junction box, with a cut-hole diameter of 68mm and depth that can t in both the device and the EU
connected cables (DIN 49073).
•: 1 Gang in-wall junction box, 75x75mm (W, H), and depth that can t in both the device and the connected cables UK
(BS 4662).
Tuotetiedot
| Merkki: | Kramer |
| Kategoria: | Ei luokiteltu |
| Malli: | WP-3H2 |
Tarvitsetko apua?
Jos tarvitset apua merkille Kramer WP-3H2 esitä kysymys alla ja muut käyttäjät vastaavat sinulle
Ei luokiteltu Kramer Käyttöohjeet

21 Helmikuuta 2025
2 Helmikuuta 2025
8 Tammikuuta 2025
2 Tammikuuta 2025
20 Joulukuuta 2024
17 Joulukuuta 2024
17 Joulukuuta 2024
17 Joulukuuta 2024
17 Joulukuuta 2024
17 Joulukuuta 2024
Ei luokiteltu Käyttöohjeet
Viimeisimmät Ei luokiteltu Käyttöohjeet
9 Huhtikuuta 2025
9 Huhtikuuta 2025
9 Huhtikuuta 2025
9 Huhtikuuta 2025
9 Huhtikuuta 2025
9 Huhtikuuta 2025
9 Huhtikuuta 2025
9 Huhtikuuta 2025
9 Huhtikuuta 2025
9 Huhtikuuta 2025