Atdec TH-VWP-100 Käyttöohje
Lue alta 📖 käyttöohje suomeksi merkille Atdec TH-VWP-100 (5 sivua) kategoriassa Wandsteun. Tämä opas oli hyödyllinen 35 henkilölle ja sai 4.2 tähden keskimäärin 5 käyttäjältä
Sivu 1/5
TH-VWV
TH-VWVP
TH-VWP-050
TH-VWP-080
TH-VWP-100
TH-VWP-160
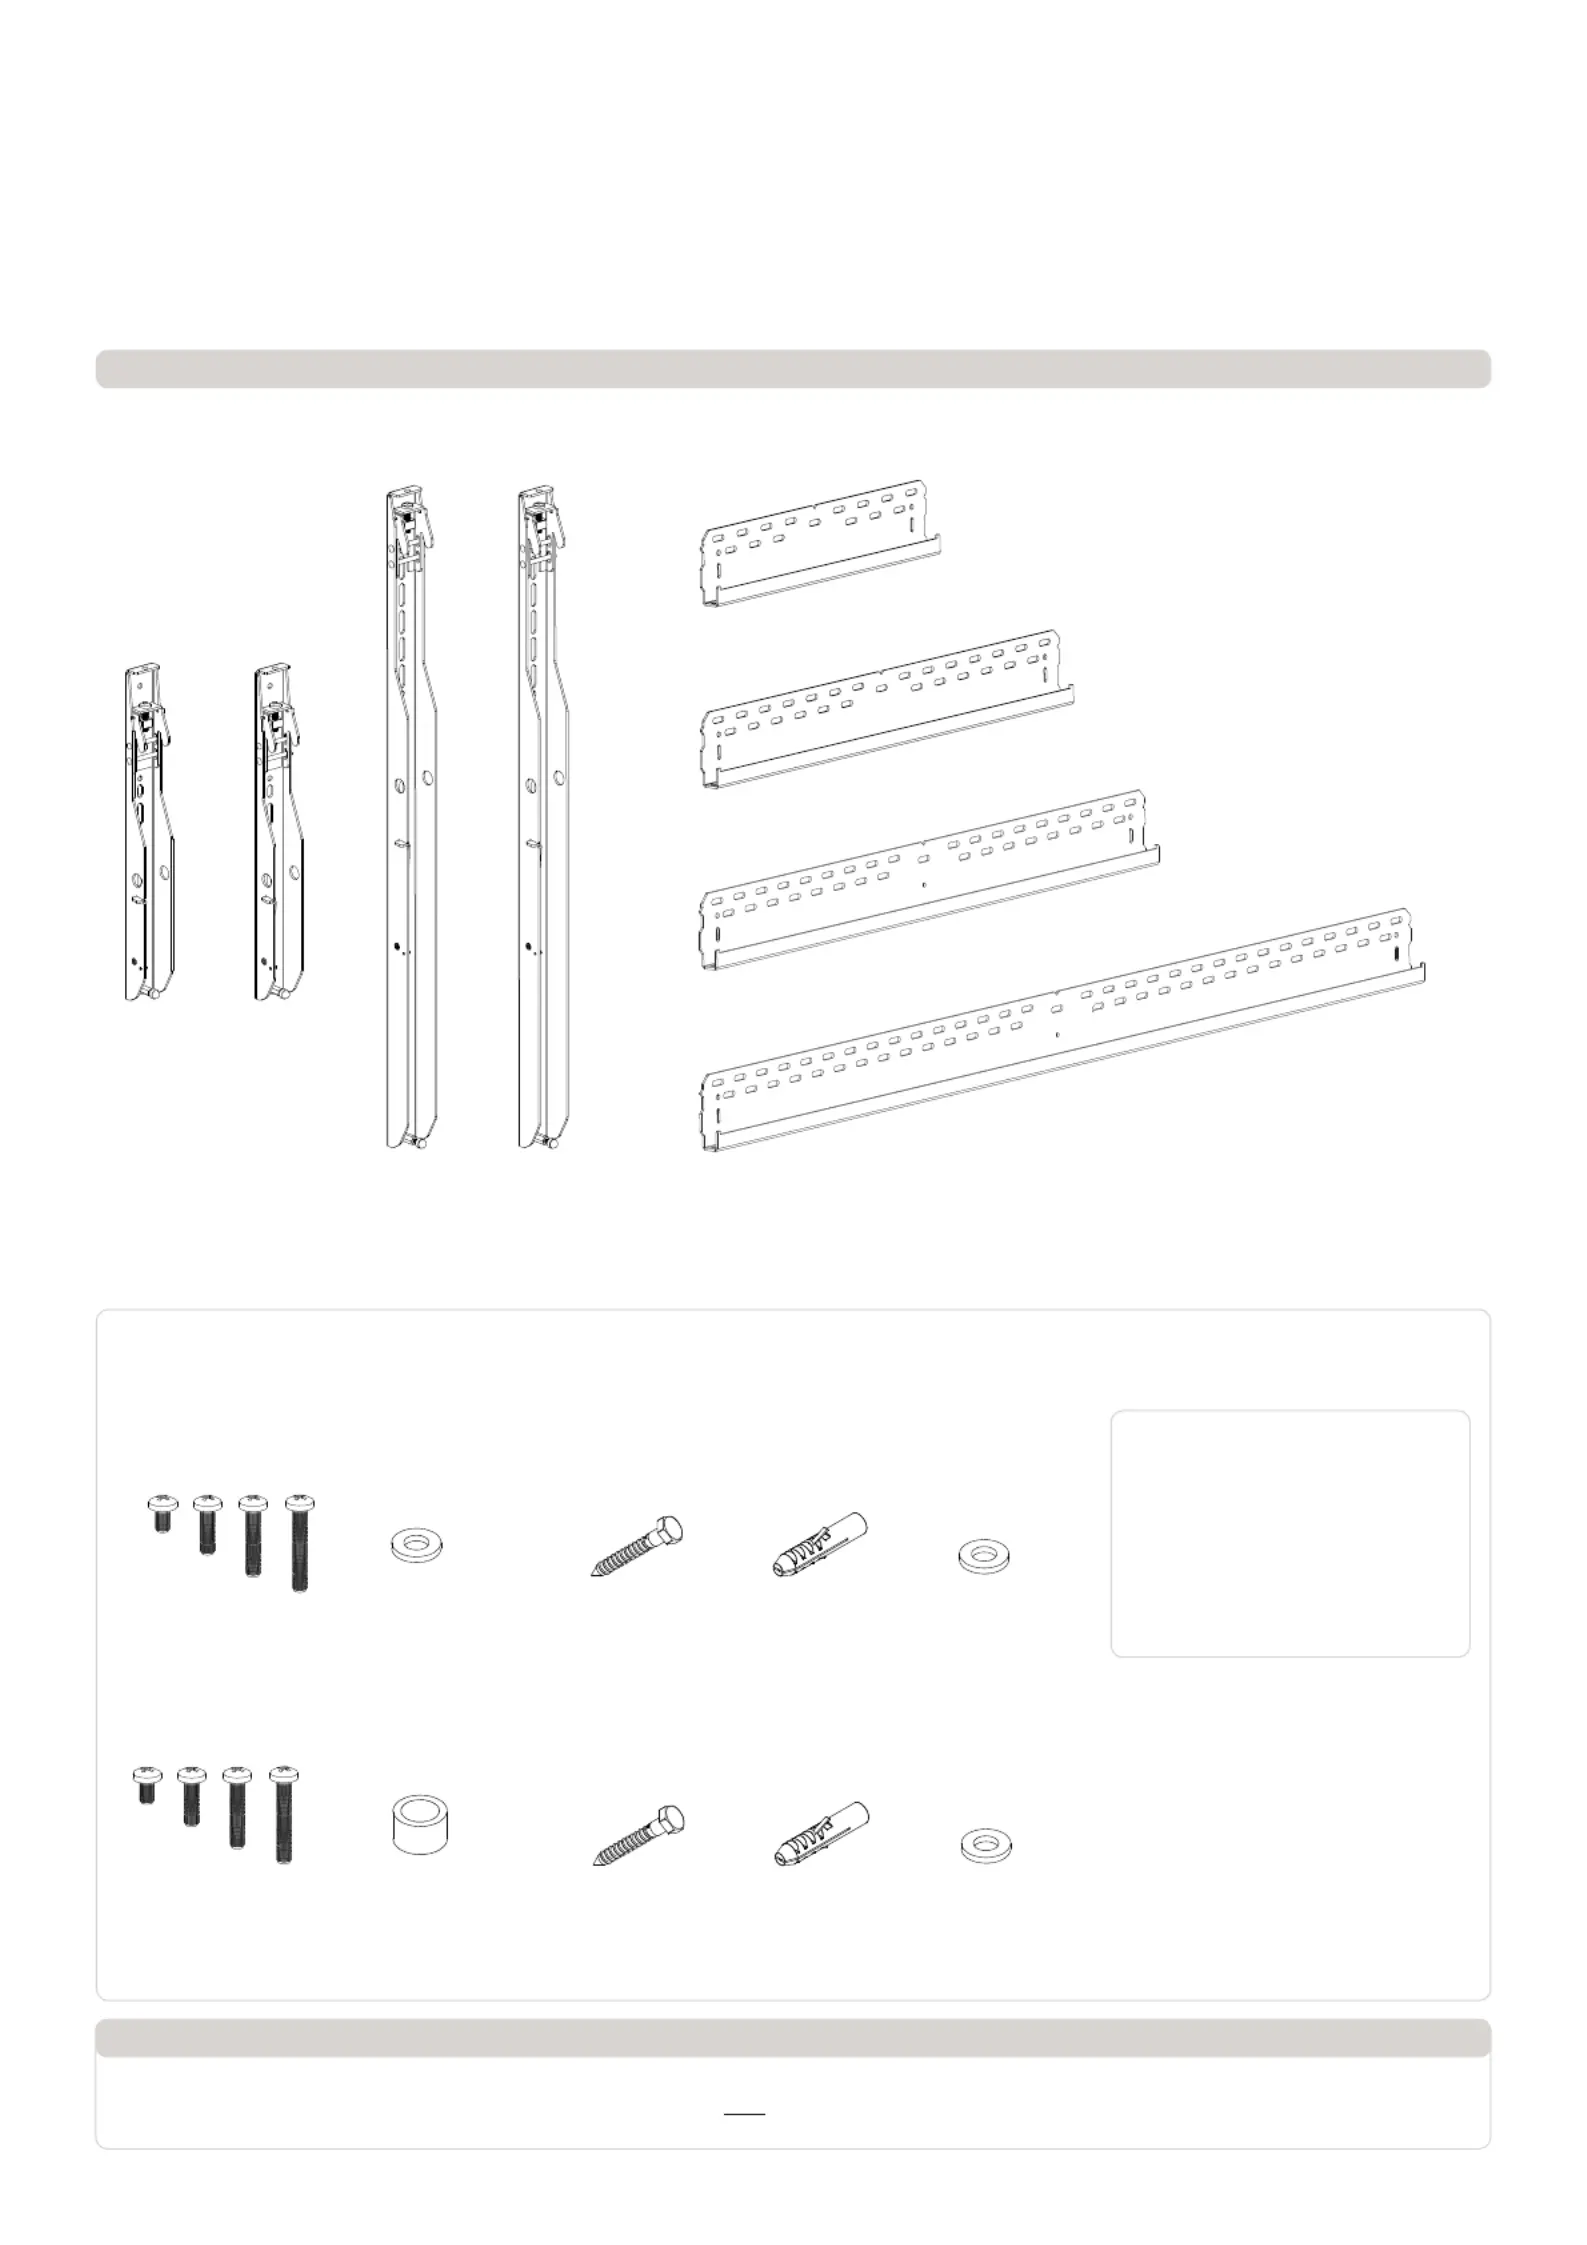
Component Checklist
Universal Video Wall
! IMPORTANT - Install Video Wall as per installation instruction.
! This product supports a maximum load of 165kg (363lbs.) per panel or screen.
! The manufacturer accepts no responsibility for incorrect installation.
IMPORTANT INFORMATION:
Mounting Bracket (x2)
TH-VWVP
Mounting Bracket (x2)
TH-VWV
Wall Plate (1.6m)
TH-VWP-160
Wall Plate (0.8m)
TH-VWP-080
Wall Plate (0.5m)
TH-VWP-050
Wall Plate (1m)
TH-VWP-100
HARDWARE
Mounting Brackets
(TH-VWV, TH-VWVP)
Wall Plate 0.5m, 0.8m, 1m
(TH-VWP-050, TH-VWP-080, TH-VWP-100)
Wall Plate 1.6m
(TH-VWP-160)
Coach Screw
(x2)
Coach Screw
(x3)
M6 x 16/30/45/60
(x4)
M8 x 16/30/50/65
(x4)
Nylon
Anchor (x2)
Nylon
Anchor (x3)
8mm Washer (x2)
8mm Washer (x3)
Tools Required:
• Power Drill
• 8mm (0.31”) Drill Bit
• 10mm (0.39”) Masonry Drill Bit
• 13mm (0.51”) Socket Wrench
Shifter
• Phillips Head Screwdriver
• Spirit Level
• Tape Measure
M6 Washer (x4)
Spacer (x8)
Installation Instructions
Tuotetiedot
| Merkki: | Atdec |
| Kategoria: | Wandsteun |
| Malli: | TH-VWP-100 |
Tarvitsetko apua?
Jos tarvitset apua merkille Atdec TH-VWP-100 esitä kysymys alla ja muut käyttäjät vastaavat sinulle
Wandsteun Atdec Käyttöohjeet

27 Joulukuuta 2024
27 Joulukuuta 2024
Wandsteun Käyttöohjeet
Viimeisimmät Wandsteun Käyttöohjeet
5 Huhtikuuta 2025
29 Tammikuuta 2025
28 Tammikuuta 2025
24 Tammikuuta 2025
24 Tammikuuta 2025
24 Tammikuuta 2025
24 Tammikuuta 2025
24 Tammikuuta 2025
24 Tammikuuta 2025
24 Tammikuuta 2025