Symmons Dia 353GB-24 Käyttöohje
Symmons Ei luokiteltu Dia 353GB-24
Lue alta 📖 käyttöohje suomeksi merkille Symmons Dia 353GB-24 (3 sivua) kategoriassa Ei luokiteltu. Tämä opas oli hyödyllinen 45 henkilölle ja sai 4.4 tähden keskimäärin 7 käyttäjältä
Sivu 1/3
Dia
®
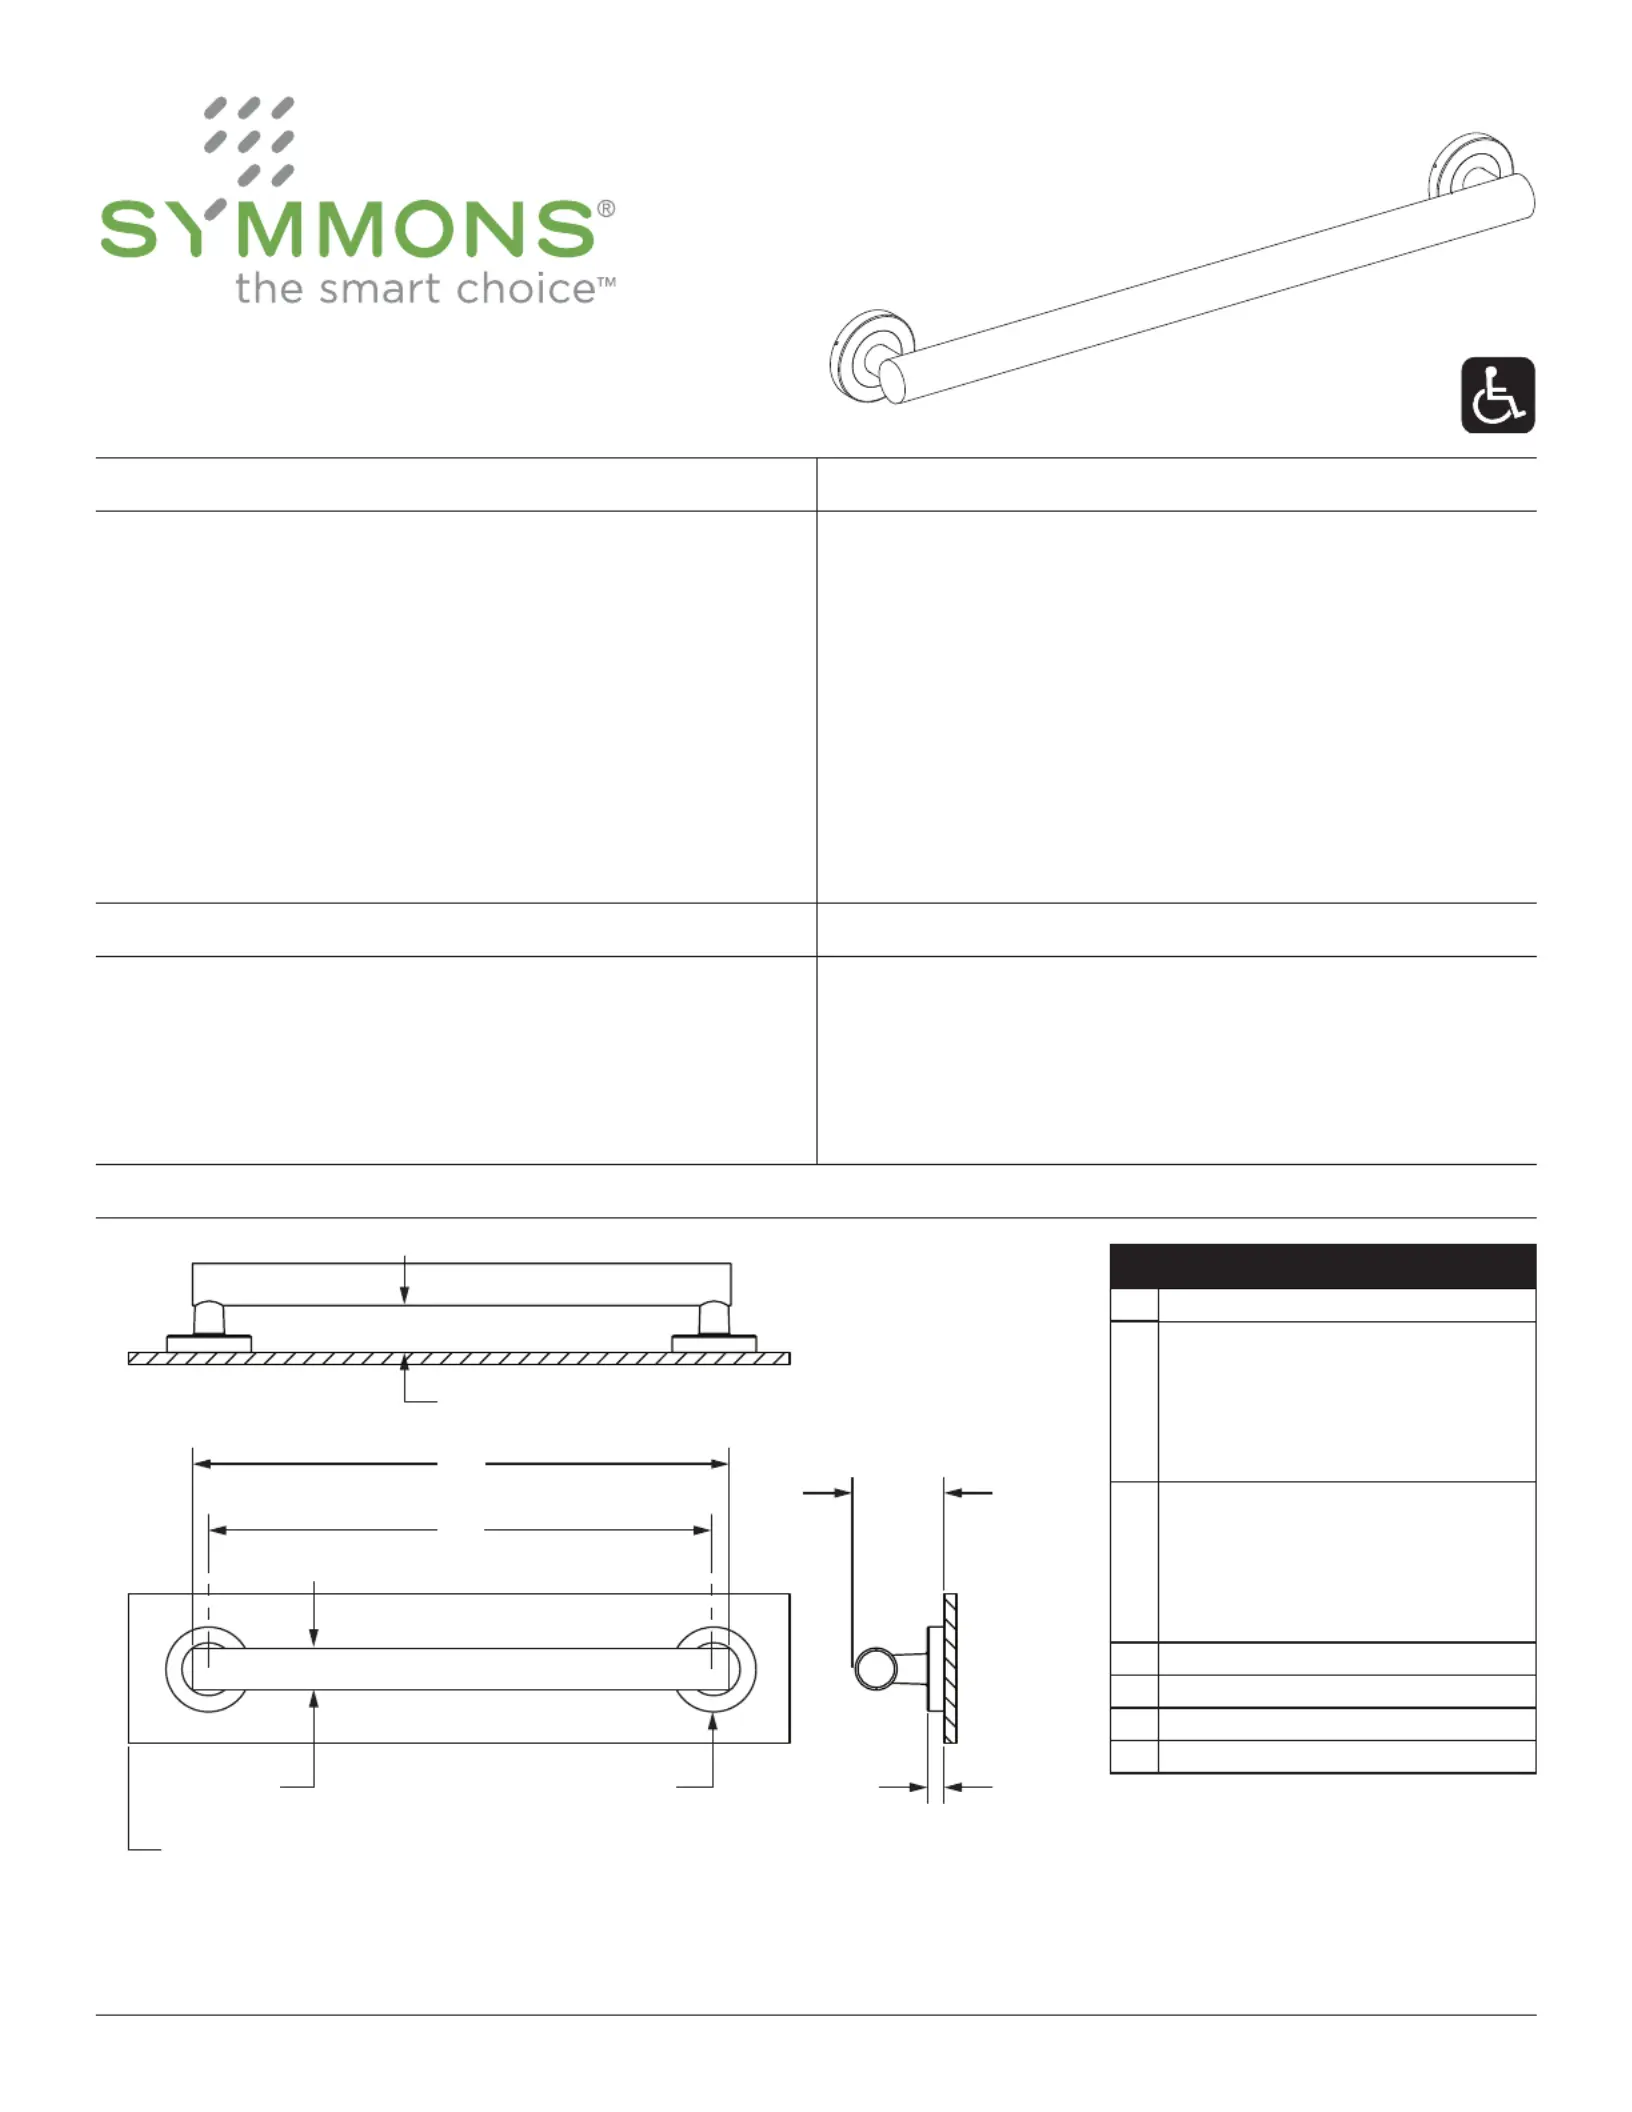
Model NumbersSpecification
353GB-12 (18, 24, 36, 42)
ADA Grab Bar Series
Operation & Maintenance Manual
☐
353GB-1212" Grab Bar for ADA Applications
☐
353GB-1818" Grab Bar for ADA Applications
☐
353GB-2424" Grab Bar for ADA Applications
☐
353GB-3636" Grab Bar for ADA Applications
☐
353GB-4242" Grab Bar for ADA Applications
Dimensions
Measurements
A1-1/2", 38 mm
B
13-1/4", 337 mm (353GB-12)
19-1/4", 489 mm (353GB-18)
25-1/4", 641 mm (3h53GB-24)
37-1/4", 946 mm (353GB-36)
43-1/4", 1099 mm (353GB-42)
C
12", 305 mm (353GB-12)
18", 457 mm (353GB-18)
24", 610 mm (353GB-24)
36", 914 mm (353GB-36)
42", 1067 mm (353GB-42)
DØ 1-1/2", 38 mm
E(2x) Ø 3-1/16", 78 mm
F3-1/16", 78 mm
G1/2", 13 mm
Note: Dimensions subject to change without notice.
Finish Options
Limited Lifetime - to the original end purchaser in
consumer/residential installations.
5 Years - for industrial/commercial installations.
Refer to www.symmons.com/warranty for complete
warranty information.
Warranty
Note: Append appropriate -sufx to model number.
☐
-STNSatin Nickel finish
• Supports up to 250 lbs.
• 1-1/2" bar diameter
• 3" ange diameter
• Bar extends 1-1/2" from wall
• Concealed mounting for a clean look
• Meets WW-P-541/8B Federal Specication for
Manufacturing
• Meets ADA load requirements when properly installed
• Stainless steel construction
• Grab bar compatible with WingIts stainless steel grab
bar fasteners (p/n GBW40) for drywall applications
BB
DD
GG
FF
FINISHED WALLFINISHED WALL
AA
CC
EE
Tuotetiedot
| Merkki: | Symmons |
| Kategoria: | Ei luokiteltu |
| Malli: | Dia 353GB-24 |
Tarvitsetko apua?
Jos tarvitset apua merkille Symmons Dia 353GB-24 esitä kysymys alla ja muut käyttäjät vastaavat sinulle
Ei luokiteltu Symmons Käyttöohjeet

31 Joulukuuta 2025
31 Joulukuuta 2025
31 Joulukuuta 2025
31 Joulukuuta 2025
17 Joulukuuta 2024
16 Joulukuuta 2024
Ei luokiteltu Käyttöohjeet
Viimeisimmät Ei luokiteltu Käyttöohjeet
9 Huhtikuuta 2025
9 Huhtikuuta 2025
9 Huhtikuuta 2025
9 Huhtikuuta 2025
9 Huhtikuuta 2025
9 Huhtikuuta 2025
9 Huhtikuuta 2025
9 Huhtikuuta 2025
9 Huhtikuuta 2025
9 Huhtikuuta 2025