Switel DH-100 Käyttöohje
Switel Hälytysjärjestelmä DH-100
Lue alta 📖 käyttöohje suomeksi merkille Switel DH-100 (2 sivua) kategoriassa Hälytysjärjestelmä. Tämä opas oli hyödyllinen 34 henkilölle ja sai 4.5 tähden keskimäärin 2 käyttäjältä
Sivu 1/2
MA-600 is a plug-in receiver, it can carry two wireless transmitters
such as doorbell buttons with two distinguishable flash pattern.
The first coded transmitter will flash rapidly; the second coded
transmitter flashes slower.
Step 1: Press & Hold the Learn button
for 3 seconds. The red LED
indicator inside the lens will blink.
(if the red LED indicator lights
constantly that means the
memory of the receiver is full.
Please see section 3)
Step 2: Press the Melody selector button ♫
to scroll through the melodies.
Once you hear a melody you
prefer, do not press any button as
the melody is set for that
transmitter.
Step 3: Once the melody is selected, trigger the transmitter to
pair. If successful, the receiver (chime unit) will
generate a short tone. Press the Learn selector
button to exit the pairing mode, the system is now
ready to use.
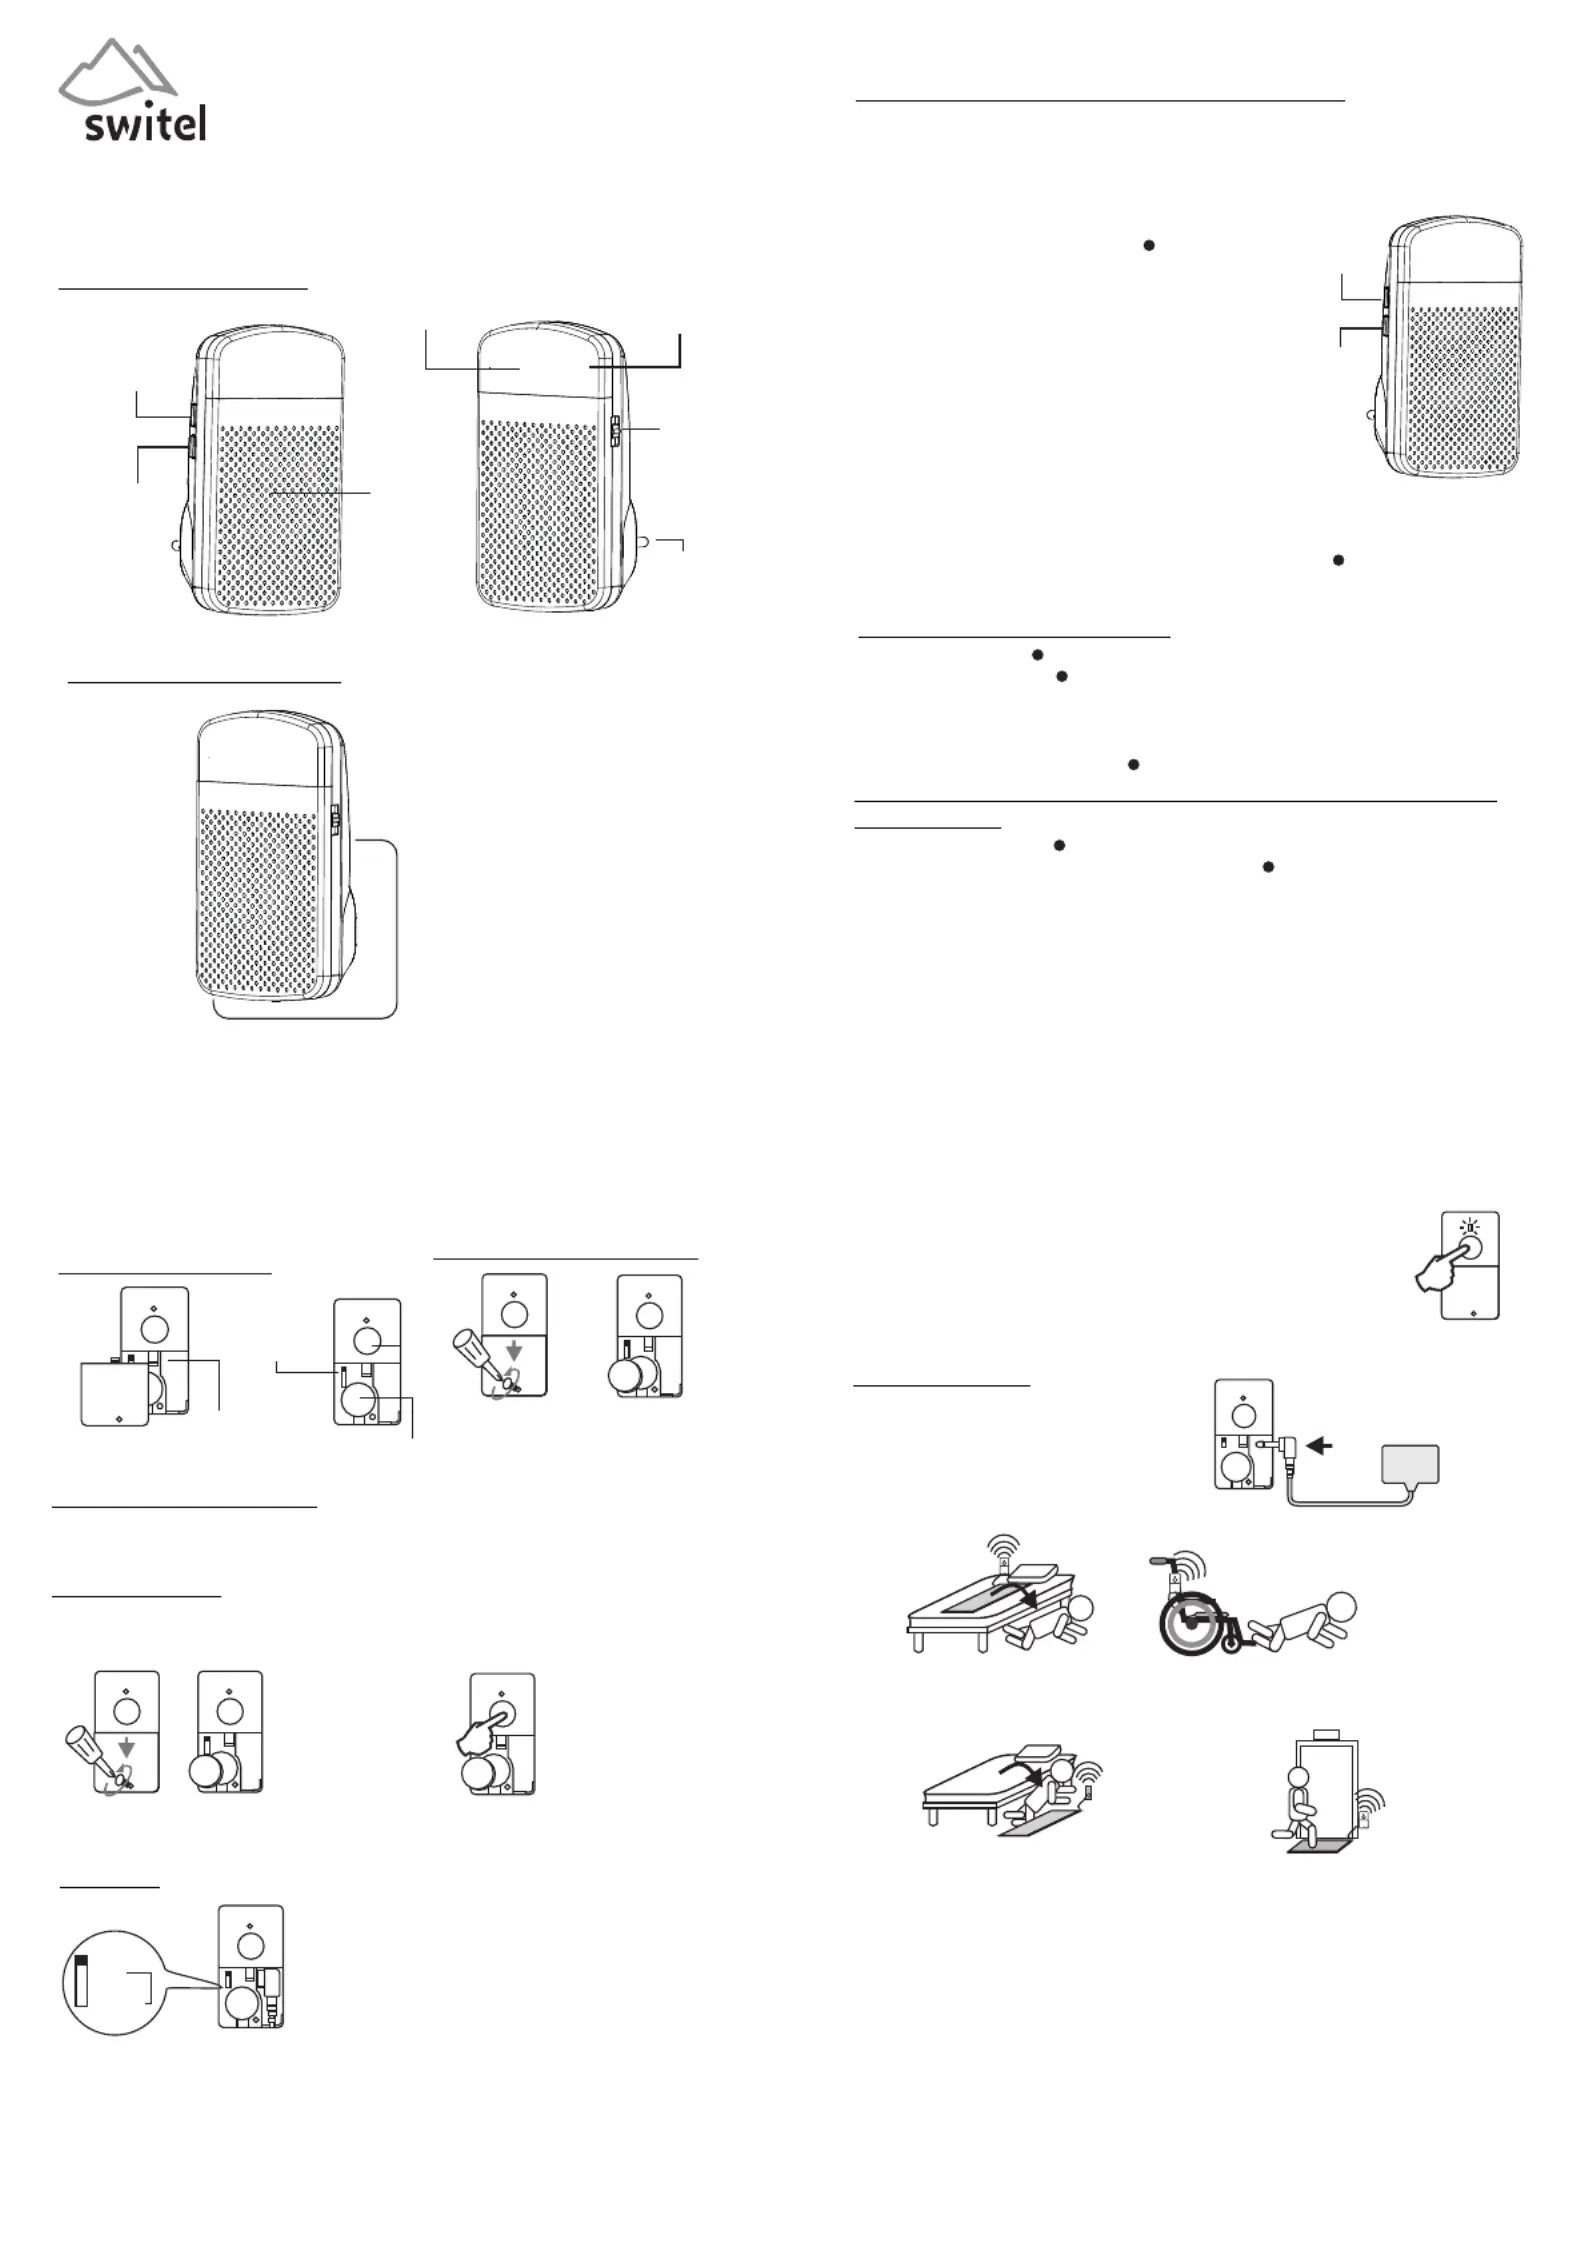
PARTS & FUNCTION
MOUNTING & POWER
Flasher
Indicator
Function
switch
Speaker
Melody
button
Learn
button
Wall plug
(AC plug)
Press & hold the Learn button for 3 seconds to enter the pairing
mode. Press the Learn button to scroll between 1 and 2
transmitters , press the Melody selector repeatedly until you ♫
have found the desired melody.
Trigger the transmitter to confirm the melody, when you hear a
twice short tone press the Learn button to exit.
1. ASSIGNMENT OF THE TRANSMITTER
3. CLEAR THE TRANSMITTER FROM THE RECEIVER
MEMORY
Press & hold the Learn button for 3 seconds to enter the
pairing mode. Press & hold both the Learn button & the ♫
Melody selector together for 3 seconds to delete the memory.
The receiver will generate a beep tone to indicate all
transmitters on the memory is deleted. The red LED will change
to blink. Now you can pair the new transmitters to the receiver
as per the previous section.
Melody
Learn
USER MANUAL
4. TRANSMITTER BATTERY LOW
When the indicator lights constantly after triggered, it indicates this
transmitter is battery low. Please replace its battery as soon as possible.
This receiver works with AC 80V to 240V. Simply plug into a well
visible AC wall socket, it'll turn on.
* PLEASE NOTE THE TRANSMITTER & RECEIVER ARE
READY TO USE
Two transmitters can be assigned to the receiver by sequence.
The transmitter can only be assigned if it is not yet known in the
memory of the receiver.
2. CHANGE THE MELODY
PAD TRANSMITTER
Part & Function
Battery installation
Mono jack for
External sensor
Battery
compartment
* Unlock the screw
* Slide to open the cover
* Insert a CR2032
Battery "+" face up
Switch for
Fall Mat or
Bed Pad +
Delay
If the coding is the same as another transmitter universal transmitter
you must change the code. When you have changed the code re-pair
the . universal transmitter
Open the cover
Remove the battery
Press and hold the test button, insert
the battery whilst holding the button
for 5 seconds. The LED will flash 5 times
when a new code is generated
+
+
+
+
+
Setting
+
Pad
Mat
+ 3S
+ 10Min
Temporary Cancel Call Button
To cancel the call button function, press and hold the call
button 5 secons. The LED will blink 4 time to indicate the call
button is disable.
To enable the call function, press and hold the call button 5
seconds again. The LED will blink 2 time to indicate the call
function is enable.
Call
Button
Open the battery cover and slide the switch
to pad or mat position
Mat: for fall mat (normal open)
Pad: for Bed pad or chair pad (normal
close)
+3S: Alert after the person leave the pad
more than 3 seconds
+10Min: Alert after the person leave the
pad more than 10 minutes seconds
OPERATION
Pad
Connection
Mat
1. open the battery cover
2. Connect the pressure pad to the
transmitter
3. close the battery cover
o2.5 mono plug
/
The elder person normally lay on the mat, when the person leave the mat
more then 2 second, the transmitter will send out the alert signal to the
receiver
EXIT
The transmitter will send out the alert signal to the receiver, when some
step on (fall on) the mat The universal transmitter can connected to other
type of sensor such as a switch.
Code Conflict
Paring to the receiver
The Sensor is already paired with the receive. You can add (pair) one more
transmitter to the system follow the instructions of the receiver.
DH-100
Tuotetiedot
| Merkki: | Switel |
| Kategoria: | Hälytysjärjestelmä |
| Malli: | DH-100 |
Tarvitsetko apua?
Jos tarvitset apua merkille Switel DH-100 esitä kysymys alla ja muut käyttäjät vastaavat sinulle
Hälytysjärjestelmä Switel Käyttöohjeet

12 Joulukuuta 2024
Hälytysjärjestelmä Käyttöohjeet
Viimeisimmät Hälytysjärjestelmä Käyttöohjeet
2 Huhtikuuta 2025
2 Huhtikuuta 2025
2 Huhtikuuta 2025
2 Huhtikuuta 2025
5 Maaliskuuta 2025
5 Maaliskuuta 2025
25 Helmikuuta 2025
25 Helmikuuta 2025
25 Helmikuuta 2025
25 Helmikuuta 2025