StarTech.com M2E1BMU31C Käyttöohje
StarTech.com Ei luokiteltu M2E1BMU31C
Lue alta 📖 käyttöohje suomeksi merkille StarTech.com M2E1BMU31C (2 sivua) kategoriassa Ei luokiteltu. Tämä opas oli hyödyllinen 40 henkilölle ja sai 4.3 tähden keskimäärin 3 käyttäjältä
Sivu 1/2
Quick-Start Guide
To view manuals, FAQs, videos, drivers, downloads, technical drawings, and more, visit www.startech.com/support.
Manual Revision: February 27, 2019 9:51 AM
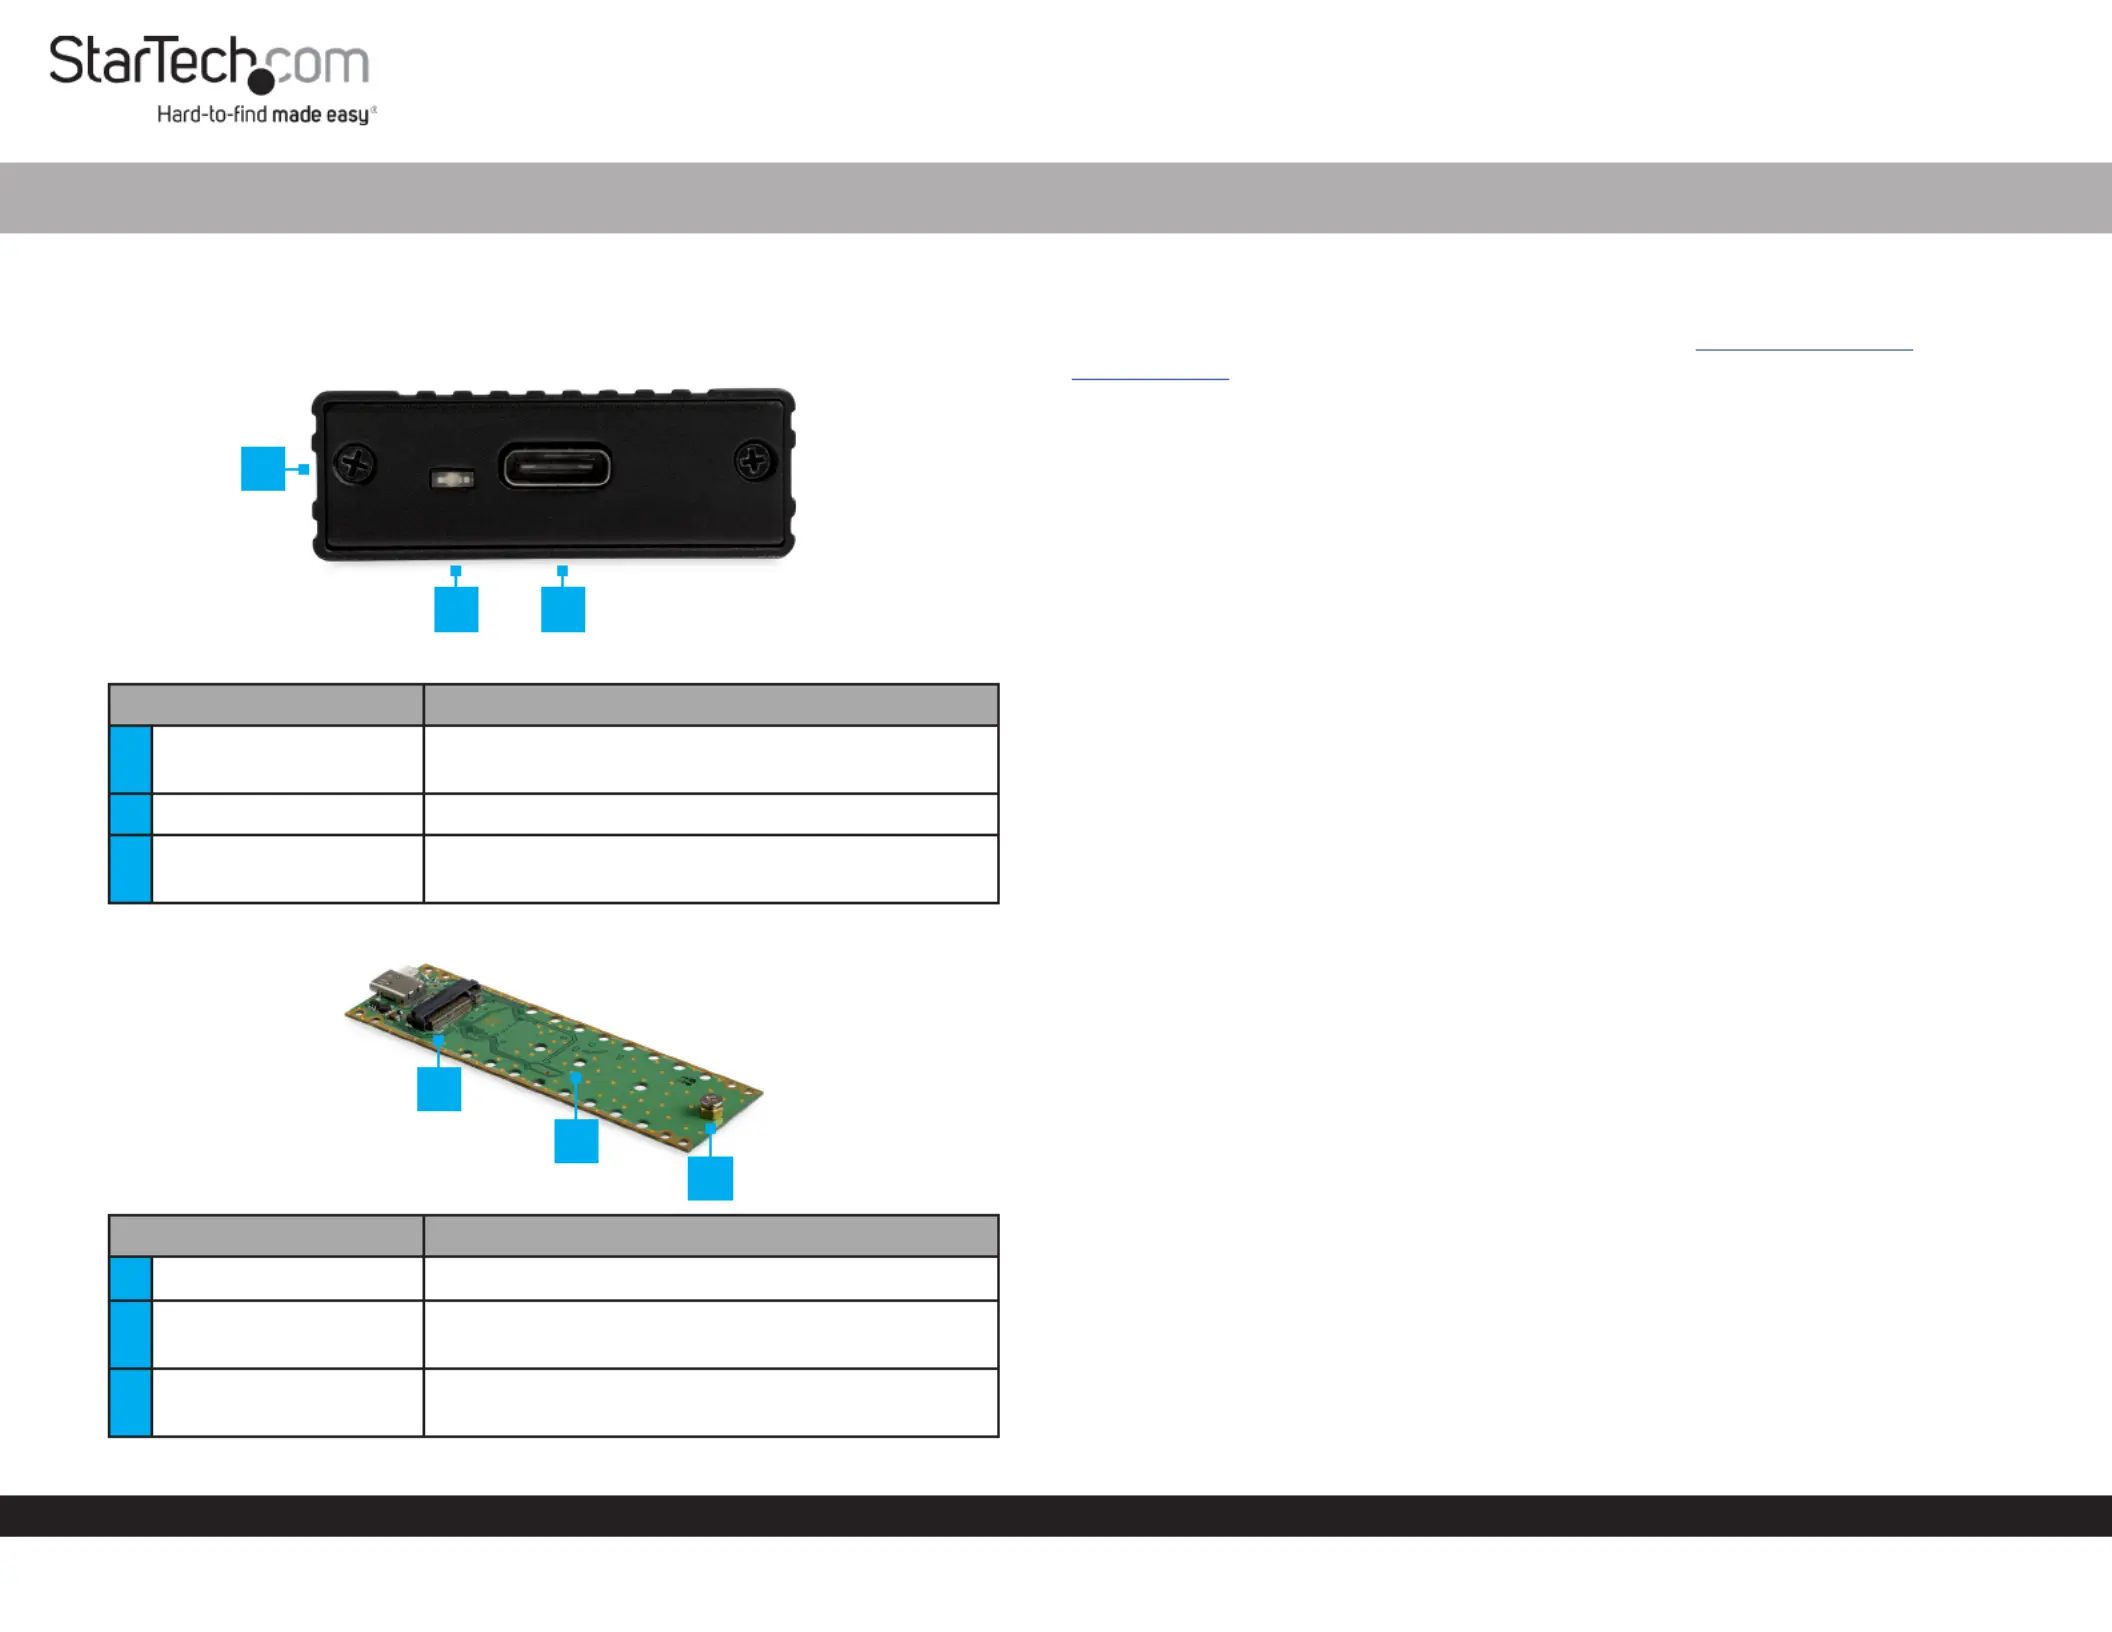
Product Diagram (M2E1BMU31C)
Exterior
ComponentFunction
1Drive-Tray Screws x 2
• Used to secure the in the Drive Tray
Enclosure.
2Power LED• Indicates that the Enclosure is receiving power.
3USB-C Port
• Used to connect the to the Enclosure Host
Computer.
Interior
ComponentFunction
4Drive Connector• Used to connect the to the .DriveEnclosure
5
Adjustable Drive
Length Holes
• Used to accommodate dierent drive lengths.
6
Drive-Mount Screw/
Nut
• Used to secure the to the .DriveEnclosure
M.2 NVMe Enclosure | USB 3.1 (10Gbps) | USB-C
1
Requirements
For the latest requirements and full manual, please visit www.startech.com/
M2E1BMU31C
Installation
Installing a Drive
Warning! Drives should be handled carefully, especially when they’re transported. If
you’re not careful with your drives, you may lose data as a result.
1. Using a remove the (x 2) from the Phillips Head Screwdriver,Drive-Tray Screws
Enclosure Cover Plate and remove the.
2. Carefully pull the out of the . Drive TrayEnclosure
3. Place the next to the and align the screw groove on the with DriveDrive TrayDrive
the on the .Adjustable Drive Length HolesDrive Tray
Note: If the drive-mount hardware is already installed in the correct position, proceed
to step 6.
4. Use a (included) and a set of to remove the Phillips Head Screwdriver PliersDrive-
Mount Screw, Stando,Nut and .
5. Insert the and into the correct (80, 60, StandoNutAdjustable Drive Length Hole
42, or 30) according to the length of the .Drive
6. Using a set of tighten the and .PliersStandoNut
7. Gently slide the connector on the (on a 30-degree angle) into the Drive
corresponding connector on the .Enclosure
Note: The connector on your drive is keyed so that it only ts one way.
8. Lightly push the down into position on the circuit board.Drive
9. Insert the through the screw groove on the and into the Drive-Mount ScrewDrive
Stando.
10. Using a tighten the , being careful Phillips Head ScrewdriverDrive-Mount Screw
not to over-tighten.
11. Slide the into the center grooves in the enclosure so that the Drive TrayUSB-C Port
is facing outward.
12. Place the over the and circuit board.Cover PlateUSB-C Port
2
4
3
6
5
Tuotetiedot
| Merkki: | StarTech.com |
| Kategoria: | Ei luokiteltu |
| Malli: | M2E1BMU31C |
Tarvitsetko apua?
Jos tarvitset apua merkille StarTech.com M2E1BMU31C esitä kysymys alla ja muut käyttäjät vastaavat sinulle
Ei luokiteltu StarTech.com Käyttöohjeet

18 Maaliskuuta 2025
18 Maaliskuuta 2025
20 Tammikuuta 2025
20 Tammikuuta 2025
1 Tammikuuta 2025
31 Joulukuuta 2025
31 Joulukuuta 2025
31 Joulukuuta 2025
31 Joulukuuta 2025
31 Joulukuuta 2025
Ei luokiteltu Käyttöohjeet
Viimeisimmät Ei luokiteltu Käyttöohjeet
9 Huhtikuuta 2025
9 Huhtikuuta 2025
9 Huhtikuuta 2025
9 Huhtikuuta 2025
9 Huhtikuuta 2025
9 Huhtikuuta 2025
9 Huhtikuuta 2025
9 Huhtikuuta 2025
9 Huhtikuuta 2025
9 Huhtikuuta 2025