Pioneer CA-HR-FD-EVO.001 Käyttöohje
Pioneer Ei luokiteltu CA-HR-FD-EVO.001
Lue alta 📖 käyttöohje suomeksi merkille Pioneer CA-HR-FD-EVO.001 (4 sivua) kategoriassa Ei luokiteltu. Tämä opas oli hyödyllinen 33 henkilölle ja sai 4.2 tähden keskimäärin 6 käyttäjältä
Sivu 1/4
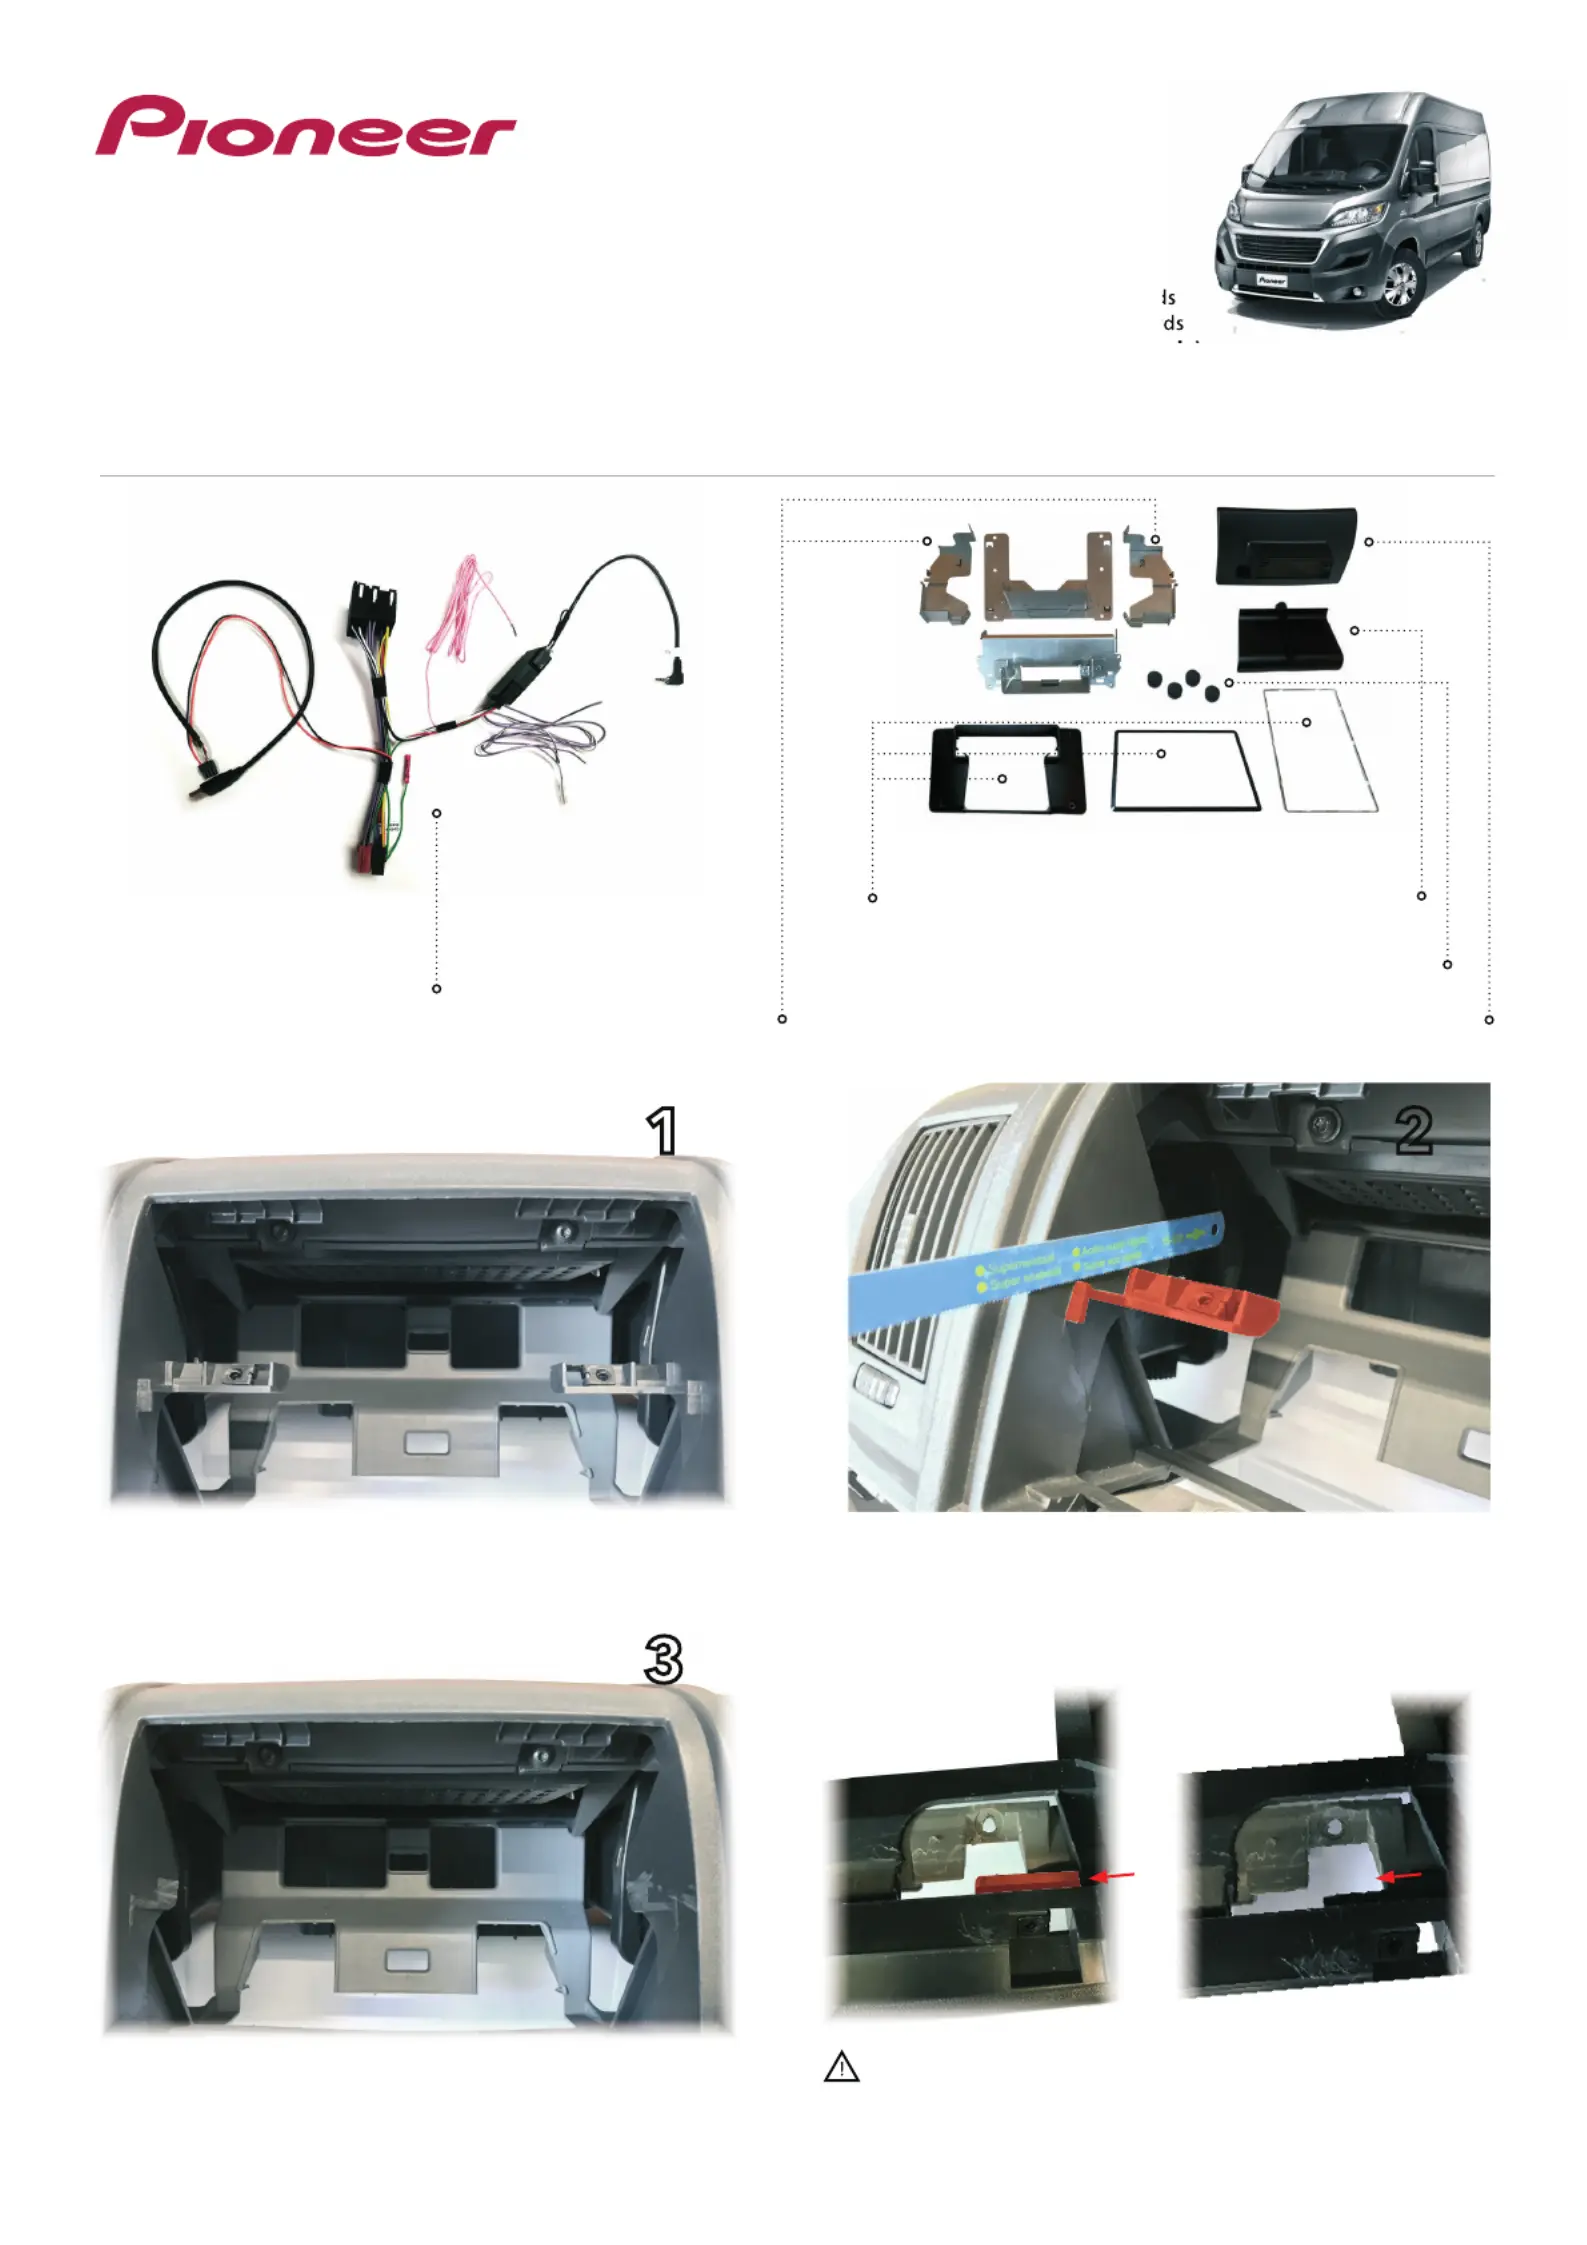
Installation manual SPH-EVO82DAB-DUC | Version 1.0
EN - Installation Manual
Original dashboard
Screen brackets
Interface
Dashboard cover
Screw covers
Cable cover
Screen cover
Result after the modification
Cut out the center supports / support bar
12
3
CA-HR-FD-EVO.001
INSTALLATION KIT FOR SPH-EVO82DAB-DUC
Compatibility:
• Fiat Ducato from 2007 onwards
• Peugeot Boxer from 2007 onward
• Citroen Jumper from 2007 onwar
(open dash platform with ISO only)
Result after the cut
If the van comes with these ridges, please remove by cutting
to make space for the metal brackets.
Tuotetiedot
| Merkki: | Pioneer |
| Kategoria: | Ei luokiteltu |
| Malli: | CA-HR-FD-EVO.001 |
Tarvitsetko apua?
Jos tarvitset apua merkille Pioneer CA-HR-FD-EVO.001 esitä kysymys alla ja muut käyttäjät vastaavat sinulle
Ei luokiteltu Pioneer Käyttöohjeet

31 Tammikuuta 2025
4 Tammikuuta 2025
1 Tammikuuta 2025
1 Tammikuuta 2025
1 Tammikuuta 2025
30 Joulukuuta 2025
30 Joulukuuta 2025
30 Joulukuuta 2025
21 Joulukuuta 2024
15 Joulukuuta 2024
Ei luokiteltu Käyttöohjeet
Viimeisimmät Ei luokiteltu Käyttöohjeet
9 Huhtikuuta 2025
9 Huhtikuuta 2025
9 Huhtikuuta 2025
9 Huhtikuuta 2025
9 Huhtikuuta 2025
9 Huhtikuuta 2025
9 Huhtikuuta 2025
9 Huhtikuuta 2025
9 Huhtikuuta 2025
9 Huhtikuuta 2025