Pioneer CA-HM-HO.003 Käyttöohje
Pioneer Ei luokiteltu CA-HM-HO.003
Lue alta 📖 käyttöohje suomeksi merkille Pioneer CA-HM-HO.003 (8 sivua) kategoriassa Ei luokiteltu. Tämä opas oli hyödyllinen 32 henkilölle ja sai 4.8 tähden keskimäärin 2 käyttäjältä
Sivu 1/8
INSTALLATION INSTRUCTIONS FOR PART 99-7802CH
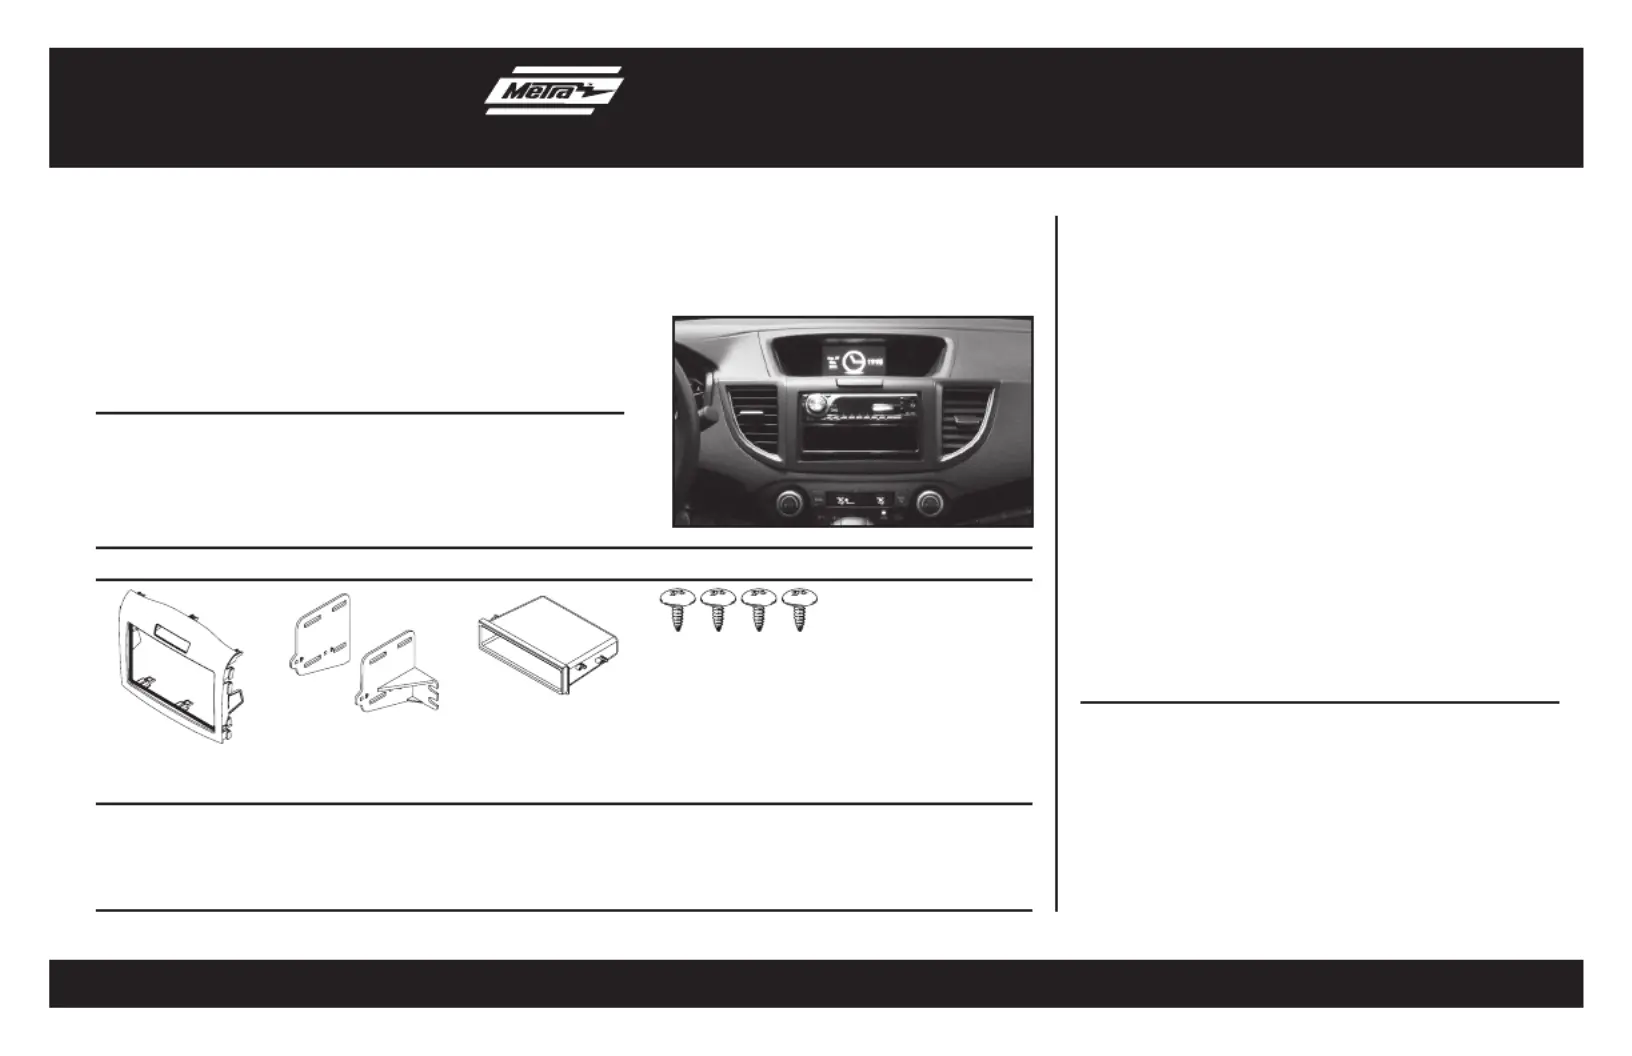
APPLICATIONS
METRA. The World’s best kits.
™
metraonline.com1-800-221-0932
© COPYRIGHT 2004-2011 METRA ELECTRONICS CORPORATION
REV. 11/12/2012 INST99-7802CH
CAUTION: Metra recommends disconnecting the
negative battery terminal before beginning any
installation. All accessories, switches, and especially
air bag indicator lights must be plugged in
beforereconnecting the battery or cycling the ignition.
NOTE: Refer to the instructions included with the
aftermarket radio.
Table of Contents
• ISO DIN head unit provision with pocket
• Painted Charcoal
• A) Radio Housing Trim Panel • B) Radio Brackets • C) Pocket • D) (4) #8 x 3/8” Phillips Truss-Head Screws
KIT FEATURES
KIT COMPONENTS
WIRING & ANTENNA CONNECTIONS (sold separately)
Wiring Harness: • 70-1729 Honda Harness 2008-Up
Antenna Adapter: • 40-HD11 Honda Antenna Adapter 2009-Up
• Panel removal tool • Phillips screwdriver • Socket Wrench
TOOLS REQUIRED
Honda CR-V 2012-up
99-7802CH
A
B
CD
Dash Disassembly
–Honda CR-V 2012-up ...........................................2
Kit Assembly
–ISO DIN head unit provision with pocket ...............3
Tuotetiedot
| Merkki: | Pioneer |
| Kategoria: | Ei luokiteltu |
| Malli: | CA-HM-HO.003 |
Tarvitsetko apua?
Jos tarvitset apua merkille Pioneer CA-HM-HO.003 esitä kysymys alla ja muut käyttäjät vastaavat sinulle
Ei luokiteltu Pioneer Käyttöohjeet

31 Tammikuuta 2025
4 Tammikuuta 2025
1 Tammikuuta 2025
1 Tammikuuta 2025
1 Tammikuuta 2025
30 Joulukuuta 2025
30 Joulukuuta 2025
30 Joulukuuta 2025
21 Joulukuuta 2024
15 Joulukuuta 2024
Ei luokiteltu Käyttöohjeet
Viimeisimmät Ei luokiteltu Käyttöohjeet
9 Huhtikuuta 2025
9 Huhtikuuta 2025
9 Huhtikuuta 2025
9 Huhtikuuta 2025
9 Huhtikuuta 2025
9 Huhtikuuta 2025
9 Huhtikuuta 2025
9 Huhtikuuta 2025
9 Huhtikuuta 2025
9 Huhtikuuta 2025