Panduit FPONE2 Käyttöohje
Panduit Ei luokiteltu FPONE2
Lue alta 📖 käyttöohje suomeksi merkille Panduit FPONE2 (44 sivua) kategoriassa Ei luokiteltu. Tämä opas oli hyödyllinen 48 henkilölle ja sai 4.6 tähden keskimäärin 8 käyttäjältä
Sivu 1/44
ForTechnicalSupport:www.panduit.com/resources/install_maintain.asp
INSTALLATIONINSTRUCTIONS
©PanduitCorp.2020
FS159
Page1of2
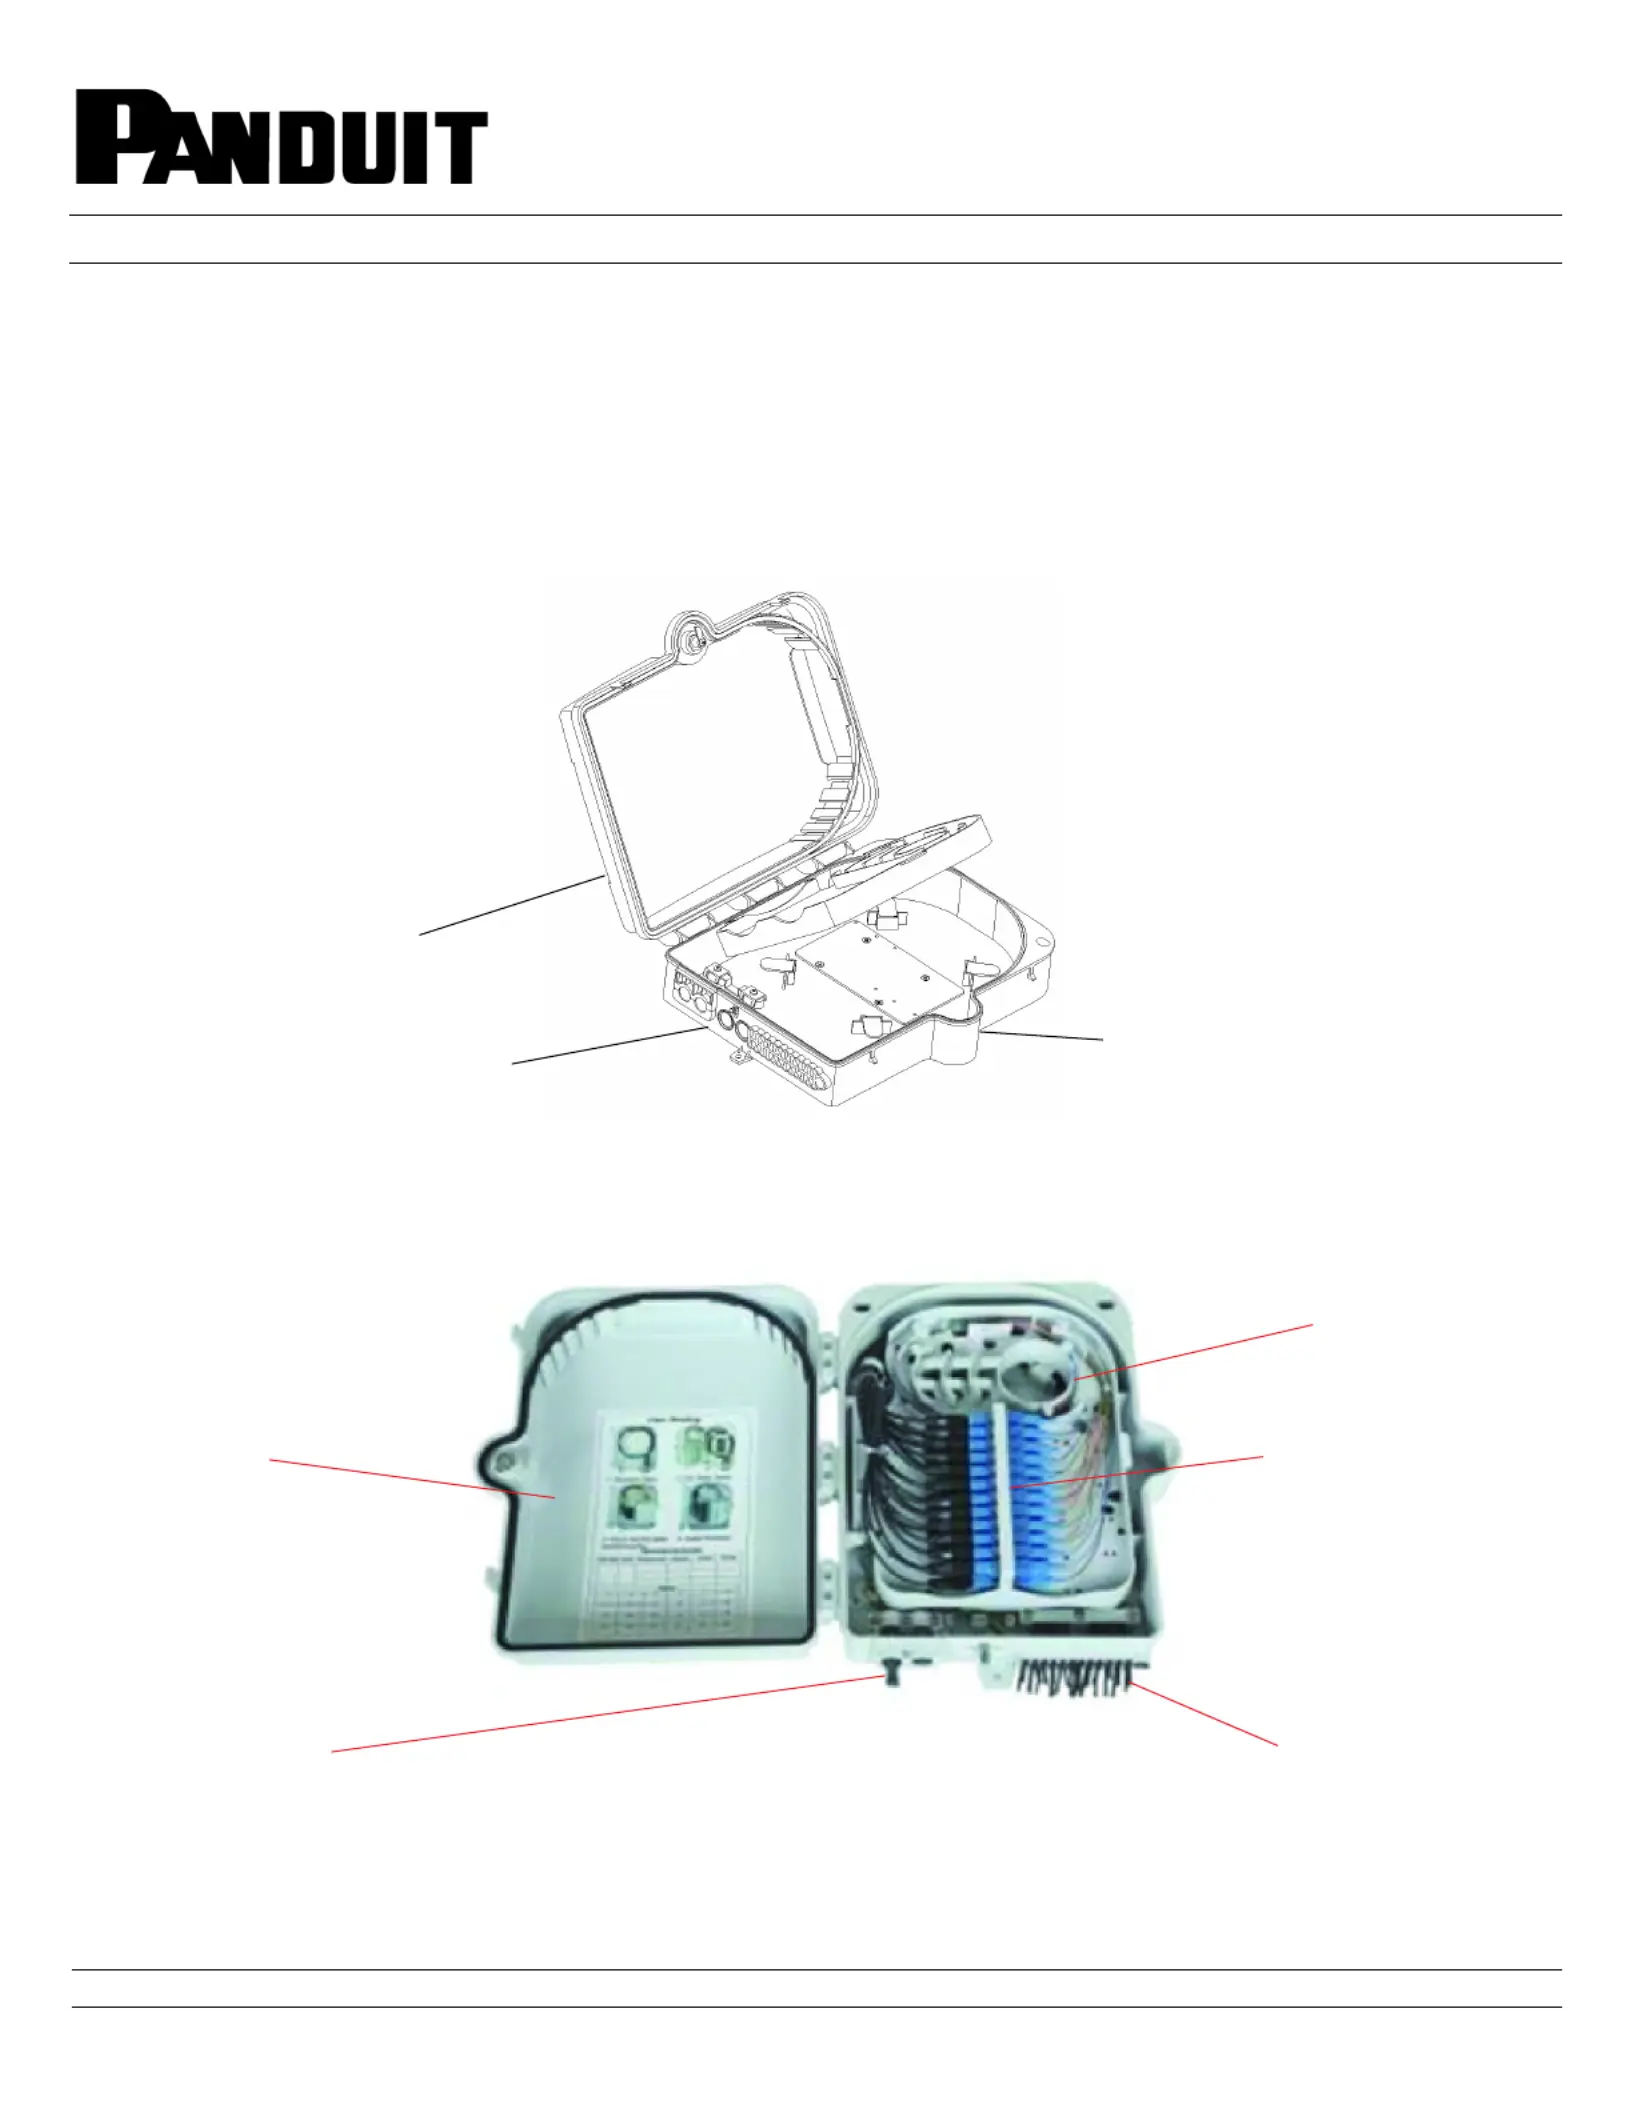
FiberPONEnclosure
PartNumber(s):FPONE2
SPECIFICATIONS:
Material:PC+ABS,waterresistant,dust-proof,IP55
Dimension(HxWxD):317x235x100mm
Color:LightGray
AdapterType:SC
NumberofAdapters:Max24
NumberofSplitters:Max1(Nx2,Nx4,andNx8,)andMax1(Nx16)
WallMount
Bottom
Front
Back
ProductStructureandCableEntry
DropCable
OSPCable
AdapterStorage
Fiber
Management
Lid
Tuotetiedot
| Merkki: | Panduit |
| Kategoria: | Ei luokiteltu |
| Malli: | FPONE2 |
Tarvitsetko apua?
Jos tarvitset apua merkille Panduit FPONE2 esitä kysymys alla ja muut käyttäjät vastaavat sinulle
Ei luokiteltu Panduit Käyttöohjeet

8 Tammikuuta 2025
30 Joulukuuta 2025
30 Joulukuuta 2025
30 Joulukuuta 2025
30 Joulukuuta 2025
27 Joulukuuta 2024
27 Joulukuuta 2024
27 Joulukuuta 2024
27 Joulukuuta 2024
15 Joulukuuta 2024
Ei luokiteltu Käyttöohjeet
Viimeisimmät Ei luokiteltu Käyttöohjeet
9 Huhtikuuta 2025
9 Huhtikuuta 2025
9 Huhtikuuta 2025
9 Huhtikuuta 2025
9 Huhtikuuta 2025
9 Huhtikuuta 2025
9 Huhtikuuta 2025
9 Huhtikuuta 2025
9 Huhtikuuta 2025
9 Huhtikuuta 2025