PAC LP3-4 Käyttöohje
PAC
Ei luokiteltu
LP3-4
Lue alta 📖 käyttöohje suomeksi merkille PAC LP3-4 (2 sivua) kategoriassa Ei luokiteltu. Tämä opas oli hyödyllinen 33 henkilölle ja sai 4.6 tähden keskimäärin 17 käyttäjältä
Sivu 1/2
1
L.O.C.PRO™ LP3-4
Line Output Converter
Before You Start
Replacing your radio? PAC also produces RadioPRO
™
which is a radio replacement solution, with steering wheel
control retention built-in. This greatly expedites the installation of a new radio into your vehicle.
To see if there is a RadioPRO
™
interface for your vehicle, visit www.pac-audio.com and search "Radio PRO".
Installation Instructions
The professional way to integrate
your new amplier.
General Overview
Install It Right with L.O.C. PRO
™
Don’t cheat yourself out of all the performance your new radio or amplier can deliver. Proper audio line level
matching is critical when replacing your vehicle’s factory (OEM) radio or amplier. It can be the difference
between a great sounding system that you enjoy every day and a buggy, noisy mess that drives you crazy.
PAC L.O.C.PRO™ interfaces have been professionally designed for those who want the very best.
The L.O.C.PRO™ LP3-2 can be used for adding ampliers to a system that does not have RCA outputs. Level
matching is achieved using precision stereo gain dials and will enable proper adjustment of audio output of the
radio for optimum system performance. Included in these instructions are the most common applications for the
L.O.C.PRO™ LP3-2.
For specialty applications not covered in this manual, please visit www.pac-audio.com for more comprehensive,
vehicle specic wiring diagrams.
Direct url - www.pac-audio.com/products/locpro
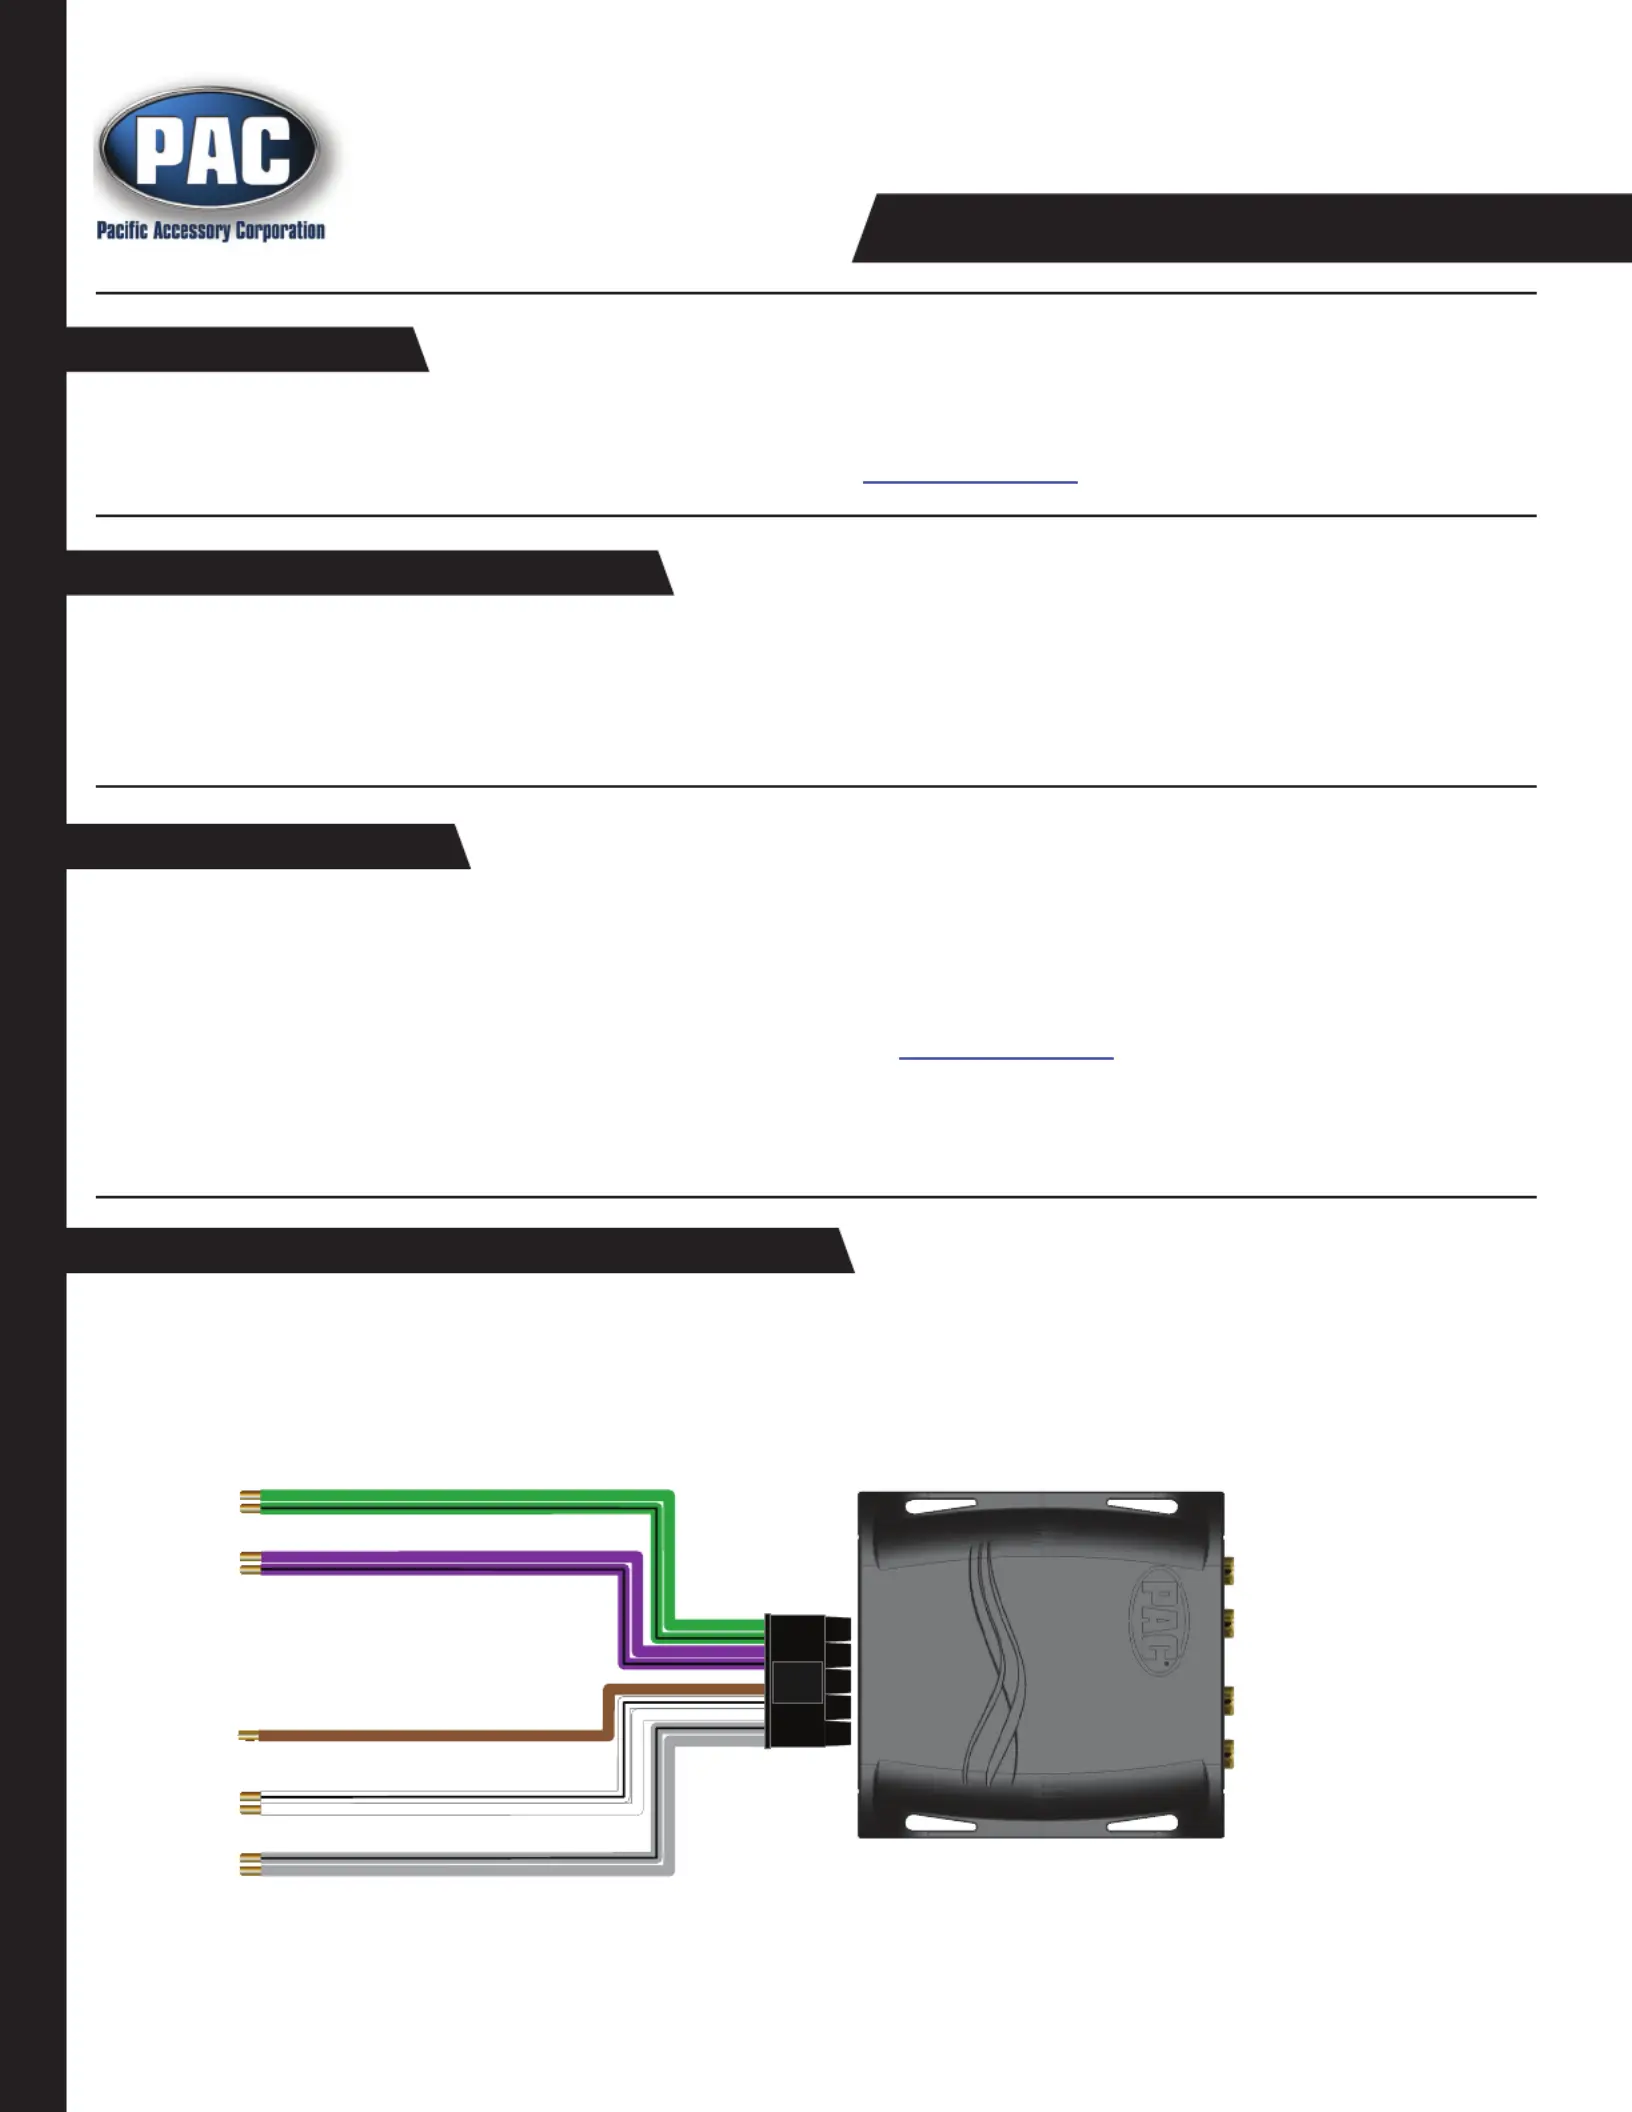
Speaker Level Input to RCA Level Output
Speaker level input to RCA level output is the most commonly used conguration for the LP3-4.
Use this when you need to create RCA level outputs from a source that only has speaker level outputs.
After all the connections are made, skip to the level adjustment section of this manual.
Copyright 2013 Pacic Accessory Corporation. Content subject to change without notice.
+
+
+
+
+
+
+
+
+
+
+
+
+
+
+ +
+
+
+
+
+ +
+
+
+
+
+
+
+
+
+ + + + + + +
+ + + + + + + + + +
+ + + + + + + + + + + + + + + + + + + + + + + + + + + + + + + +
+
+ +
+
+ +
+ + +
+
+
+
+
+
+
+
+
+
+
+
+
+ + +
+ + + + + + + + +
+ + + +
+ + + + +
+
+
+
+
+
+ + + + + + +
+ + + + + +
+ + + + + + + + + + + + + + + + + + + + + + + + + + + + + + + +
+
+ + + + + +
+
+
+
+
+
+
+
+
+
+
Front Right Audio Input
Rear Le Audio Input
Rear Right Audio Input
Front Le Audio Input
Audio Ground Input -
Rear Le Output
Rear Right Output
Front Le Output
Front Right Output
(
OPTIONAL
)
Note: If using large RCA connectors that are difcult to insert into housing, unsnap the
L.O.C.PRO™ cover and remove end panel insert around RCA outputs.
Tuotetiedot
| Merkki: | PAC |
| Kategoria: | Ei luokiteltu |
| Malli: | LP3-4 |
Tarvitsetko apua?
Jos tarvitset apua merkille PAC LP3-4 esitä kysymys alla ja muut käyttäjät vastaavat sinulle
Ei luokiteltu PAC Käyttöohjeet

10 Maaliskuuta 2025

19 Helmikuuta 2025

19 Helmikuuta 2025

19 Helmikuuta 2025

19 Helmikuuta 2025

19 Helmikuuta 2025

19 Helmikuuta 2025

19 Helmikuuta 2025

12 Helmikuuta 2025

12 Helmikuuta 2025
Ei luokiteltu Käyttöohjeet
- Ei luokiteltu Hertz
- Ei luokiteltu Babyzen
- Ei luokiteltu Yamazen
- Ei luokiteltu Altrad
- Ei luokiteltu Olympus
- Ei luokiteltu Eero
- Ei luokiteltu E-ast
- Ei luokiteltu Hypnos
- Ei luokiteltu Continental Edison
- Ei luokiteltu SBS
- Ei luokiteltu Kenwood
- Ei luokiteltu Toro
- Ei luokiteltu Wiesenfield
- Ei luokiteltu Ugreen
- Ei luokiteltu Adobe
Viimeisimmät Ei luokiteltu Käyttöohjeet

9 Huhtikuuta 2025

9 Huhtikuuta 2025

9 Huhtikuuta 2025

9 Huhtikuuta 2025

9 Huhtikuuta 2025

9 Huhtikuuta 2025

9 Huhtikuuta 2025

9 Huhtikuuta 2025

9 Huhtikuuta 2025

9 Huhtikuuta 2025