Heatmiser DS1-E Käyttöohje
Heatmiser Termostaatti DS1-E
Lue alta 📖 käyttöohje suomeksi merkille Heatmiser DS1-E (4 sivua) kategoriassa Termostaatti. Tämä opas oli hyödyllinen 37 henkilölle ja sai 4.0 tähden keskimäärin 7 käyttäjältä
Sivu 1/4
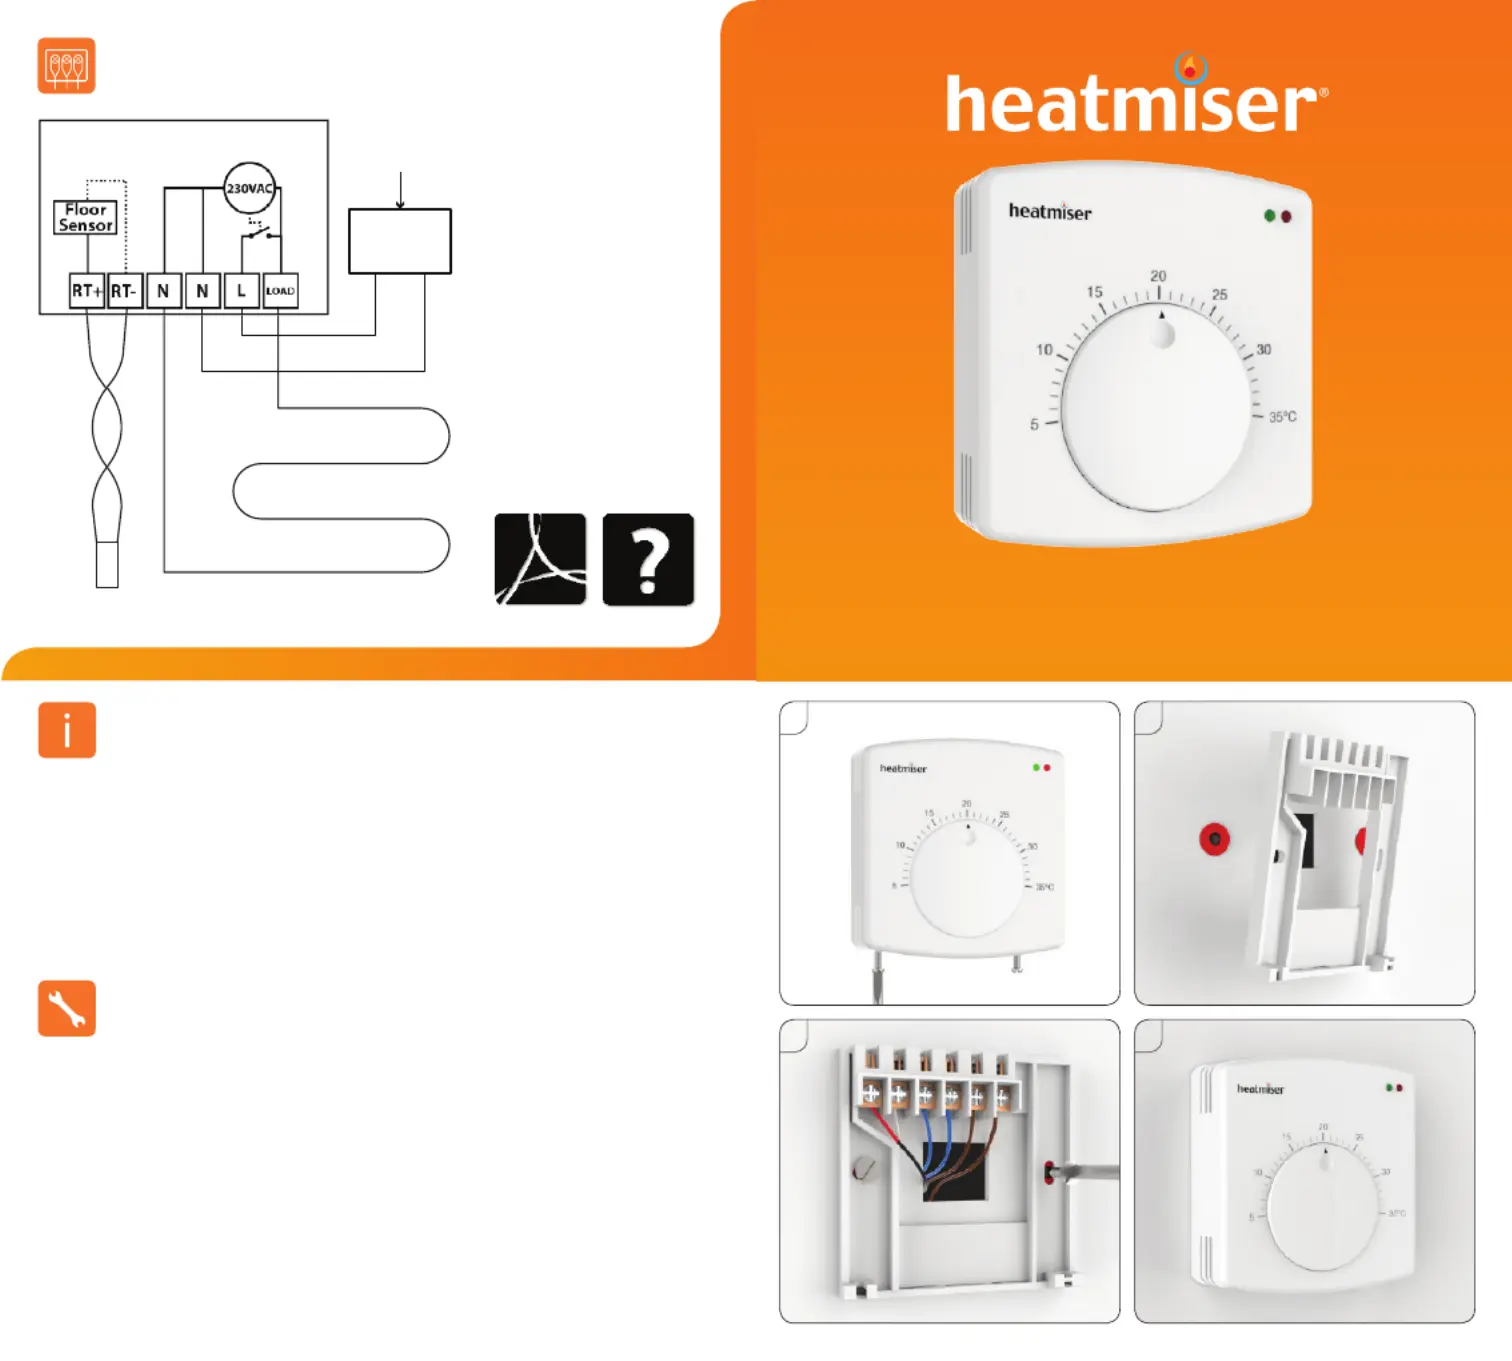
Wiring Diagram
RCD
MAINS SUPPLY
LN
MATTING OR WIRE
FlOOR PROBE
DS1-E
The Heatmiser DS1-E dial type thermostat is designed
specically for electric underoor heating.
This thermostat incorporates the following functions;
• Adjustable Switching Dierential
• LED Heat and Power Indication
• 230v AC, 13A Switching
Want More Information?
Call our support team on:
+44 (0)1254 669090
Or view video specications
directly on our website:
www.heatmiser.com
Introduction
1
4
Model: DS1-E
IN ORDER TO AVOID ANY RISK OF ELECTRIC SHOCK, TURN OFF THE POWER TO THE
HEATING SYSTEM.
This dial thermostat is designed to be surface mounted.
1. Separate the front part of the thermostat by unscrewing securing screws on the
bottom face of the thermostat.
2. Mark 2 hole positions on the wall using the backplate as a positioning template. Drill at
the marked positions and insert a wall plug in to each hole.
3. Terminate the thermostat as per wiring diagram and screw the DS1-E back plate to the
back box.
4. Reconnect the thermostat front plate and insert the securing screws.
Installation
PDFFAQ
2
3
Tuotetiedot
| Merkki: | Heatmiser |
| Kategoria: | Termostaatti |
| Malli: | DS1-E |
Tarvitsetko apua?
Jos tarvitset apua merkille Heatmiser DS1-E esitä kysymys alla ja muut käyttäjät vastaavat sinulle
Termostaatti Heatmiser Käyttöohjeet

26 Lokakuuta 2024
26 Lokakuuta 2024
26 Lokakuuta 2024
26 Lokakuuta 2024
26 Lokakuuta 2024
26 Lokakuuta 2024
26 Lokakuuta 2024
26 Lokakuuta 2024
26 Lokakuuta 2024
26 Lokakuuta 2024
Termostaatti Käyttöohjeet
Viimeisimmät Termostaatti Käyttöohjeet
9 Huhtikuuta 2025
6 Huhtikuuta 2025
5 Huhtikuuta 2025
2 Huhtikuuta 2025
1 Huhtikuuta 2025
1 Huhtikuuta 2025
1 Huhtikuuta 2025
1 Huhtikuuta 2025
1 Huhtikuuta 2025
1 Huhtikuuta 2025