EXSYS EX-1303 Käyttöohje
Lue alta 📖 käyttöohje suomeksi merkille EXSYS EX-1303 (2 sivua) kategoriassa Kaapelit tietokoneille ja oheislaitteille. Tämä opas oli hyödyllinen 38 henkilölle ja sai 4.1 tähden keskimäärin 7 käyttäjältä
Sivu 1/2
6 5
EXEXEX
-
-
-130313031303
EnglishEnglishEnglish
EXEXEX
-
-
-130313031303
EnglishEnglishEnglish
1
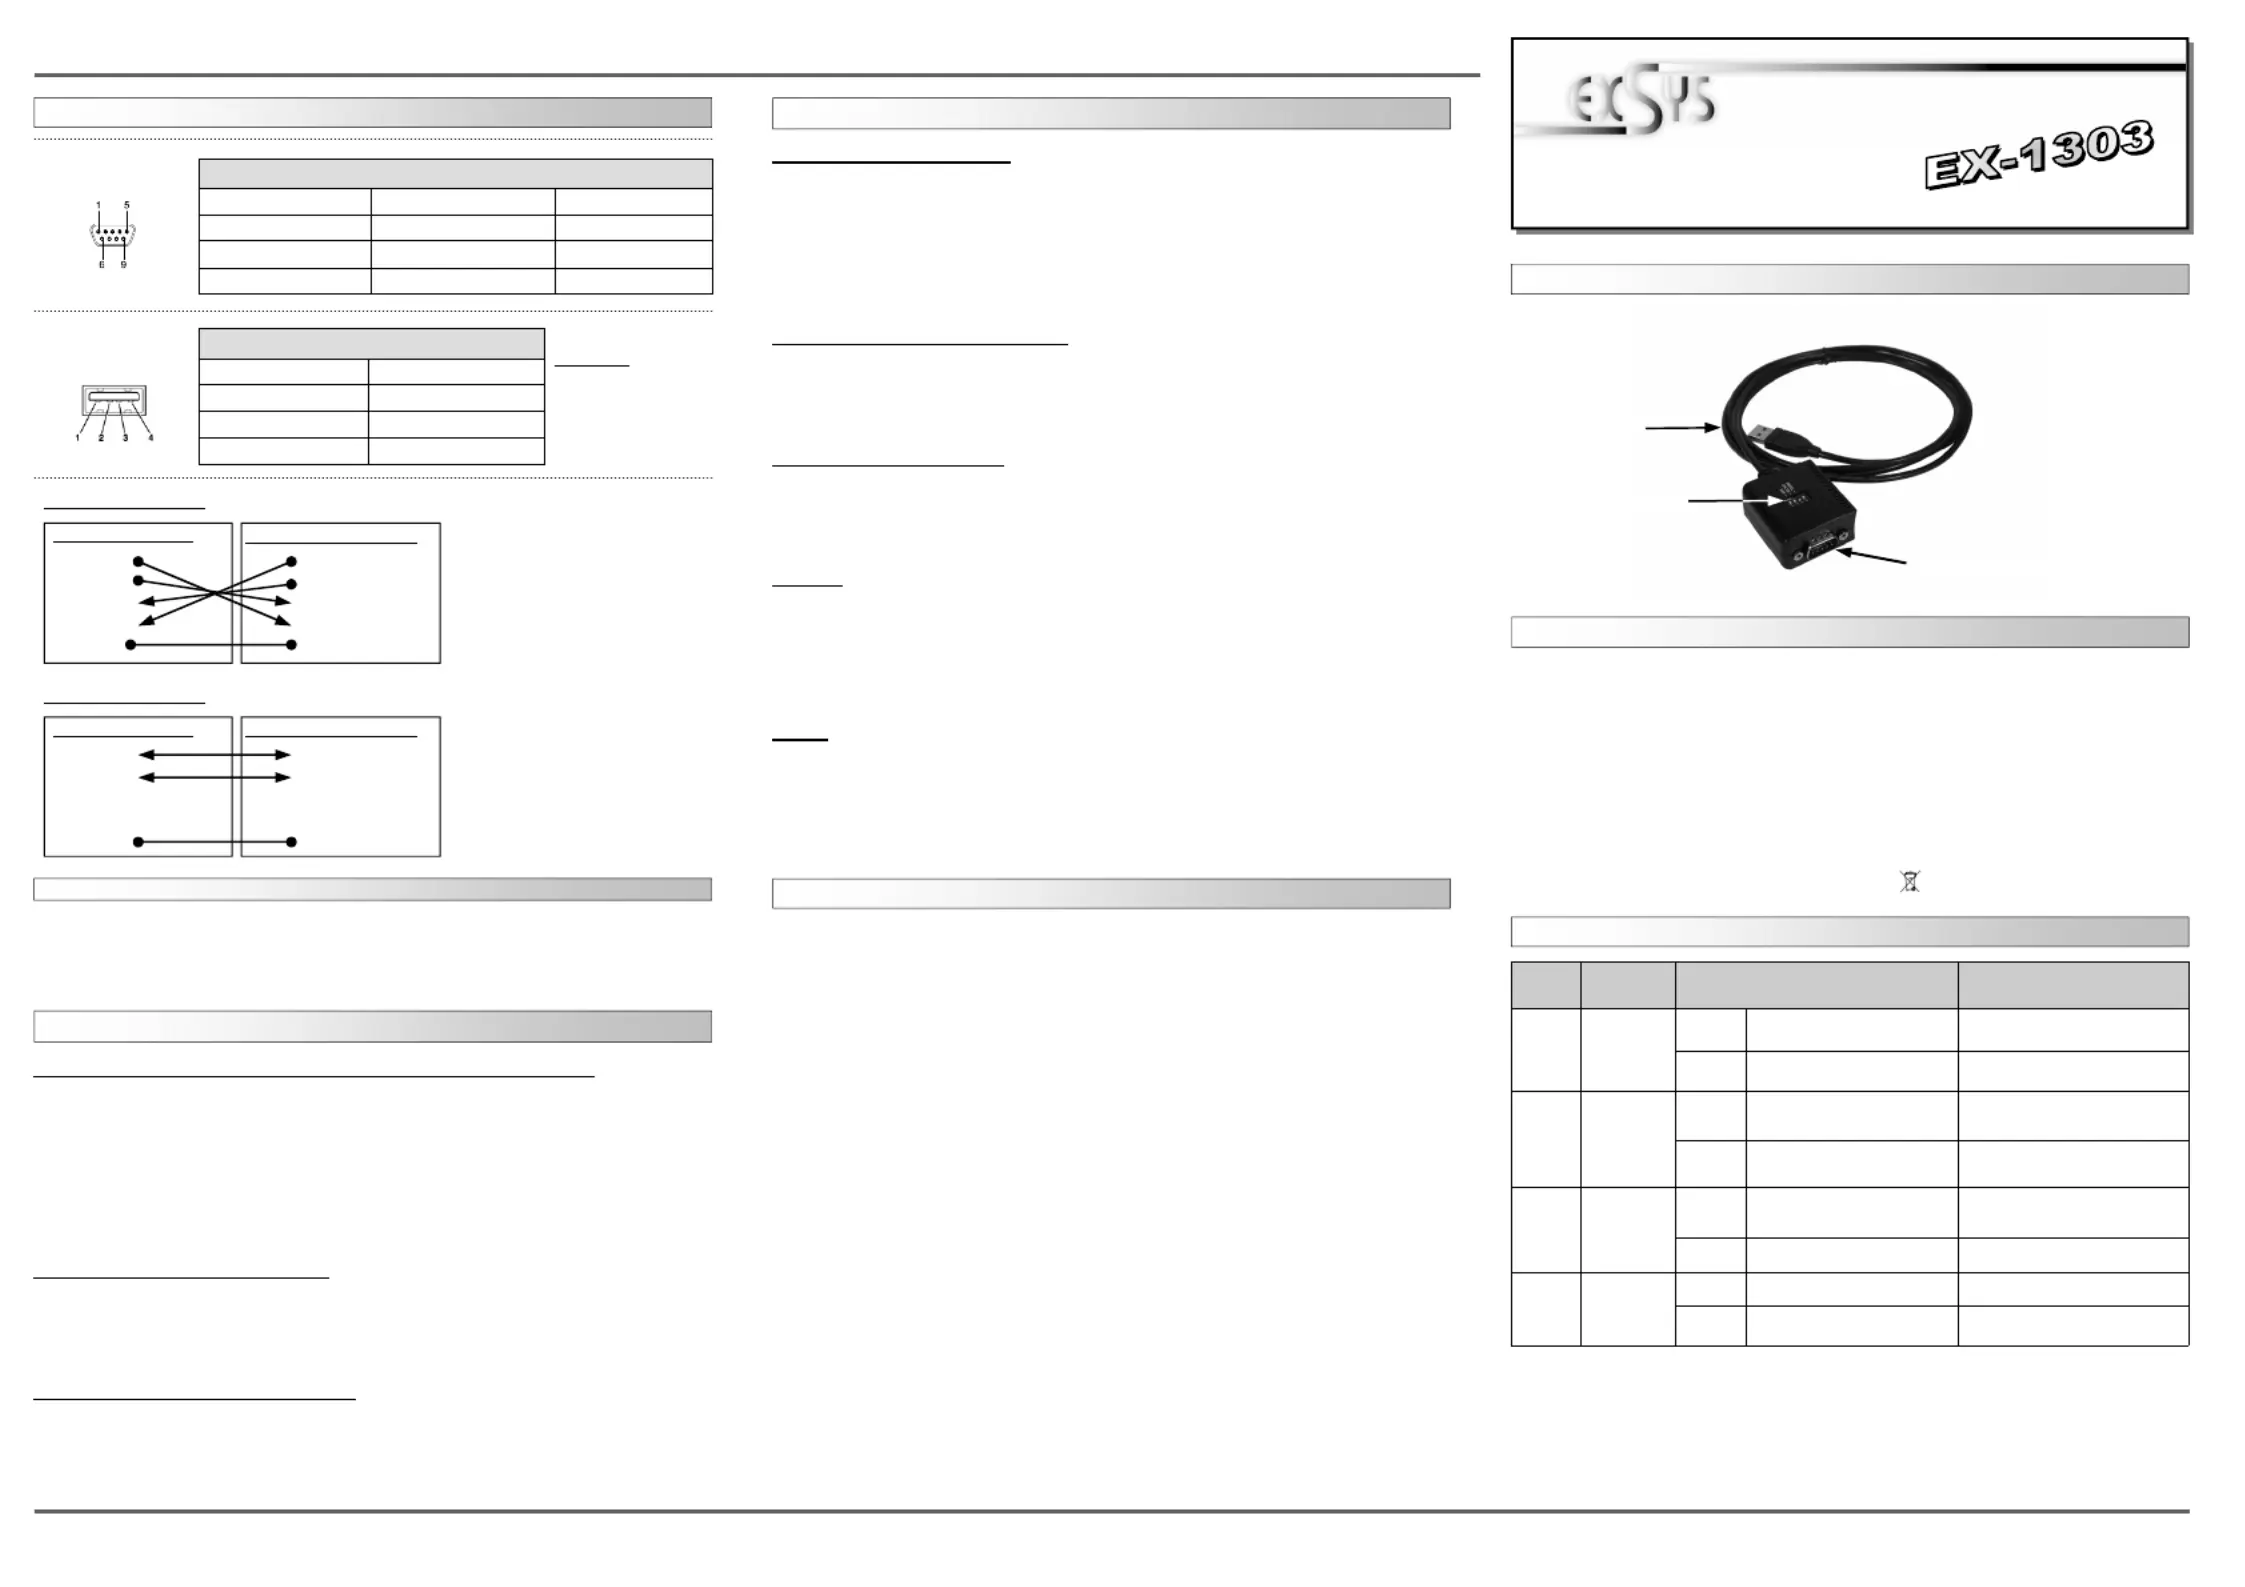
Die EX-1303 ist ein Modul zur Umsetzung von USB auf eine RS-422/485 Schnittstelle
mit FIFO 16C550 Ports für den Anschluss von High Speed Seriellen RS-422/485 Peri-
pherie Geräten (z.B. Modem, Plotter usw.) Das USB Modul ist Hot Plug & Play fähig.
Für die Einstellungen der I/O Adressen und Interrupts sind keine Jumper und Einstellun-
gen notwendig. Sie werden vom System BIOS und beim Installieren des Betriebssys-
tems automatisch vorgenommen.
BESCHREIBUNG & TECHNISCHE DATEN :
AUFBAU :
Kompatibilität: USB 1.1 & 2.0 Anschluss
Betriebssysteme: WIN 9.x/ ME/ 2000/ XP/ Server 200x/ Vista/ 7/ 8, Linux, MAC
Anschlüsse: 1 x 9 Pin RS-422/485 Sub-D Stecker, 1 x USB A-Buchse
Lieferumfang: EX-1303, Anleitung, CD
Zertikate:
CE
CECE
CE
/ FCC / RoHS / WEEE DE97424562 / WHQL
DRIVER INSTALLATION :
JUMPEREINSTELLUNG & ANSCHLÜSSE:
USB A–Anschluss
S1 9 Pin Stecker Seriell RS-422/485
CLEANING :
For cleaning please use only a dry u less cloth and remove the dirt with gently pres-
sure. In the area of the connectors please make sure that no bres from the cloth re-
main in the connectors. Attention! Never use a moist or wet cloth for cleaning!
Windows XP/ Vista/ 2000/ Server 200x/ 7/ 8 (32&64-Bit) :
Windows will recognize a new and open the hardware assistant. “FT232R USB UART“
Please choose manual installation and put the driver CD into your CD-Rom drive. Enter
the Path
"D:\USB_to_IO\FTDI\(32_64bit)Win7_8_XP_Vista_2008_2008R2_2003_2000”.
into the box for the Path/Source and click at . Now Windows search for >next/continue<
the drivers in the specied directory. Follow the hardware assistant and nish the instal-
lation. If Windows recognizes other new devices repeat the above described steps.
Attention! Restart Windows in any case after installing the drivers.
CHECK THE INSTALLED DRIVER:
Click at <>< then enter and click at . In the windows StartRun“compmgmt.msc“>OK<
that open select Under you should nd >Device Manager<. ”Ports (COM and LPT)“
one more new as sample (COM5). If you see this or similar entries "USB Serial Port„
the module is installed correctly.
INSTALL THE PERIPHERAL DEVICE:
The speed from the serial ports can be set to the maximum baud rate of 115.2Kbaud.
With double click select for example<>Device manager< > USB Serial Port (COM5).
Now you can select the dierent settings of baud rate, stop/start-bits etc. This setting
you can use also for the other COM ports.
DRIVER INSTALLATION :
Windows 98/ 98SE/ ME:
Windows will recognize a new and open the hardware assistant. “FT232R USB UART“
Please choose manual installation and put the driver CD into your CD-Rom drive (as
sample D:) . Now enter the Path into the box for the “D:\USB_to_IO\FTDI\Win98_ME”
Path/Source and click at . Now Windows search for the drivers in the >next/continue<
specied directory. Follow the hardware assistant and nish the installation. If Windows
recognizes other new devices repeat the above described steps. Restart Attention!
Windows in any case after installing the drivers.
CHECK THE INSTALLED DRIVER:
Click at <>< then enter and click at . In the windows StartRun“compmgmt.msc“>OK<
that open select Under you should nd >Device Manager<. ”Ports (COM and LPT)“
one more new as sample (COM3). If you see this or similar entries "USB Serial Port„
the module is installed correctly.
CHANGE PORT NUMBER:
If you like to change the port number for example COM 3 to COM 5, open the >Device
Manager< >COM3<, >Settings< click at and then >Advance<. There you can change
between COM 3 to 256.
LINUX:
There are drivers available for Linux. The drivers are located in the folder
“D:\USB_to_IO\FTDI\Linux x86_64“on the driver CD. They are supported by the most
versions of Linux. Because each individual distribution and kernel version of Linux is
dierent, sadly we cant provide a installation instruction. Please refer to the installation
manual for standard IO ports from your Linux version !
MAC:
There are drivers available for MAC. The drivers are located in the folder
“D:\USB_to_IO\FTDI\MAC OSX or Mac_OS_9_8“on the driver CD. They are support-
ed by the most versions of MAC OS. Because each individual version of MAC OS is
dierent, sadly we cant provide a installation instruction. Please refer to the installation
manual for standard IO ports from your MAC OS version !
BedienungsanleitungBedienungsanleitung
Vers. 1.2 / 04.05.13
Umschalter RS-422/485
Switch
Pin#
Switch
Switch Switch
Switch
Name
NameName
Name
Beschreibung
BeschreibungBeschreibung
Beschreibung
1
485/422
OFF 485 (Werkseinstellung)
485 (Werkseinstellung)485 (Werkseinstellung)
485 (Werkseinstellung)
2-Draht RS-485 Mode
ON 422 4-Draht RS-422 Mode
2
ECHO/
NO_ECHO
OFF
ECHO
Übermittelte Daten werden mit
Echo zurückgesendet
ON
NO_ECHO
NO_ECHONO_ECHO
NO_ECHO
(Werkseinstellung)
(Werkseinstellung)(Werkseinstellung)
(Werkseinstellung)
Keine Echo Daten
3
NO TERM/
TERM
OFF
NO TERM
(Werkseinstellung / OFF)
(Werkseinstellung / OFF)(Werkseinstellung / OFF)
(Werkseinstellung / OFF)
Terminator ausgeschaltet
ON TERM Terminator eingeschaltet
4 Leer
OFF OFF keine Funktion
ON
(Werkseinstellung ON)
(Werkseinstellung ON)(Werkseinstellung ON)
(Werkseinstellung ON) keine Funktion
Switch
Position
Position Position
Position
•
Wenn Sie den Mode auf “422” setzen, sind die anderen Einstellung (AUTO, ECHO und
LOOP) nicht mehr aktiv.
•
Der “Echo Mode” ist nützlich für das Anwendungsprogramm um zu erkennen ob der RS-
485 “Bus” in einem Konikt ist. Sind die zurückgesendeten Daten nicht die gleichen was
gesendet wurde, ist der RS-485 Bus in einem Konikt.
JUMPERSETTING & CONNECTORS:
DB 9M:
Pin Signal Pin Signal Pin Signal
1 CDC 4 DTR 7 RTS
2 RXD 5 GROUND 8 CTS
3 TXD 6 DSR 9 RI
Serial 9 Pin male connector:
USB A-Connector:
USB 2.0 A-male connector:
Pin Signal Pin Signal
1 VCC 4 GND
2 DATA-
3 DATA+
Attention!
Never plug in with
force or in wrong
direction.
RS-422 Cable Wiring:
DB 9 Male (EX-1303)
1 TXD-
2 TXD+
3 RXD+
4 RXD-
5 GND
RS-422 Peripheraldevice
1 TXD-
2 TXD+
3 RXD+
4 RXD-
5 GND
RS-485 Cable Wiring:
DB 9 Male (EX-1303)
1 DATA-
2 DATA+
3 NC
4 NC
5 GND
RS-485 Peripheraldevice
1 TXD-
2 TXD+
3 NC
4 NC
5 GND
HARDWAREINSTALLATION :
Because the designs of computers are different, only general installation instructions are
given. Please refer your computer’s reference manual whenever in doubt.
1. Connect the end from the USB cable ( A-Plug ) to the USB A-connector at your PC.
Tuotetiedot
| Merkki: | EXSYS |
| Kategoria: | Kaapelit tietokoneille ja oheislaitteille |
| Malli: | EX-1303 |
Tarvitsetko apua?
Jos tarvitset apua merkille EXSYS EX-1303 esitä kysymys alla ja muut käyttäjät vastaavat sinulle
Kaapelit tietokoneille ja oheislaitteille EXSYS Käyttöohjeet

15 Lokakuuta 2024
Kaapelit tietokoneille ja oheislaitteille Käyttöohjeet
Viimeisimmät Kaapelit tietokoneille ja oheislaitteille Käyttöohjeet
9 Huhtikuuta 2025
5 Huhtikuuta 2025
5 Huhtikuuta 2025
3 Huhtikuuta 2025
2 Huhtikuuta 2025
2 Huhtikuuta 2025
2 Huhtikuuta 2025
2 Huhtikuuta 2025
2 Huhtikuuta 2025
2 Huhtikuuta 2025