DCS BND-CNR Käyttöohje
Lue alta 📖 käyttöohje suomeksi merkille DCS BND-CNR (2 sivua) kategoriassa Grilli. Tämä opas oli hyödyllinen 57 henkilölle ja sai 4.4 tähden keskimäärin 8 käyttäjältä
Sivu 1/2
BNDCNR BEND CORNER BRACKET
INSTALLATION INSTRUCTIONS
Before you begin, read these instructions completely and carefully.
Getting Started
Remove packaging ■
CONTENTS
Eye Goggles
Screwdriver - Phillips #2
7/16” Socket and Ratchet Driver
7/16” Box or Open End Wrench
DescriptionQty
Bracket Top1
Bracket Leg2
Machine Screw #10-24 x 3/4” Phillips4
Hex Nut 1/4-204
Washer 5/16 ID x 3/4 OD4
Hex Bolt 1/4-20 x 3/4”4
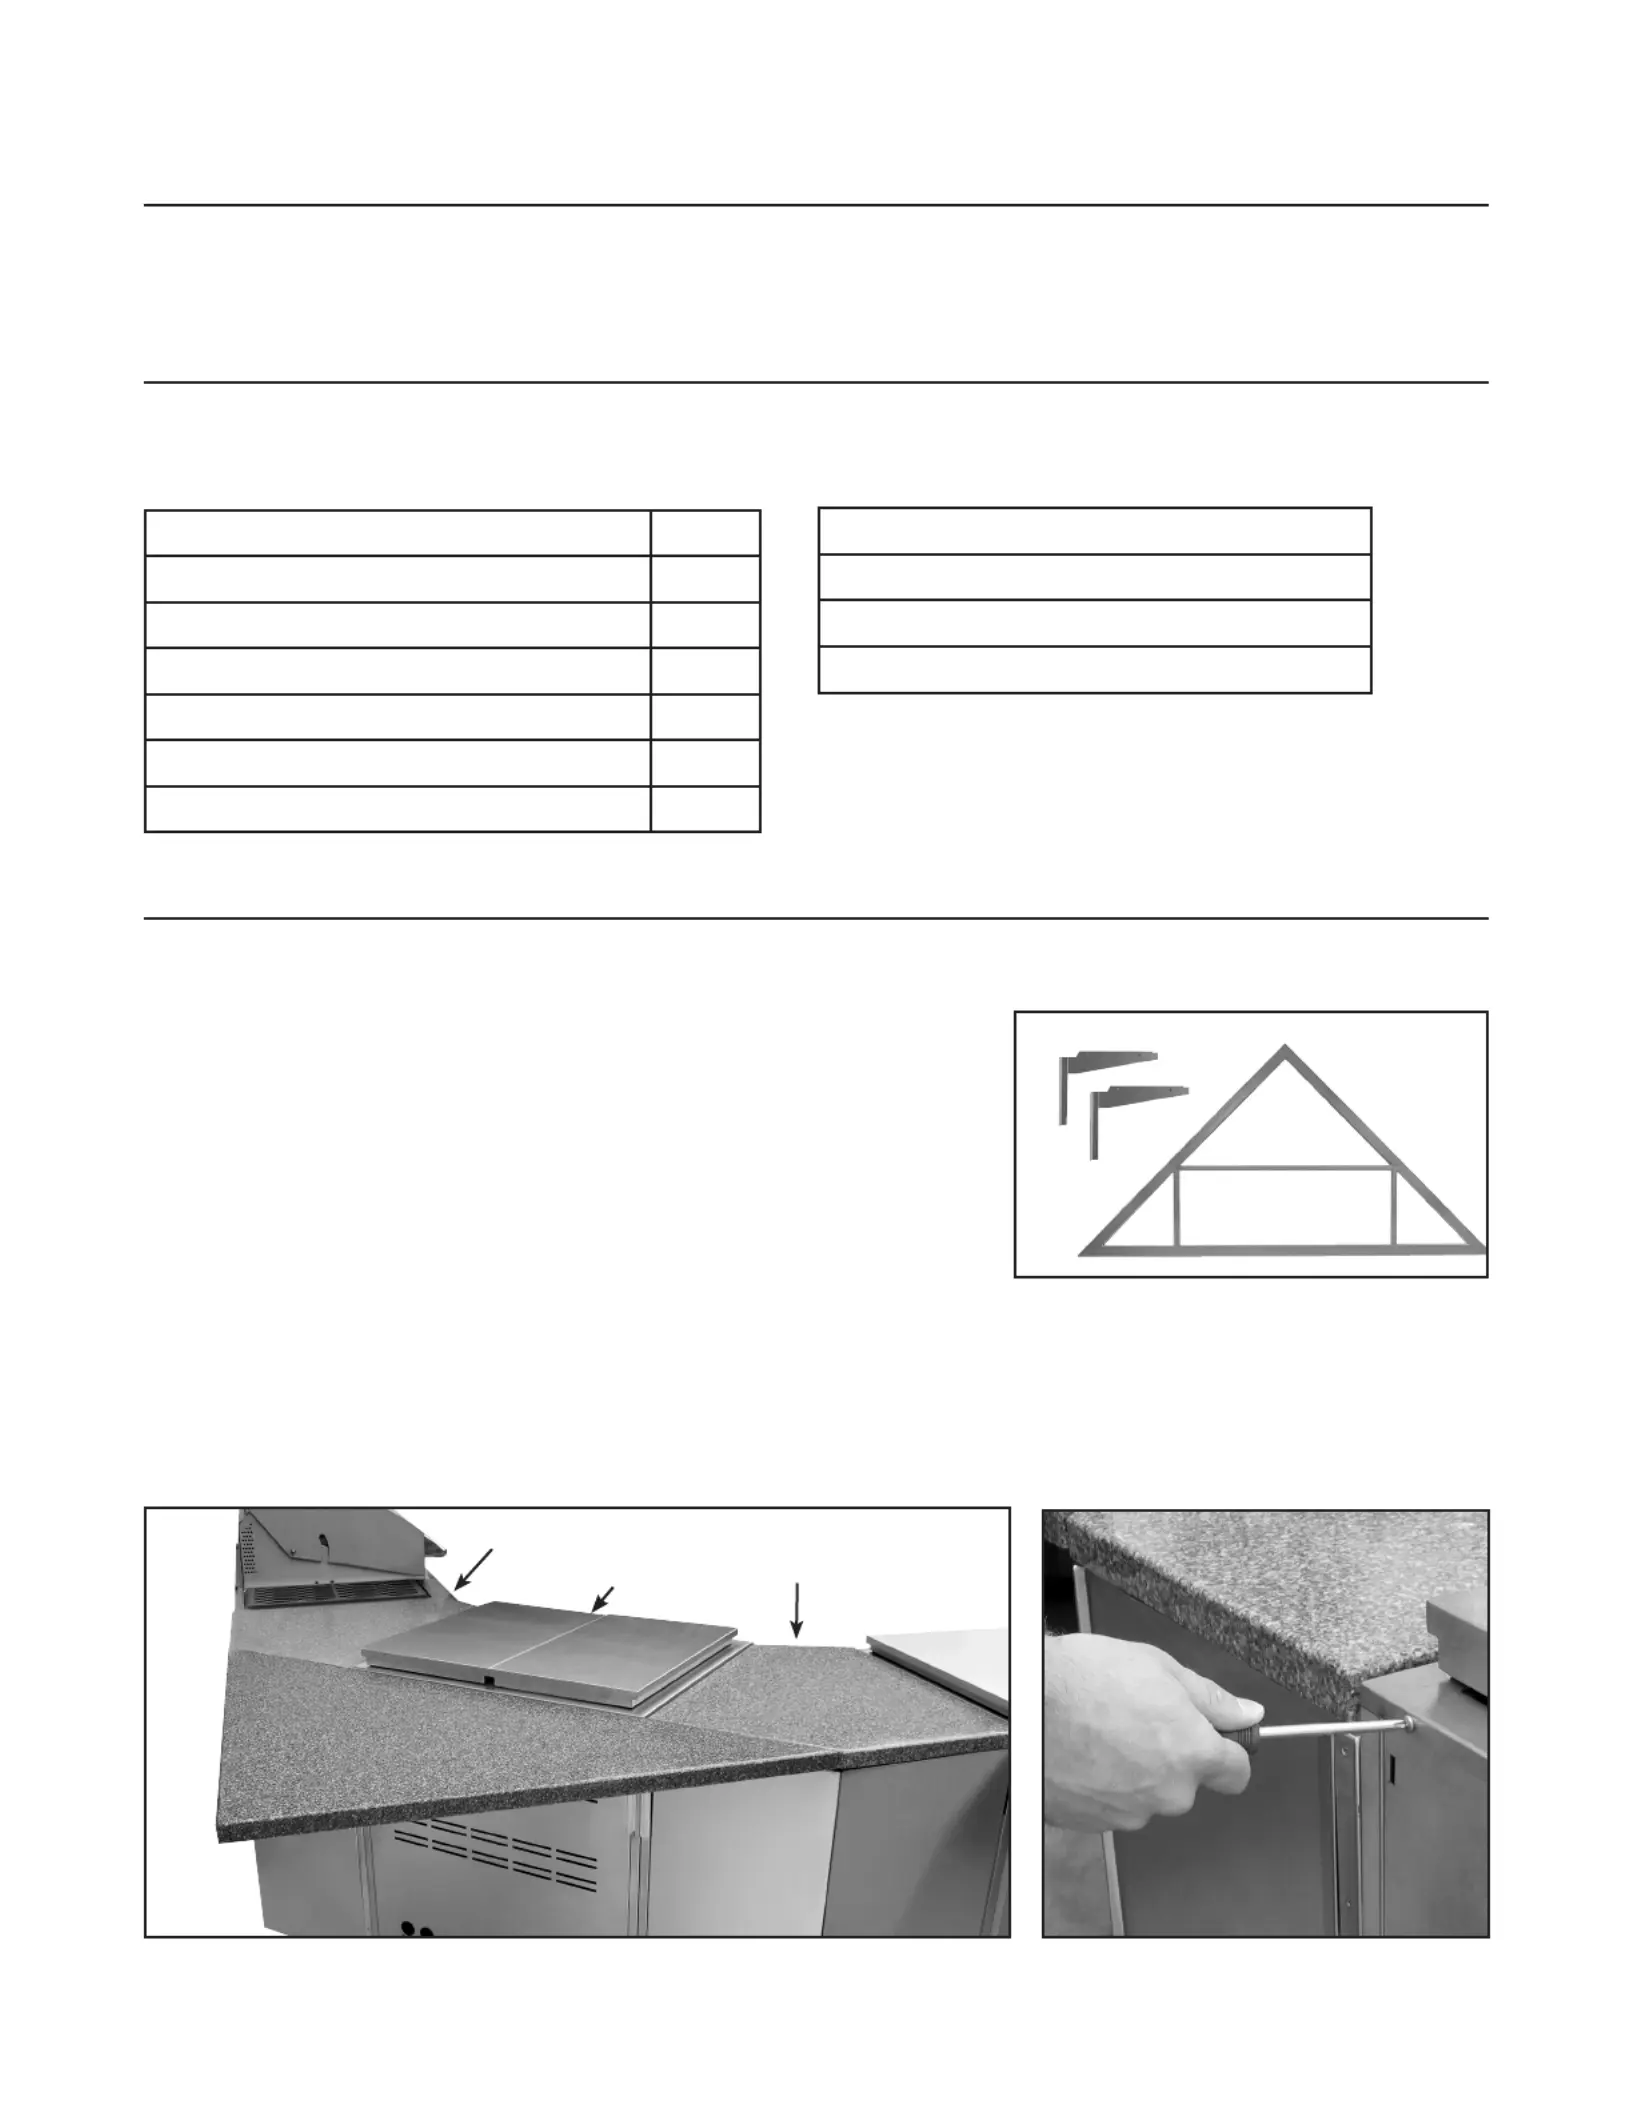
BND-CNR :
The BND-CNR is composed of three main pieces (one large 1.
brackettop and two bracket legs) that are held together using
four bolts and nuts. The bracket is mounted to the bend units
with four screws (Fig. 01).
Mounting of the BND-CNR bracket requires two CAD-BND 2.
bend units mounted with a CAD-30 cart between them and
any size CAD cart or refrigeration unit with wrapper on the
outer sides. When assembled, this conguration will provide
a solid base to which the BND-CNR bracket can be safely
mounted. The assembly should look similar to the image
below (Fig. 02).
Note: Before beginning installation, remove screws holding the rear of the center outdoor appli-
ance and cart to prevent damage (Fig. 03). Ensure the grill head is secured to the front of the
cart behind the drip pan.
Fig. 02
TOOLS NEEDED
Installation Instructions
Fig. 01
Fig. 03
Over. . .
CAD-BNDCAD30 with
outdoor
appliance
CAD-BND
Tuotetiedot
| Merkki: | DCS |
| Kategoria: | Grilli |
| Malli: | BND-CNR |
Tarvitsetko apua?
Jos tarvitset apua merkille DCS BND-CNR esitä kysymys alla ja muut käyttäjät vastaavat sinulle
Grilli DCS Käyttöohjeet

29 Maaliskuuta 2025
21 Helmikuuta 2025
21 Helmikuuta 2025
16 Lokakuuta 2024
Grilli Käyttöohjeet
Viimeisimmät Grilli Käyttöohjeet
9 Huhtikuuta 2025
9 Huhtikuuta 2025
5 Huhtikuuta 2025
1 Huhtikuuta 2025
1 Huhtikuuta 2025
1 Huhtikuuta 2025
27 Maaliskuuta 2025
12 Maaliskuuta 2025
1 Maaliskuuta 2025
28 Helmikuuta 2025