CRUX RVCHN-76C Käyttöohje
CRUX Ei luokiteltu RVCHN-76C
Lue alta 📖 käyttöohje suomeksi merkille CRUX RVCHN-76C (2 sivua) kategoriassa Ei luokiteltu. Tämä opas oli hyödyllinen 53 henkilölle ja sai 4.6 tähden keskimäärin 2 käyttäjältä
Sivu 1/2
RVCHN-76C
Rear View Integration with Lip Mount Camera for
Select Honda Civic Vehicles without Navigation 2012-2013
R
INTERFACING SOLUTIONS
Sightline
Multi View Integration
Crux Interfacing Solutions • Chatsworth, CA 91311
phone: (818) 609-9299 • fax: (818) 996-8188 • www.cruxinterfacing.com
rev.102120
1 of 2
- Automacally switches to rear-view when vehicle is in reverse gear.
- Aermarket lip mount rear view camera included.
- Plug & Play Installaon.
PRODUCT FEATURES:
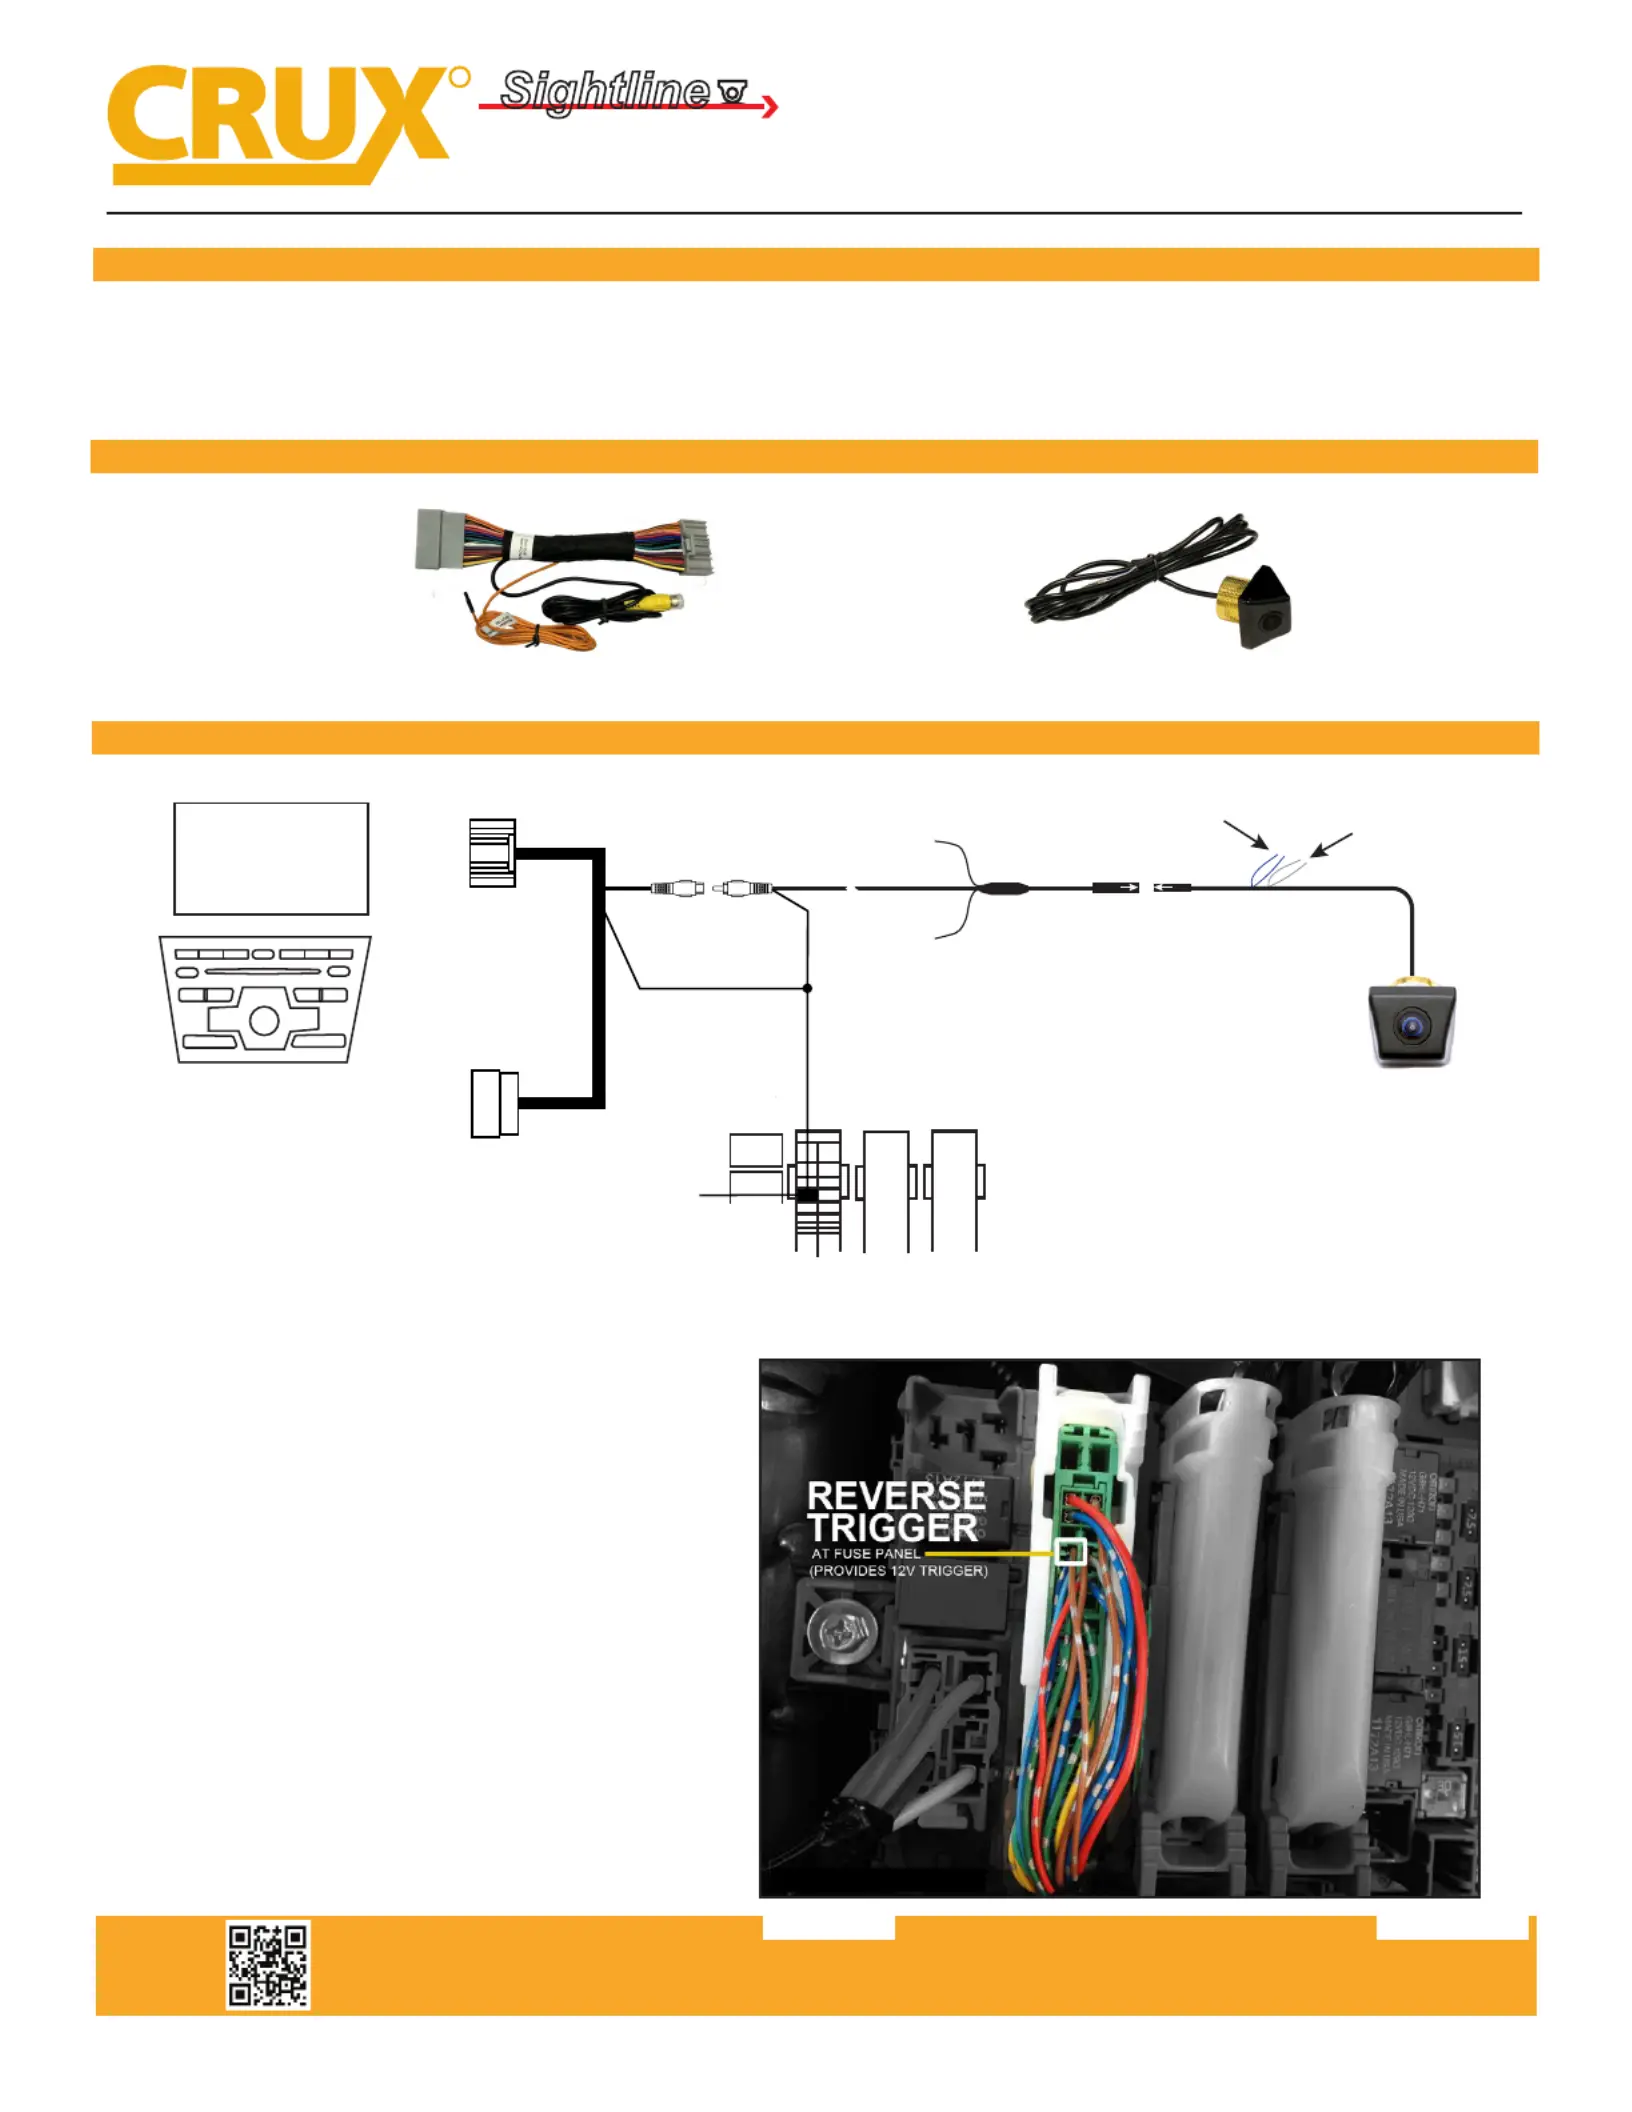
INSTALLATION DIAGRAM:
Video
Connection
WHITE**
Parking Line
Cut = OFF / Connect = ON
BLUE
(not used
keep connected)
**NOTE: Changes to the parking line option
will take eect after a power cycle.
Camera Power
Regulator
*Camera Ground
(to chassis)
Red wire
Not Used (Insulate)
Make sure the arrows
line up and push in
the connectors well.
Factory
Screen
Radio
To factory
screen
To factory
harness
Green Connector at fuse Panel
(Driver’s left kick panel)
Pin 4
Brown/Silver dots wire
(Reverse Camera Trigger)
Orange Wire
(reverse trigger)
Use a length of 18 gauge wire (not included)
and tap the RED camera power wire from the
Yellow RCA and ORANGE reverse trigger wire to
pin# 4 (BROWN/SILVER dots) wire on the Green
connector in the fuse panel. This is the factory
reverse trigger wire.
PARTS INCLUDED:
RVCHN-76C HarnessCUL-03 Lip Mount Camera
Tuotetiedot
| Merkki: | CRUX |
| Kategoria: | Ei luokiteltu |
| Malli: | RVCHN-76C |
Tarvitsetko apua?
Jos tarvitset apua merkille CRUX RVCHN-76C esitä kysymys alla ja muut käyttäjät vastaavat sinulle
Ei luokiteltu CRUX Käyttöohjeet

10 Maaliskuuta 2025
10 Maaliskuuta 2025
10 Maaliskuuta 2025
10 Maaliskuuta 2025
10 Maaliskuuta 2025
10 Maaliskuuta 2025
10 Maaliskuuta 2025
10 Maaliskuuta 2025
10 Maaliskuuta 2025
10 Maaliskuuta 2025
Ei luokiteltu Käyttöohjeet
Viimeisimmät Ei luokiteltu Käyttöohjeet
9 Huhtikuuta 2025
9 Huhtikuuta 2025
9 Huhtikuuta 2025
9 Huhtikuuta 2025
9 Huhtikuuta 2025
9 Huhtikuuta 2025
9 Huhtikuuta 2025
9 Huhtikuuta 2025
9 Huhtikuuta 2025
9 Huhtikuuta 2025