CRUX RVCCH-75D Käyttöohje
CRUX Ei luokiteltu RVCCH-75D
Lue alta 📖 käyttöohje suomeksi merkille CRUX RVCCH-75D (28 sivua) kategoriassa Ei luokiteltu. Tämä opas oli hyödyllinen 45 henkilölle ja sai 4.0 tähden keskimäärin 5 käyttäjältä
Sivu 1/28
Crux Interfacing Solutions • Chatsworth, CA 91311
phone: (818) 609-9299 • fax: (818) 996-8188 • www.cruxinterfacing.com
RVCCH-75D
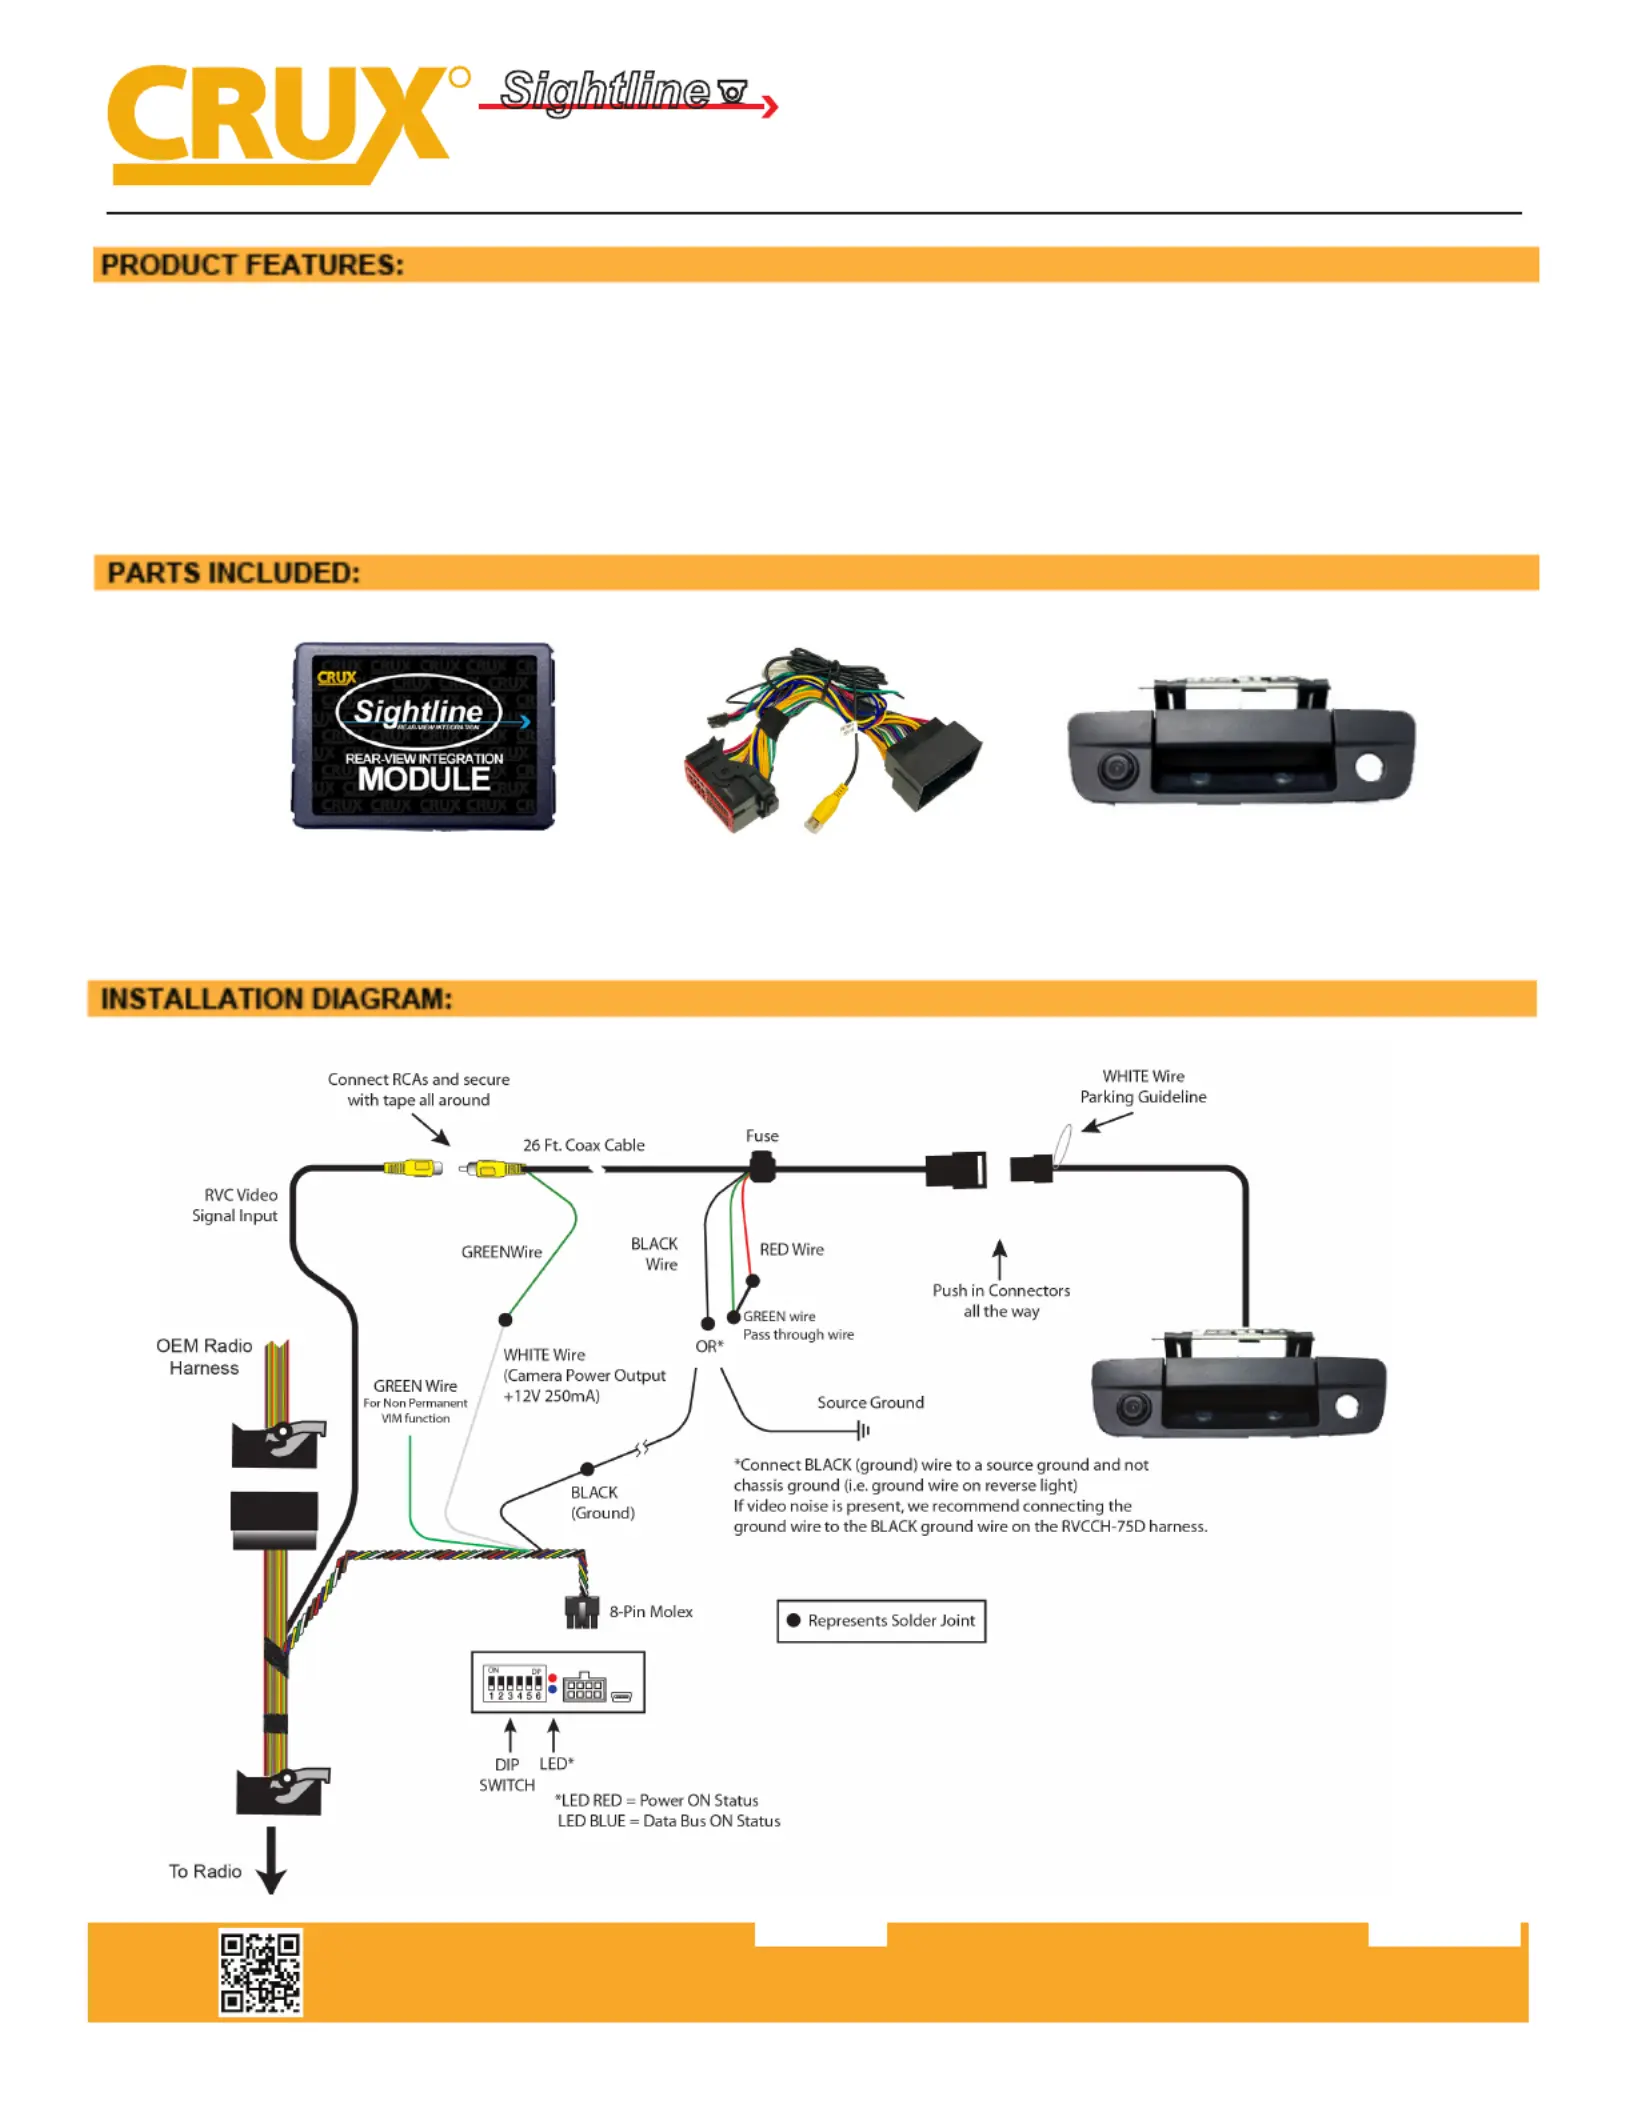
Rear View Integration Interface with VIM
for DODGE RAM Trucks
R
INTERFACING SOLUTIONS
Sightline
Multi View Integration
rev.09222021
1 of 3
• Acvates Uconnect Touchscreen Radio for enabling Video features
• Aermarket Rear-view Camera included
• Automacally switches to Rear-view when car is in Reverse mode
• Forced reverse camera view feature
• VIM funcon
• Plug & Play Installaon
RVCCH-75D ModuleRVCCH-75D HarnessCDR-02 Camera
Tuotetiedot
| Merkki: | CRUX |
| Kategoria: | Ei luokiteltu |
| Malli: | RVCCH-75D |
Tarvitsetko apua?
Jos tarvitset apua merkille CRUX RVCCH-75D esitä kysymys alla ja muut käyttäjät vastaavat sinulle
Ei luokiteltu CRUX Käyttöohjeet

10 Maaliskuuta 2025
10 Maaliskuuta 2025
10 Maaliskuuta 2025
10 Maaliskuuta 2025
10 Maaliskuuta 2025
10 Maaliskuuta 2025
10 Maaliskuuta 2025
10 Maaliskuuta 2025
10 Maaliskuuta 2025
10 Maaliskuuta 2025
Ei luokiteltu Käyttöohjeet
Viimeisimmät Ei luokiteltu Käyttöohjeet
9 Huhtikuuta 2025
9 Huhtikuuta 2025
9 Huhtikuuta 2025
9 Huhtikuuta 2025
9 Huhtikuuta 2025
9 Huhtikuuta 2025
9 Huhtikuuta 2025
9 Huhtikuuta 2025
9 Huhtikuuta 2025
9 Huhtikuuta 2025