Coleman Vela Käyttöohje
Lue alta 📖 käyttöohje suomeksi merkille Coleman Vela (2 sivua) kategoriassa Teltta. Tämä opas oli hyödyllinen 46 henkilölle ja sai 4.8 tähden keskimäärin 4 käyttäjältä
Sivu 1/2
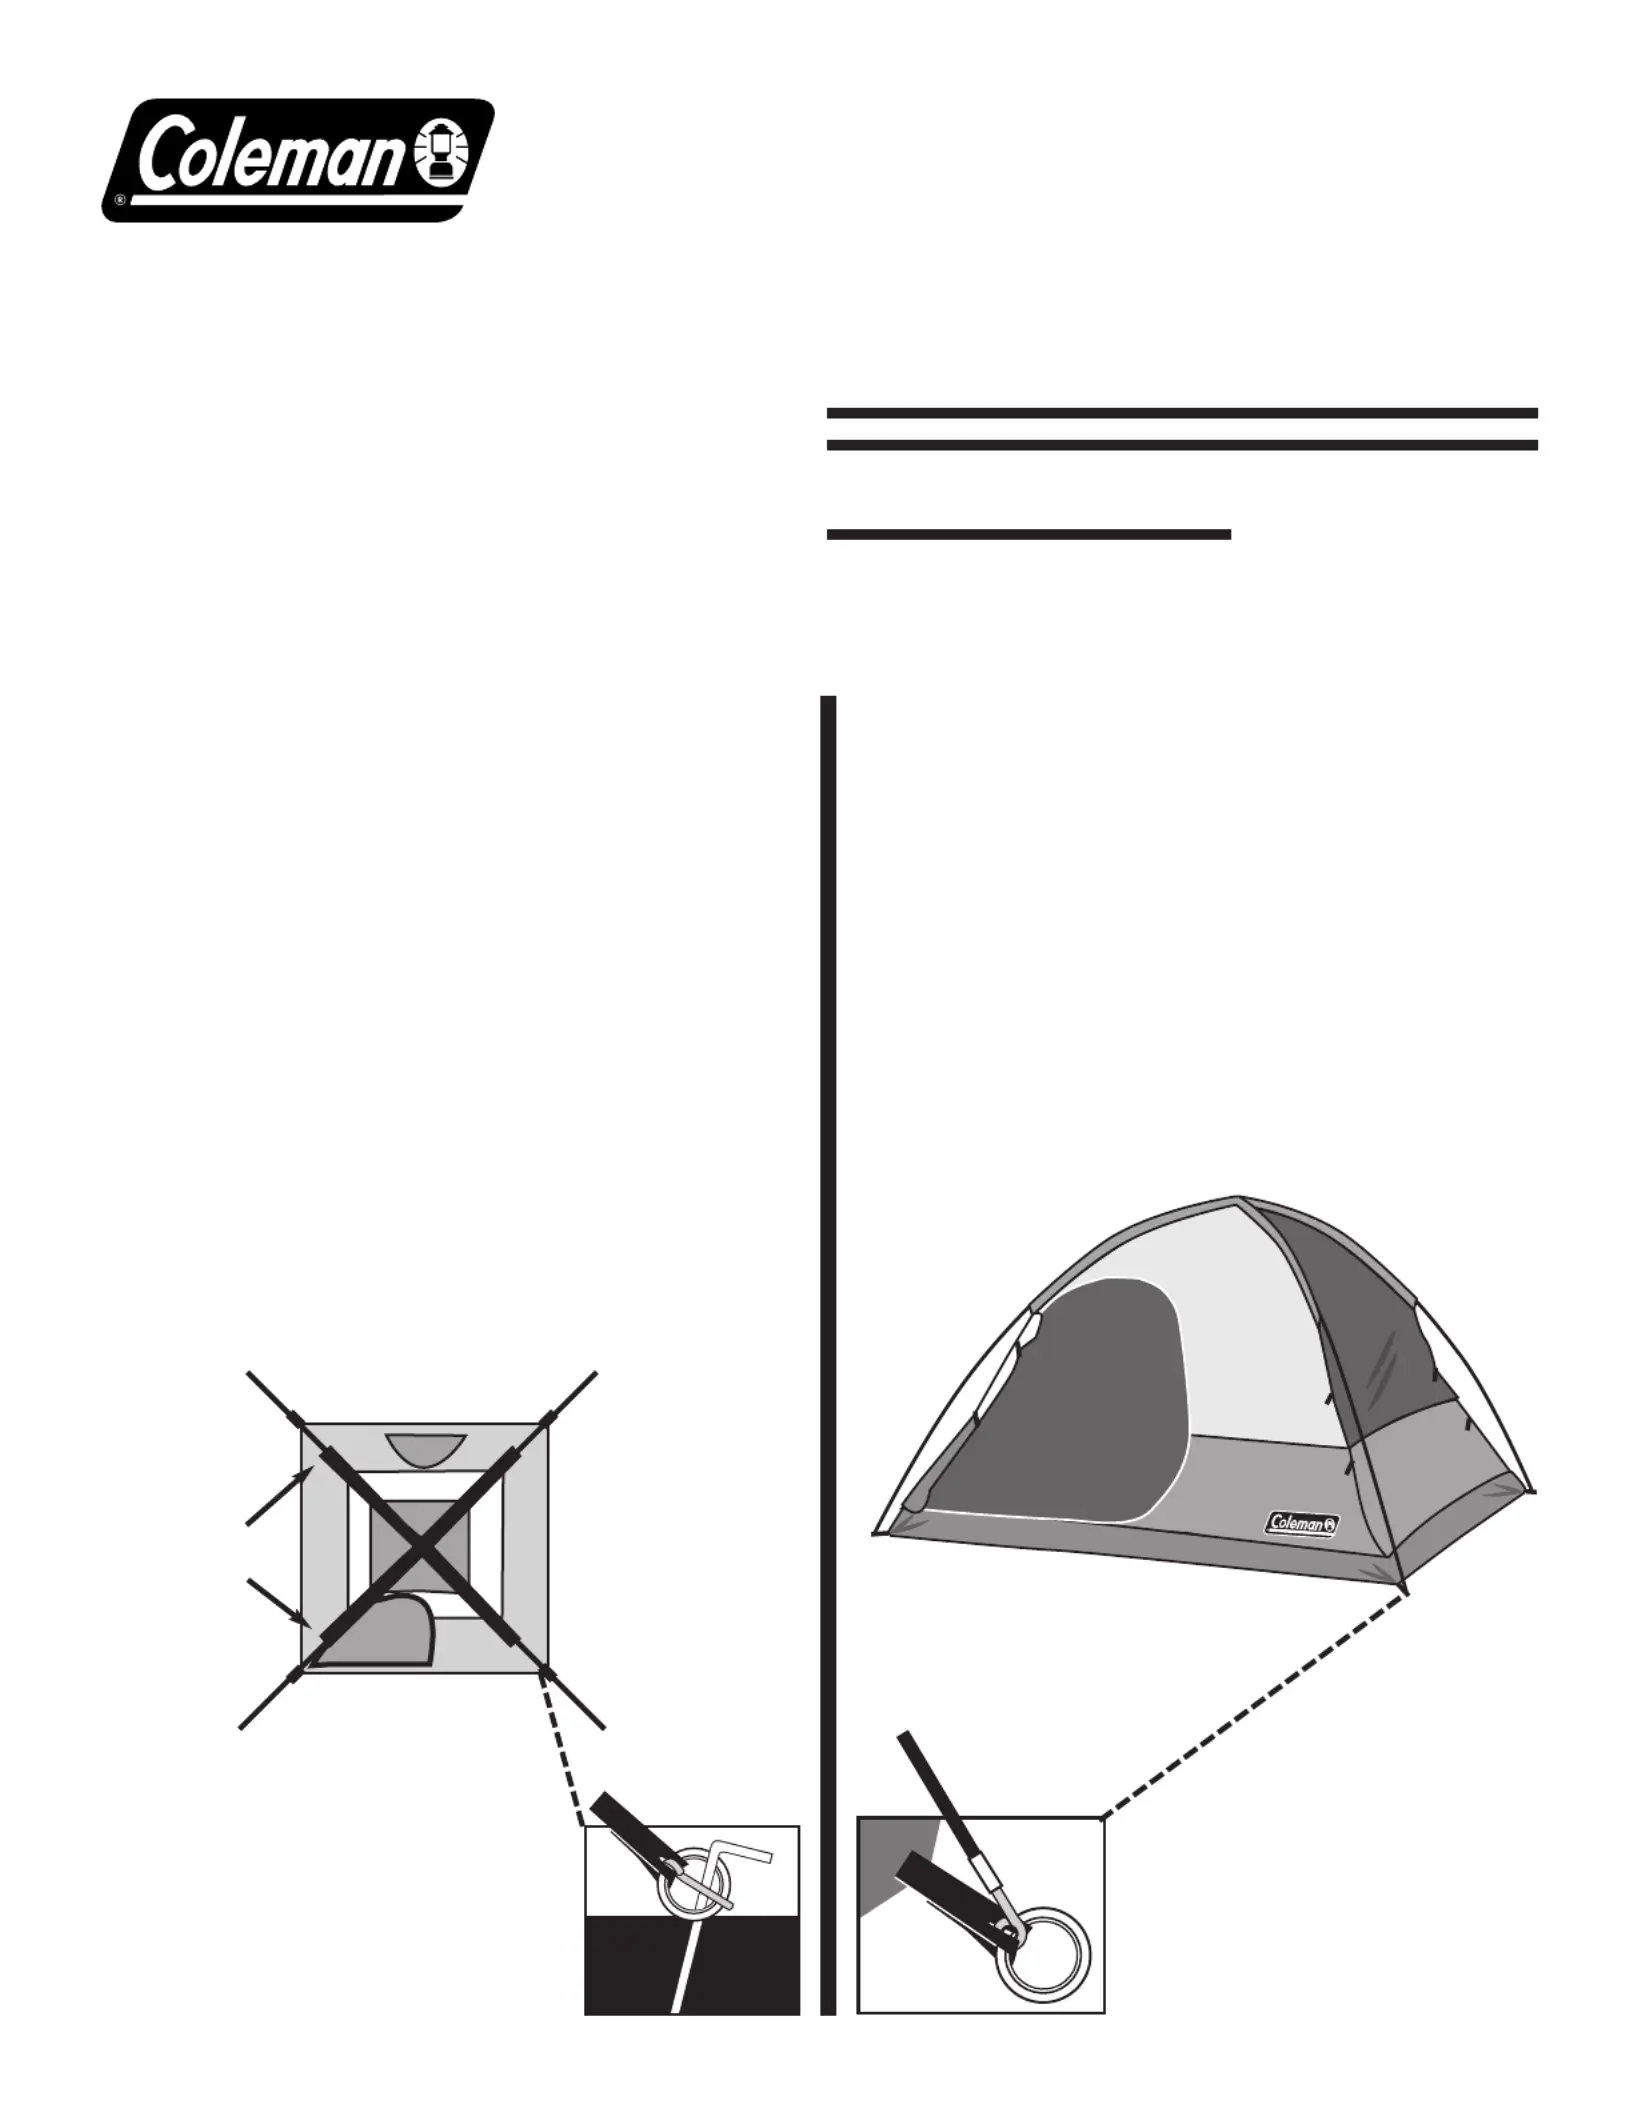
Connect Frame to Tent
– Insert one end of main tent pole
onto pin of pin & ring system at tent
corner. (illus. 3)
– Go to opposite end of pole and
gradually apply pressure to the pole
forming an arch until you are able to
insert the pin into the pole.
– Repeat for second pole. (illus. 4)
1
Layout & Positioning
of Tent, Pole Assembly
– Layout and position tent with door
facing desired direction. (illus. 1)
– Unzip door.
– Stake down tent using the rings of the
pin & ring system at the corners of the
tent. Keep the floor taut. (illus. 2)
– Assemble frame poles by
interlocking shock-corded poles.
This will make two long poles.
– Insert the poles diagonally into pole
sleeves.The center of the poles should
cross forming an “X” in the middle of
tent. (illus. 1)
2
Assembled
poles
inserted
through
pole
sleeves
illus. 1
illus. 4
Tent frame set-up
illus. 2
Tent stake through ring
illus. 3
Insert pole end onto
pin & ring
VELA
®
12’x11’
When You Are Ready To Set
Up Your Tent
– Select a level campsite clear of
rocks, branches and other hard
or sharp objects.
– Do not set up your tent under trees.
–For best results in windy conditions,
do not position the door of tent
into the wind.
(1) Rainfly
Pole
Rainfly Part No.
9161-1041
(2) Main Tent
Poles
POLE ASSEMBLYPARTS
Instructions apply to Part Number 9161-121
Part No. 9161-1021
Part No. 9161-1031
Tuotetiedot
| Merkki: | Coleman |
| Kategoria: | Teltta |
| Malli: | Vela |
Tarvitsetko apua?
Jos tarvitset apua merkille Coleman Vela esitä kysymys alla ja muut käyttäjät vastaavat sinulle
Teltta Coleman Käyttöohjeet

27 Joulukuuta 2024
27 Joulukuuta 2024
Teltta Käyttöohjeet
Viimeisimmät Teltta Käyttöohjeet
31 Maaliskuuta 2025
30 Maaliskuuta 2025
29 Maaliskuuta 2025
29 Maaliskuuta 2025
29 Maaliskuuta 2025
29 Maaliskuuta 2025
29 Maaliskuuta 2025
29 Maaliskuuta 2025
29 Maaliskuuta 2025
28 Maaliskuuta 2025