Cateye Rapid 3 Auto TL-AU630-R Käyttöohje
Lue alta 📖 käyttöohje suomeksi merkille Cateye Rapid 3 Auto TL-AU630-R (2 sivua) kategoriassa Helpotus. Tämä opas oli hyödyllinen 28 henkilölle ja sai 4.1 tähden keskimäärin 5 käyttäjältä
Sivu 1/2
+
-
TL-AU630-R
Manual
Before using the product, please
thoroughly read this manual and
keep it for future reference.
ENG
Design Pat. Pending
Copyright© 2015 CATEYE Co., Ltd.
TLAU63R-150302
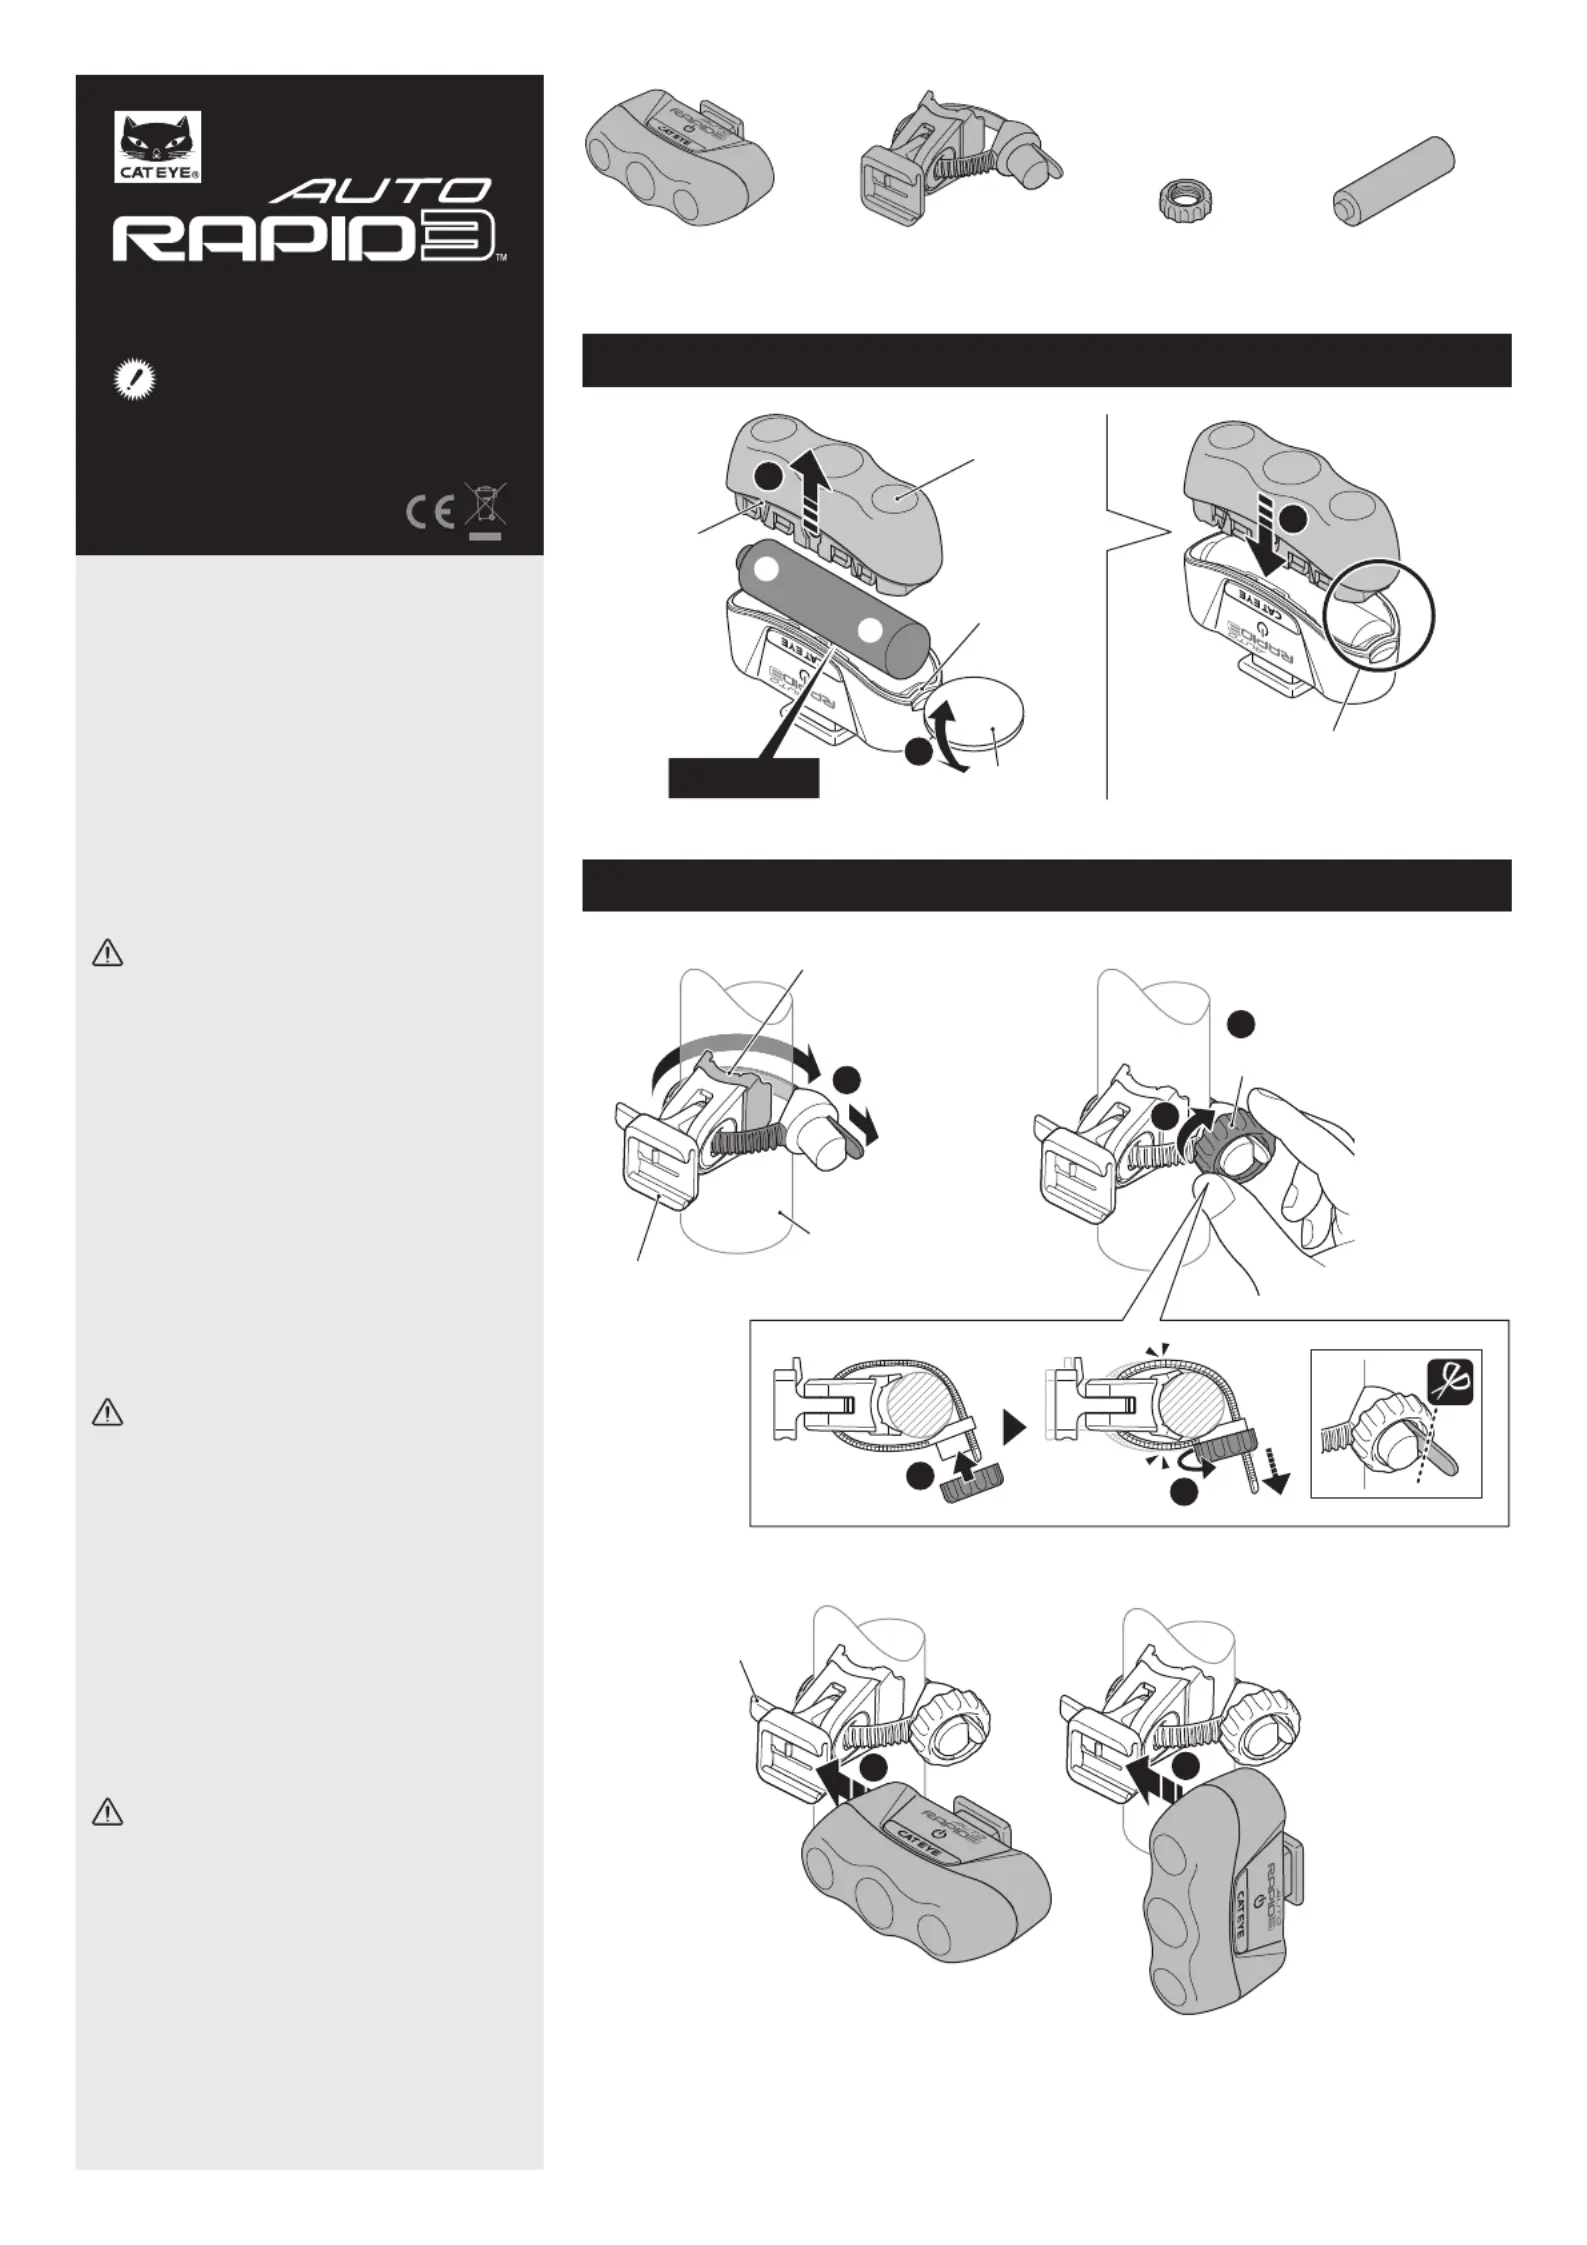
1
HOW TO INSTALL BATTERY
1
(SP-11)
x 1
Light unitFlexTight™ bracketDialAA dry-cell battery
HOW TO MOUNT
2
Rubber gasket
FlexTight™ bracket
1
1
ø
12 – 32 mm
Lever
4
4
or
Attach securely in the mounting position.
Lens
Rubber
gasket
Slot
Close the lens with the slot facing to
the body slot.
Coin
AA (LR6) x 1
Dial
2
2
3
3
2
3
AUTOMATIC LIGHTING TAIL-
LIGHT CHARACTERISTICS
• The light automatically turns on when
the sensor detects light or vibrations
during nighttime riding.
• The light also remains on for approxi-
mately 50 seconds after the bicycle
comes to a complete stop, which
provides safety when waiting for a
traffic signal to change and in similar
situations.
PRECAUTIONS ON USE
• Check periodically to ensure that the
light unit is attached securely.
• Stop your bicycle to operate the switch.
• Keep the light away from children.
• This unit is not totally waterproof.
Please wipe and dry it completely after
using in rain. Otherwise, it may cause
failure.
• If the light unit or parts become dirty
with mud, etc., clean with a soft cloth
which is moistened with mild soap.
Never apply paint thinner, benzine or
alcohol; damage will result.
PRECAUTIONS WHEN REPLAC-
ING THE BATTERY
• Do not press the switch when removing
or installing the lens or batteries.
• Be sure to install batteries in the correct
direction.
• Install the rubber gasket correctly to
maintain waterproof features.
• Remove and store batteries when you
will not use the light for a long period of
time. Otherwise, batteries may leak
liquid, which may result in failure.
INSTALLATION PRECAUTIONS
• Be sure to tighten the dial by hand.
When you tighten it too hard with a tool,
the screw thread may be stripped.
• Check the bracket frequently to be sure
it is properly tightened at all times.
• Round off the cut edge of the bracket
strap to prevent injury.
Tuotetiedot
| Merkki: | Cateye |
| Kategoria: | Helpotus |
| Malli: | Rapid 3 Auto TL-AU630-R |
Tarvitsetko apua?
Jos tarvitset apua merkille Cateye Rapid 3 Auto TL-AU630-R esitä kysymys alla ja muut käyttäjät vastaavat sinulle
Helpotus Cateye Käyttöohjeet

30 Joulukuuta 2025
30 Joulukuuta 2025
30 Joulukuuta 2025
30 Joulukuuta 2025
30 Joulukuuta 2025
17 Joulukuuta 2024
17 Joulukuuta 2024
17 Joulukuuta 2024
17 Joulukuuta 2024
17 Joulukuuta 2024
Helpotus Käyttöohjeet
Viimeisimmät Helpotus Käyttöohjeet
9 Huhtikuuta 2025
8 Huhtikuuta 2025
8 Huhtikuuta 2025
8 Huhtikuuta 2025
8 Huhtikuuta 2025
7 Huhtikuuta 2025
5 Huhtikuuta 2025
5 Huhtikuuta 2025
5 Huhtikuuta 2025
5 Huhtikuuta 2025