Calorex DH 15 Käyttöohje
Calorex Ilmankuivain DH 15
Lue alta 📖 käyttöohje suomeksi merkille Calorex DH 15 (2 sivua) kategoriassa Ilmankuivain. Tämä opas oli hyödyllinen 64 henkilölle ja sai 4.7 tähden keskimäärin 8 käyttäjältä
Sivu 1/2
SD462450 ISSUE 5
Installation instructions
MODELS DH 15AX - DH TTW 15AX
Heal & safety warnings
INSTALLATION - MODEL DH 15AX - DH TTW 15AX
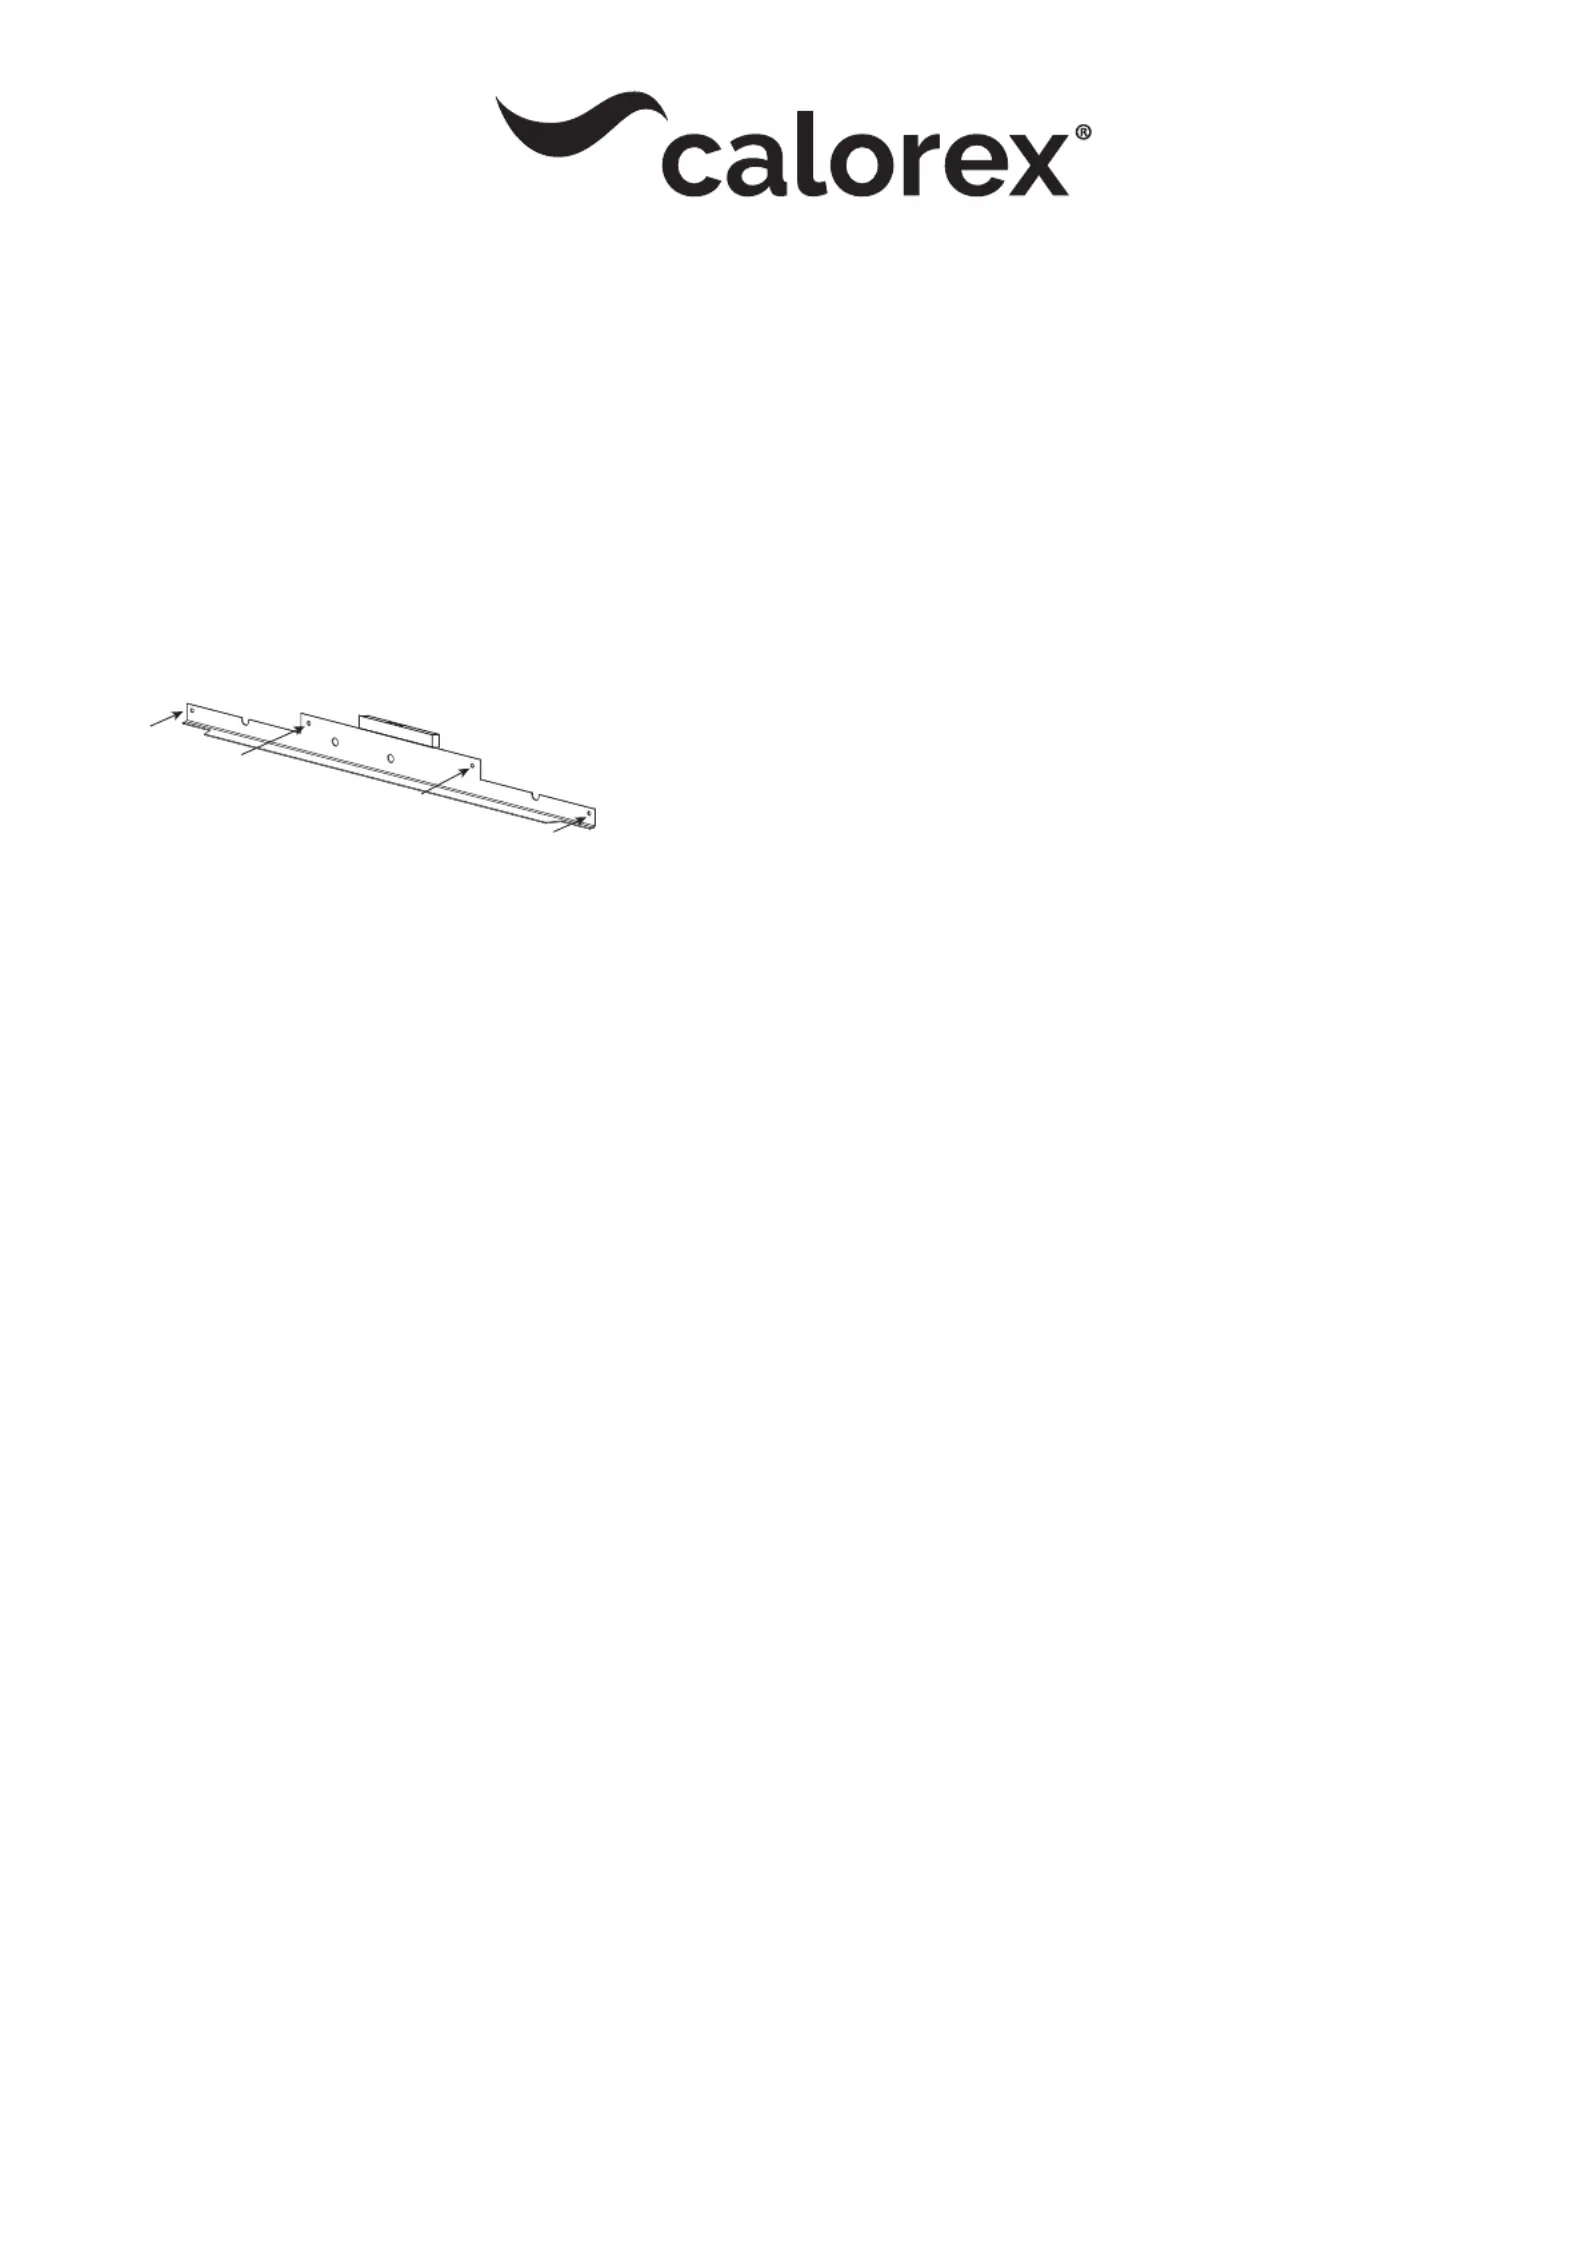
1. Remove machine from packaging and locate fixing bracket.
2. Locate bracket on wall in required position. Drill hole Ø6.0mm (no.10)
by 60mm deep as shown at ‘A’. Insert wall plug and screw bracket in
place.
3. Set bracket level wi spirit level as shown, drill rough and fix it at ‘B’
wi wall plug and screw.
4. Ensure bracket still level, tighten screws ‘A’ and ‘B’, finally drill andfix
as above at position(s) ‘C’ & ‘D’.
5. Check all screws are tight.
6. Remove machine cover, retaining all fixings.
7. Li dehumidifier on to wall bracket and mark fixing holes.
8. Drill holes and fit wall plugs as stage 2.
9. Fit dehumidifier to wall.
10. The electrical supply to e unit must be sized according to e data
on e serial number label paying special attention to I.E.E. regulations
latest edition regarding e special conditions governing electrical
supply to machines in potentially damp areas.
11. The electrical supply should be connected to e terminal block
mounted on e bracket supporting e compressor. Brown/red to
‘live’, blue/black to neutral and ear to e stud provided.
12. Whilst not mandatory, e Danerm Group recommend at an
R.C.C.B. is always fitted or at e supply is to local electricity auority
recommendations, and at all ducting is bonded in accordance wi
ese regulations.
13. The supply to e machine should incorporate fuses or motor
rated circuit breakers (Type C) to specified rating, H.R.C. fuses are
recommended. An isolator must be fitted wiin clear view and not
more an 2 metres away. The isolator must have a minimum 3mm air
gap in e off position.
14. Locate pipe from drip tray and run it away to waste.
A short leng of 10mm pipe is provided which should be led into a
fixed waste pipe.
15. Set Humidistat to, “drier”, point on knob provided.
Please leave e instructions for e user.
A
C
B
D
As e Heat Pump contains electrical and rotational equipment, it is recommended at ONLY competent persons carry out any work on is type of
machine (see warranty).
ISOLATE ELECTRICALLY BEFORE ENTERING MACHINE OR REMOVING PANELS.
This appliance is not intended for use by persons (including children) wi reduced physical,sensory or mental capabilities, or lack of experience and
knowledge, unless ey have been given supervision or instruction concerning use of e appliance by a person responsible for eir safety. Children
should be supervised to ensure at ey do not play wi e appliance.
The Calorex TTW units are designed for installation in a heated room, adjacent to e pool room.
MACHINE OPERATION
MAINTENANCE
a. Ensure air inlet/outlets are kept clear and clean.
b. Wipe clean wi damp clo.
TTW MACHINES
Fit grilles, supplied wi e Heat Pump, in position required. Self-
adhesive base supplied wi e unit to be fitted to e grill frame
as shown in e diagram below. Filters to be fitted to grille. Isolate
machine electrically before entering machine or removing panels.
MACHINE NOT RUNNING AT ALL
CHECK THE FOLLOWING:
1. Is supply switched on.
2. Is supply fuse healy.
3. Check air inlet and outlet for obstructions.
4. If, aer carrying out e above and waiting 1 hour, e machine does
not start, phone for service.
MACHINE FAN ONLY RUNNING
5. Check air inlet and outlet for obstructions, if aer 30 mins e machine
has not restarted phone for service.
WATER LEAKING FROM BASE OF UNIT
6. Check connection from machine to drain for blockages and
clear accordingly. Check fall is adequate.
7. Check at machine is level bo vertically and horizontally.
The user check list should be carried out before initiating a service
call.
Do not attempt to interfere wi any internal control settings as ese
have been factory calibrated and sealed.
If in doubt or if advice is required, contact e Danerm group UK
Service Department. by calling (01621) 856611 (option 4) or
email service.department@danerm.com.
Tuotetiedot
| Merkki: | Calorex |
| Kategoria: | Ilmankuivain |
| Malli: | DH 15 |
Tarvitsetko apua?
Jos tarvitset apua merkille Calorex DH 15 esitä kysymys alla ja muut käyttäjät vastaavat sinulle
Ilmankuivain Calorex Käyttöohjeet

2 Tammikuuta 2025
2 Tammikuuta 2025
2 Tammikuuta 2025
2 Tammikuuta 2025
2 Tammikuuta 2025
2 Tammikuuta 2025
2 Tammikuuta 2025
Ilmankuivain Käyttöohjeet
Viimeisimmät Ilmankuivain Käyttöohjeet
4 Huhtikuuta 2025
3 Huhtikuuta 2025
27 Maaliskuuta 2025
26 Helmikuuta 2025
17 Helmikuuta 2025
17 Helmikuuta 2025
17 Helmikuuta 2025
17 Helmikuuta 2025
14 Helmikuuta 2025
13 Helmikuuta 2025