Blackburn EX-1 Disc Käyttöohje
Blackburn Ei luokiteltu EX-1 Disc
Lue alta 📖 käyttöohje suomeksi merkille Blackburn EX-1 Disc (2 sivua) kategoriassa Ei luokiteltu. Tämä opas oli hyödyllinen 35 henkilölle ja sai 4.0 tähden keskimäärin 7 käyttäjältä
Sivu 1/2
EX1 Disc™
Rack
Installation Instructions
Parts List:
6 – 10 mm Buttonhead Screws
2 – 25 mm Buttonhead Screws
8 – Nylock Nuts
2 – Extenders
2 – 1/2” Seat-Stay Clamps
2 – 9/16” Seat-Stay Clamps
1 – Reflector Bracket
1 – 3 mm Allen Wrench
Installation:
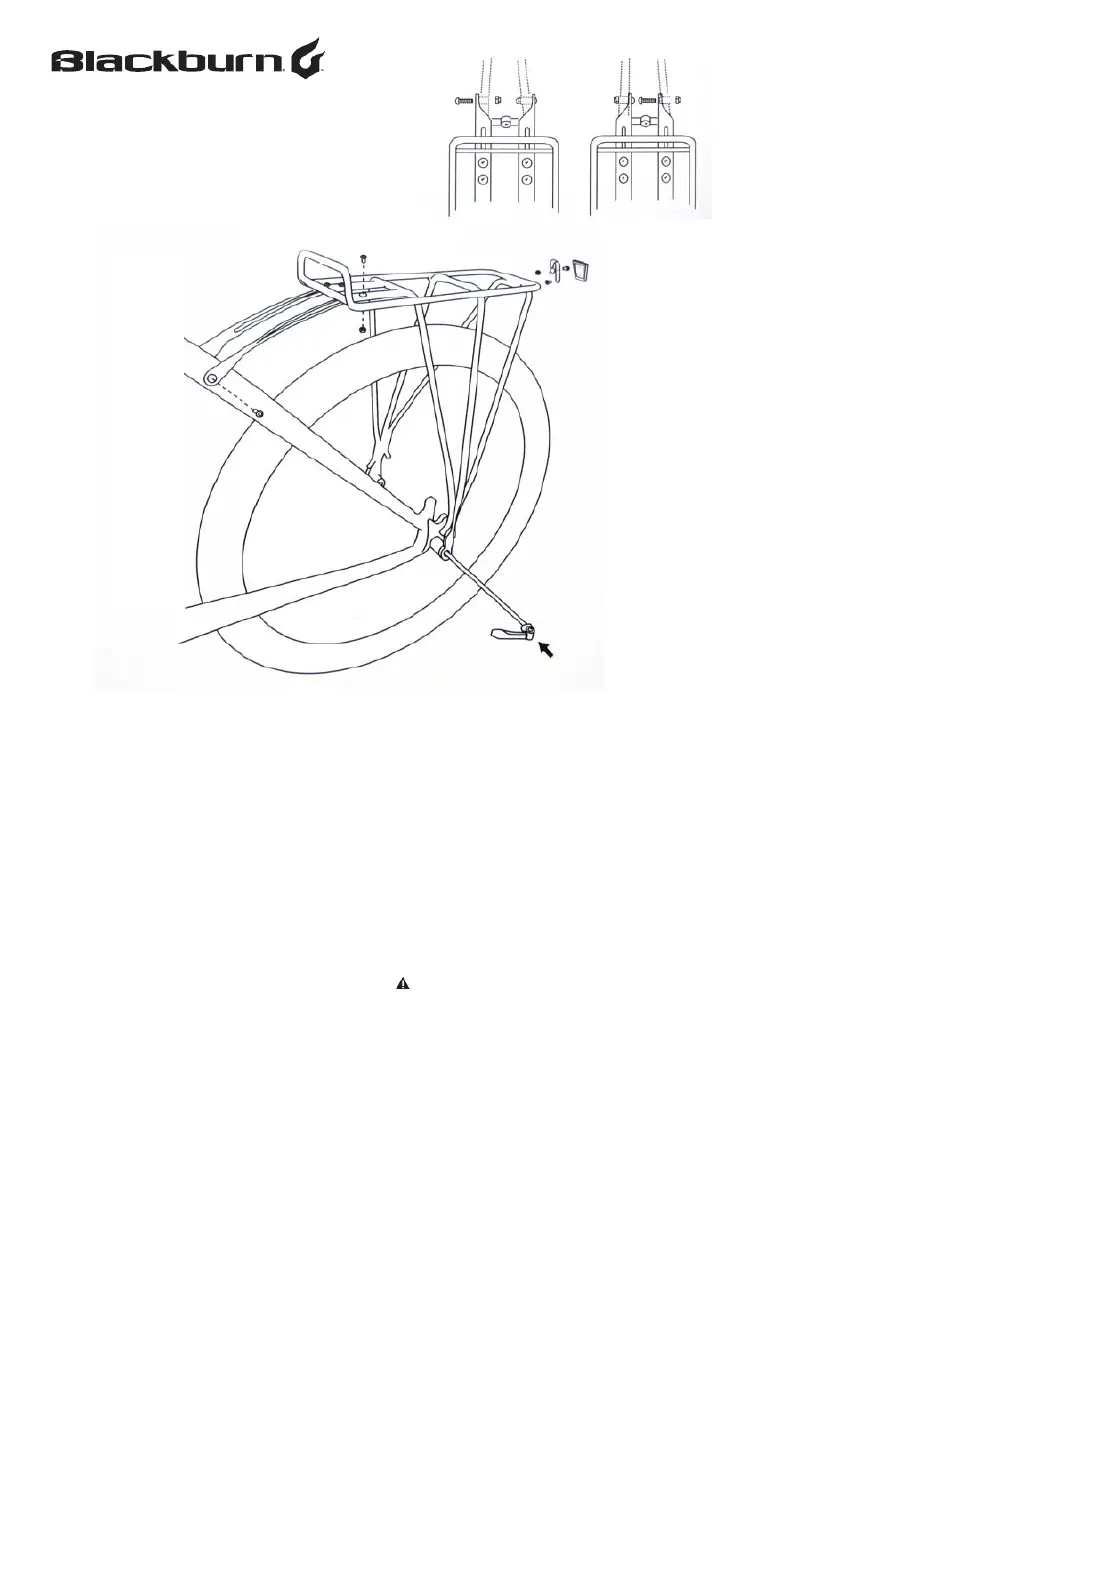
1. ATTACH EXTENDERS:
Attach extenders to
rack using four 10mm button head screws and
nylock nuts. Do not tighten. NOTE: Extenders
have an offset twist and can be installed in wide
or narrow position to match seat stay width.
2. STRUT ATTACHMENT:
Remove rear quick
release. Spread rack struts to fit on the
outside of the dropouts. Install extra long quick
release supplied with rack. Follow your
bicycle/wheel manufacturer recommendations
for removing and installing quick releases or
have a qualified bicycle shop replace it for you.
3. ATTACHING EXTENDERS:
Attach extenders
to the bike frame “Braze-on” mounts with
25mm buttonhead screws. Bend extenders (by
hand or with an adjustable wrench) to align with
braze-on mounts. NOTE: For bicycles without
seat stay “Braze-ons” use vinyl coated Seat-Stay
Clamps (2 sizes included). Attach with 10mm
screws and nylock nuts.
4. RACK ADJUSTMENT:
Adjust rack until rack
top is level with ground by sliding it on extenders
until level. Tighten all rack screws & nuts.
5. Install reflector bracket over rack and tighten
with reflector and reflector screw from your bicycle
.
Warning: Periodically check all nuts and bolts
for tightness.
Tuotetiedot
| Merkki: | Blackburn |
| Kategoria: | Ei luokiteltu |
| Malli: | EX-1 Disc |
Tarvitsetko apua?
Jos tarvitset apua merkille Blackburn EX-1 Disc esitä kysymys alla ja muut käyttäjät vastaavat sinulle
Ei luokiteltu Blackburn Käyttöohjeet

21 Joulukuuta 2024
18 Joulukuuta 2024
18 Joulukuuta 2024
18 Joulukuuta 2024
18 Joulukuuta 2024
18 Joulukuuta 2024
18 Joulukuuta 2024
17 Lokakuuta 2024
Ei luokiteltu Käyttöohjeet
Viimeisimmät Ei luokiteltu Käyttöohjeet
9 Huhtikuuta 2025
9 Huhtikuuta 2025
9 Huhtikuuta 2025
9 Huhtikuuta 2025
9 Huhtikuuta 2025
9 Huhtikuuta 2025
9 Huhtikuuta 2025
9 Huhtikuuta 2025
9 Huhtikuuta 2025
9 Huhtikuuta 2025