AXESS TYTO-02 Käyttöohje
AXESS
Ei luokiteltu
TYTO-02
Lue alta 📖 käyttöohje suomeksi merkille AXESS TYTO-02 (8 sivua) kategoriassa Ei luokiteltu. Tämä opas oli hyödyllinen 21 henkilölle ja sai 4.7 tähden keskimäärin 11 käyttäjältä
Sivu 1/8

TYTO-02
I N S TA L L AT I O N I N S T R U C T I O N S
AxxessInterfaces.com © COPYRIGHT 2019 METRA ELECTRONICS CORPORATION REV. 6/26/19 INSTTYTO-02
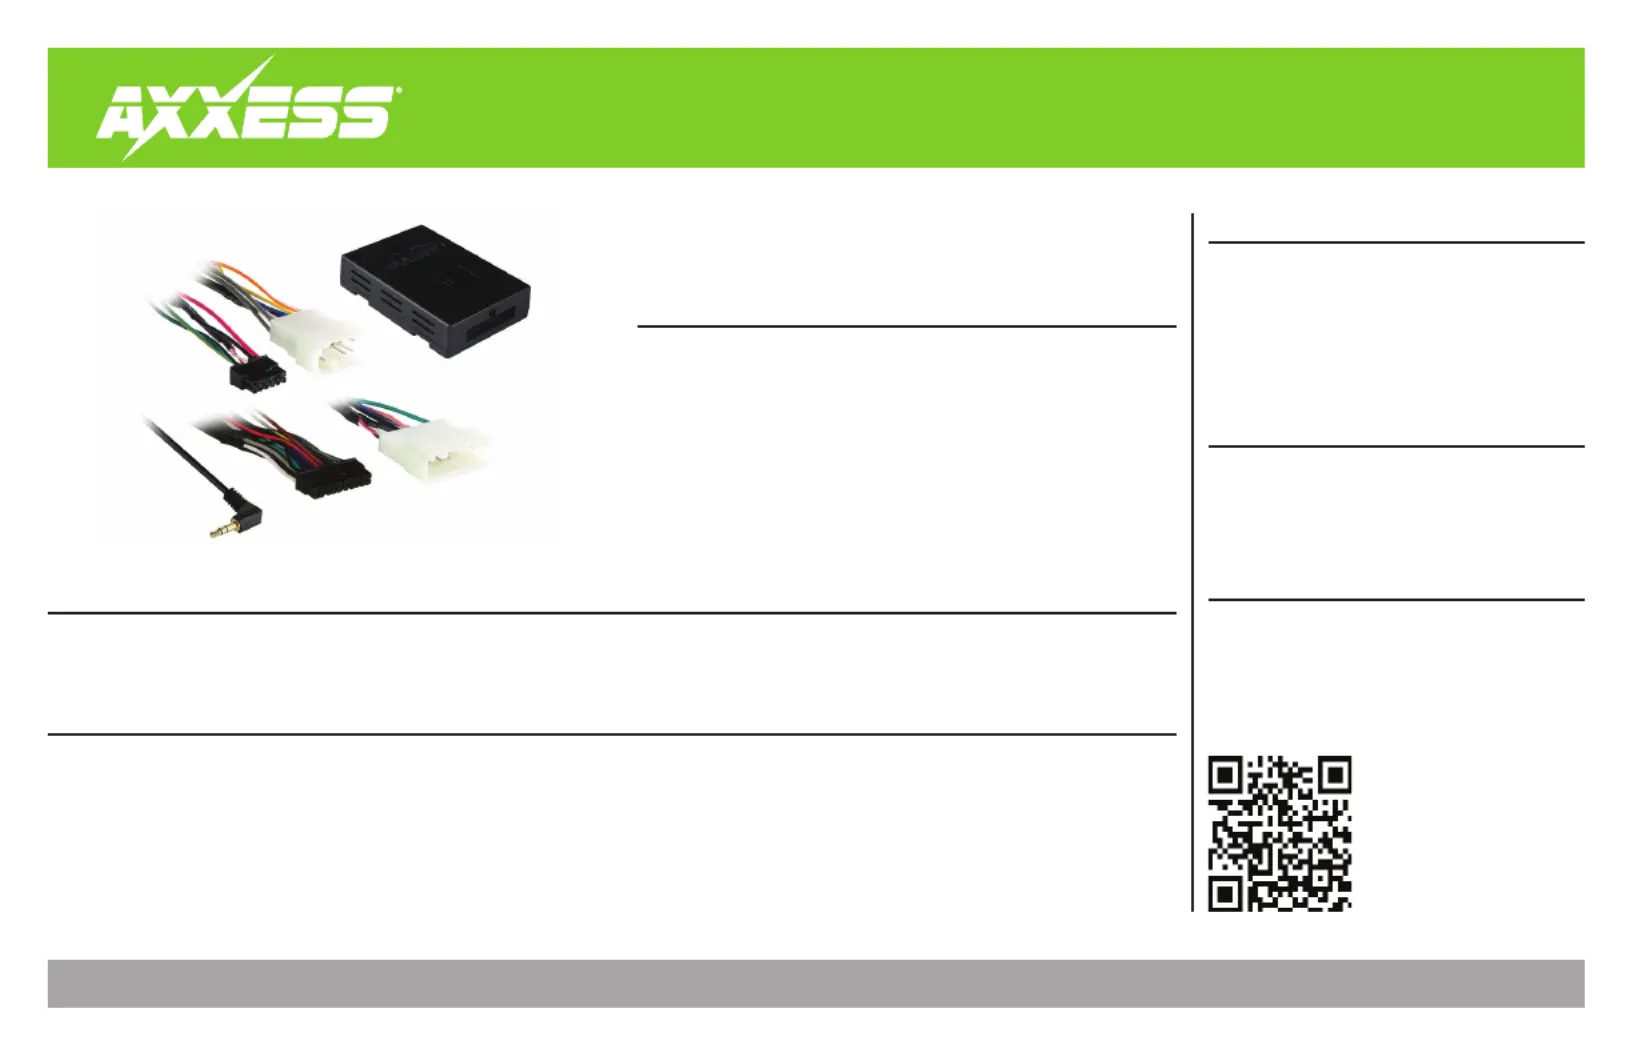
Product Info
INTERFACE FEATURES
INTERFACE COMPONENTS
OPTIONAL ACCESSORIES (sold separately)
TOOLS REQUIRED
• Cutting tool • Crimping tool • Tape • Connectors
(example: butt-connectors, bell caps, etc.)
TABLE OF CONTENTS
Connections ............................................................2
Installation .............................................................3
Programming .........................................................3
Toyota Amplifier Interface 2012-up
• Provides wires for multimedia radios (park brake, reverse)
•
Designed for amplified systems
• High level speaker input
• Retains balance and fade
• Prewired ASWC-1 harness (ASWC-1 sold separately)
• Pre-wired AX-CUSTOM-BT harness (AX-CUSTOM-BT sold separately)
• Micro-B USB updatable
• TYTO-02 interface • TYTO-02 harness
• 16-pin harness with stripped leads
Steering Wheel Control Interface: ASWC-1
Vehicle Customization Interface: AX-CUSTOM-BT
APPLICATIONS
Toyota
4Runner 2014-up
Avalon 2013-up
Camry (with NAV) 2012-2017
Highlander 2014-up
Prius 3rd gen. (with NAV) 2012-2015
Prius PHV (with NAV) 2012-2015
Prius V 2012-2017
Rav-4 2014.5-2018
Sequoia (with NAV) 2013
Sequoia 2014-up
Sienna 2015-2017
Tacoma 2014-2015
Tundra 2014-up
Venza (with HDD based NAV) 2013-2014
Venza 2015

2
CONNECTIONS
From the 16-pin harness with stripped leads to the aftermarket radio:
• Connect the wire to the amp turn on wire.Blue/White
• Connect the wire to the right front positive speaker output.Gray
• Connect the Gray/Black wire to the right front negative speaker output.
• Connect the wire to the left front positive speaker output.White
• Connect the wire to the left front negative speaker output.White/Black
• Connect the wire to the radio’s left rear positive speaker output.Green
• Connect the wire to the radio’s left rear negative speaker output.Green/Black
• Connect the wire to the radio’s right rear positive speaker output.Purple
• Connect the wire to the radio’s right rear negative speaker output.Purple/Black
• Tape off and disregard the following (6) wires, they will not be used in this application:
Brown Light Green Blue/Pink Green/Purple Orange/White, , , , , Red
From the TYTO-02 harness to the aftermarket radio:
• Connect the wire to the ground wire.Black
• Connect the Yellow wire to the battery wire.
• Connect the wire to the accessory wire.Red
• If the aftermarket radio has an illumination wire, connect the Orange/White wire to it.
The following (2) wires are only for multimedia/navigation radios that require these wires.
• Connect the wire to the reverse wire.Green/Purple
• Connect the wire to the parking brake wireLight Green
• Connect the and RCA jacks to the audio AUX-IN jacks from the aftermarket radio.Red White
12-pin pre-wired ASWC-1 harness & 3.5mm jack
This harness and 3.5mm jack are to be used with the ASWC-1 (sold separately) to retain
steering wheel audio controls. If the ASWC-1 is not being used, disregard this harness &
3.5mm jack. If it will be used, please refer to the ASWC-1 instructions for radio connections and
programming. Disregard the harness that comes with the ASWC-1.
16-pin pre-wired AX-CUSTOM-BT harness
This harness is to be used along with the AX-CUSTOM-BT (sold separately) to retain the
personalization menu that is lost when removing the factory radio. If the AX-CUSTOM-BT is not
being used, disregard this harness. If it will be used, refer to the AX-CUSTOM-BT manual for app
instructions. Disregard the harness that comes with the AX-CUSTOM-BT.

3
REV. 6/26/2019 INSTTYTO-02
With the key in the off position:
Locate the factory radio harness in the vehicle and complete all necessary connections to the 1.
aftermarket radio.
Connect the and the 2. 16-pin harness with stripped leads TYTO-02 harness into the TYTO-02
interface.
Connect the 3. TYTO-02 harness to the factory radio harness in the vehicle.
• Turn the key (or push-to-start button) to the ignition position and wait until the radio comes on.
The factory amplifier should come on and you should hear sound at this point.
• Test all functions of the installation for proper operation, before reassembling the dash.
INSTALLATION PROGRAMMING
Tuotetiedot
Merkki: | AXESS |
Kategoria: | Ei luokiteltu |
Malli: | TYTO-02 |
Tarvitsetko apua?
Jos tarvitset apua merkille AXESS TYTO-02 esitä kysymys alla ja muut käyttäjät vastaavat sinulle
Ei luokiteltu AXESS Käyttöohjeet
26 Helmikuuta 2025
26 Helmikuuta 2025
26 Helmikuuta 2025
26 Helmikuuta 2025
26 Helmikuuta 2025
26 Helmikuuta 2025
26 Helmikuuta 2025
26 Helmikuuta 2025
26 Helmikuuta 2025
26 Helmikuuta 2025
Ei luokiteltu Käyttöohjeet
- Ei luokiteltu Nec
- Ei luokiteltu SWIT
- Ei luokiteltu Everdure
- Ei luokiteltu Toddy
- Ei luokiteltu Techly
- Ei luokiteltu McIntosh
- Ei luokiteltu Thermex
- Ei luokiteltu BDI
- Ei luokiteltu Multibrackets
- Ei luokiteltu Amazfit
- Ei luokiteltu Macally
- Ei luokiteltu Cyber Acoustics
- Ei luokiteltu Bluesound
- Ei luokiteltu Atlas
- Ei luokiteltu PTZ Optics
Viimeisimmät Ei luokiteltu Käyttöohjeet
9 Huhtikuuta 2025
9 Huhtikuuta 2025
9 Huhtikuuta 2025
9 Huhtikuuta 2025
9 Huhtikuuta 2025
9 Huhtikuuta 2025
9 Huhtikuuta 2025
9 Huhtikuuta 2025
9 Huhtikuuta 2025
9 Huhtikuuta 2025