AXESS AXPIO-JT1 Käyttöohje
AXESS Ei luokiteltu AXPIO-JT1
Lue alta 📖 käyttöohje suomeksi merkille AXESS AXPIO-JT1 (16 sivua) kategoriassa Ei luokiteltu. Tämä opas oli hyödyllinen 42 henkilölle ja sai 4.9 tähden keskimäärin 6 käyttäjältä
Sivu 1/16
AXPIO-JT1
INSTALLATION INSTRUCTIONS
AxxessInterfaces.com © COPYRIGHT 2022 METRA ELECTRONICS CORPORATION REV. 7/5/22 INSTAXPIO-JT1
TOOLS & INSTALLATION ACCESSORIES REQUIRED
• Panel removal tool • Phillips screwdriver
• Torx screwdriver
TABLE OF CONTENTS
Dash Disassembly ..................................................2
Kit Assembly
- Radio provision ...................................................2
- Pioneer Modular DDIN radio provision ..............3
AXXESS Interface Installation ...........................4-16
Jeep
Gladiator JT 2020-Up
Note: This kit will function in both Single-Zone and Dual-Zone vehicles:
• All HVAC functions will be retained.
•
Single-Zone vehicles will only get status feedback of the HVAC functions,
while Dual-Zone vehicles can also be controlled through the radio screen.
• Compass is only retained on vehicles equipped with the UConnect 3
(5" touchscreen).
• The External Speaker is only required in vehicles with safety group features.
Attention! Designed specifically for Pioneer’s DMH-W4600NEX/WC4660NEX.
Pioneer 9" DMH-WC6600NEX will require the Metra Floating Mount Kit
109-UN02. (sold separately)
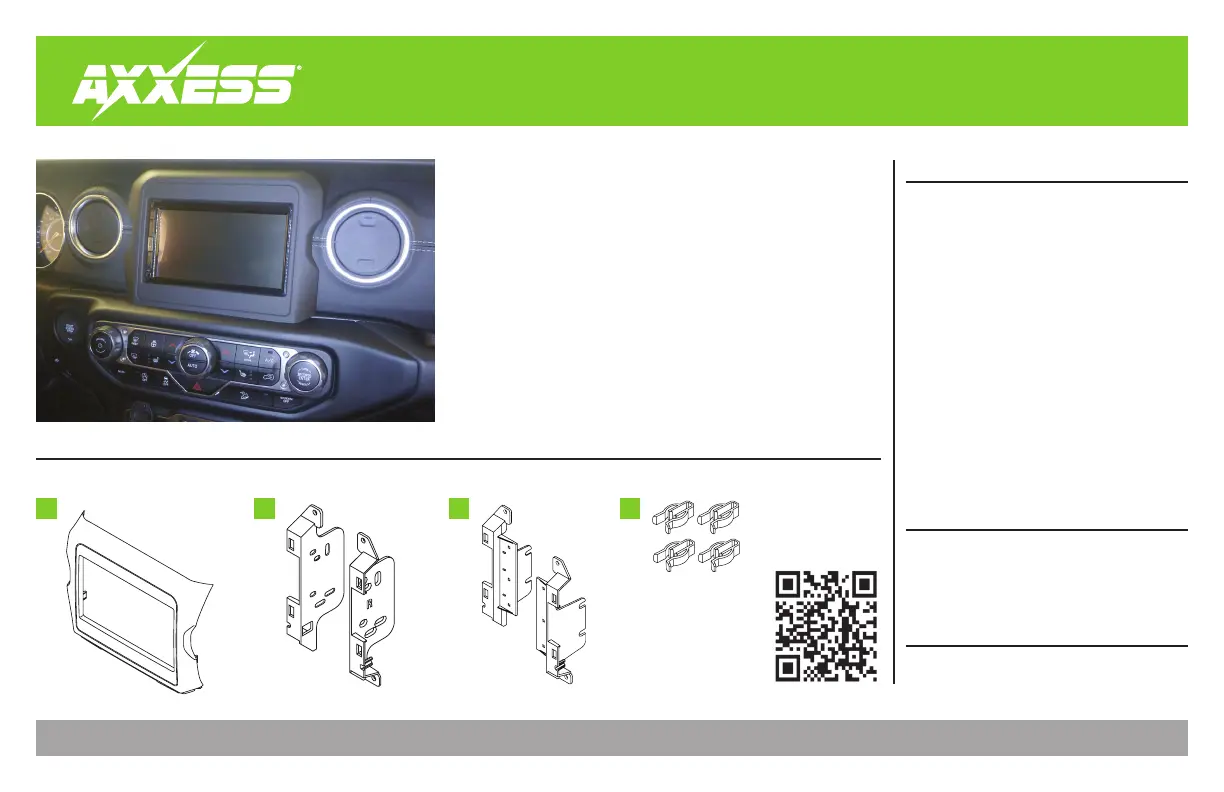
KIT COMPONENTS
• A) Radio bezel • B) Shallow mount brackets • C) Modular radio brackets • D) Panel clips (4)
ABCD
WIRING & ANTENNA CONNECTIONS
Wiring Harness: Included with Kit
Antenna Adapter:
Included with Kit
GPS
Antenna Adapter:
Included with Kit
Visit AxxessInterfaces.com for up-to-date
vehicle specific applications.
Product Info
Tuotetiedot
| Merkki: | AXESS |
| Kategoria: | Ei luokiteltu |
| Malli: | AXPIO-JT1 |
Tarvitsetko apua?
Jos tarvitset apua merkille AXESS AXPIO-JT1 esitä kysymys alla ja muut käyttäjät vastaavat sinulle
Ei luokiteltu AXESS Käyttöohjeet

26 Helmikuuta 2025
26 Helmikuuta 2025
26 Helmikuuta 2025
26 Helmikuuta 2025
26 Helmikuuta 2025
26 Helmikuuta 2025
26 Helmikuuta 2025
26 Helmikuuta 2025
26 Helmikuuta 2025
26 Helmikuuta 2025
Ei luokiteltu Käyttöohjeet
Viimeisimmät Ei luokiteltu Käyttöohjeet
9 Huhtikuuta 2025
9 Huhtikuuta 2025
9 Huhtikuuta 2025
9 Huhtikuuta 2025
9 Huhtikuuta 2025
9 Huhtikuuta 2025
9 Huhtikuuta 2025
9 Huhtikuuta 2025
9 Huhtikuuta 2025
9 Huhtikuuta 2025