AXESS AXAC-CH3 Käyttöohje
AXESS Ei luokiteltu AXAC-CH3
Lue alta 📖 käyttöohje suomeksi merkille AXESS AXAC-CH3 (16 sivua) kategoriassa Ei luokiteltu. Tämä opas oli hyödyllinen 53 henkilölle ja sai 4.7 tähden keskimäärin 3 käyttäjältä
Sivu 1/16
AXAC-CH3
INSTALLATION INSTRUCTIONS
AxxessInterfaces.com © COPYRIGHT 2023 METRA ELECTRONICS CORPORATION REV. 1/31/23 INSTAXAC-CH3
ATTENTION: With the key out of the
ignition, disconnect the negative battery
terminal before installing this product.
Ensure that all installation connections,
especially the air bag indicator lights, are
plugged in before reconnecting the battery
or cycling the ignition to test this product.
NOTE: Refer also to the instructions
included with the aftermarket accessory
before installing this device.
INTERFACE FEATURES
TOOLS REQUIRED
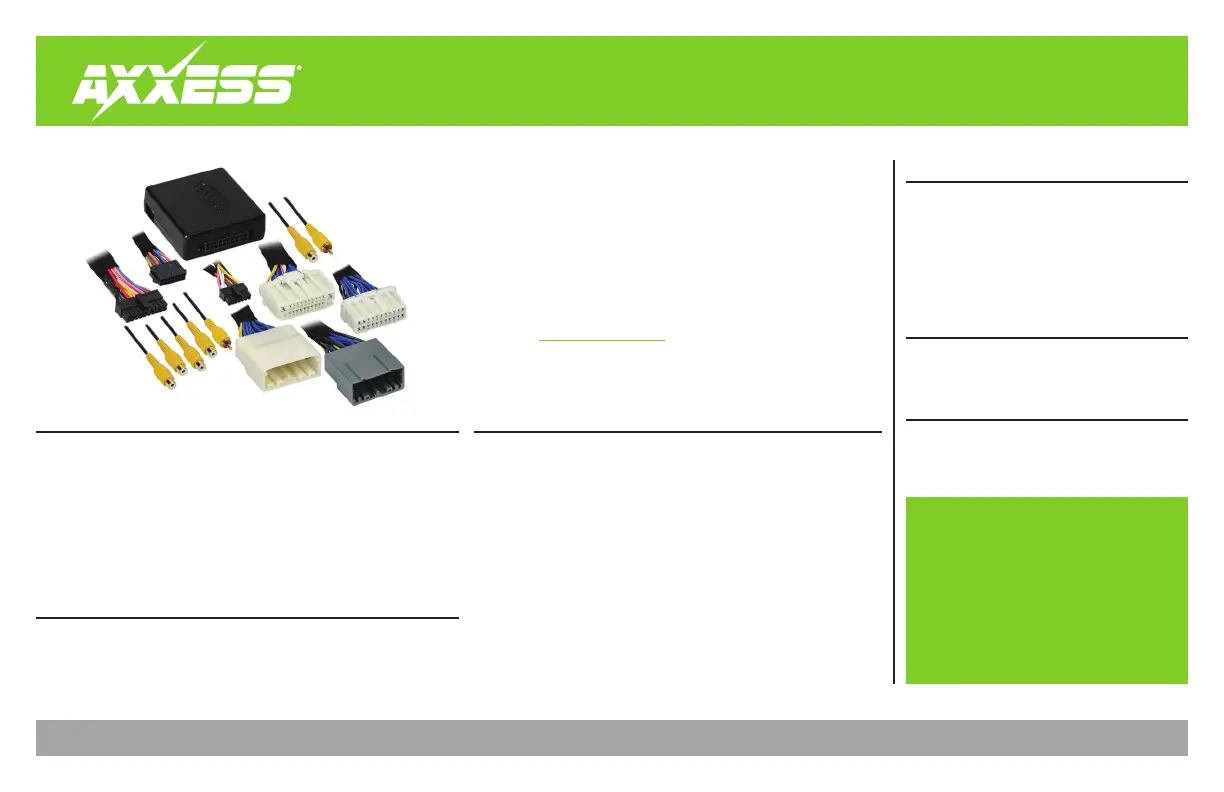
INTERFACE COMPONENTS
REQUIRED ITEMS
TABLE OF CONTENTS
Introduction............................................................2
Configuration .....................................................2-4
Connections ............................................................5
Installation .............................................................6
Programming .........................................................6
• (4) Camera inputs
• Reverse signal trigger generated via CAN bus communication
of the vehicle
• Turn signal trigger generated via CAN bus communication
of the vehicle
• (4) Programmable camera control wires
• Micro-B USB updatable
• Crimping tool and connectors, or solder gun,
solder, and heat shrink
• Tape • Wire cutter • Zip-ties
• AXAC-CH3 interface
• AXAC-CH3 interface harness
• AXAC-CH3 vehicle harness (qty. 2)
• 22-pin T-harness
• 22-pin T-harness (cam harness)
Update Cable: AXUSB-MCBL (sold separately)
Axxess Updater Program
†
With 8.4-inch U-Connect RB5 or RE2 radio
Chrysler/Dodge
†
Camera Interface With
Pre-Wired
Harness
2011-2018
APPLICATIONS
Chrysler
300 2011-2014
Dodge
Charger 2011-2014
Journey 2011-2018
Note: Only compatible with NTSC cameras.
Visit AxxessInterfaces.com for more detailed information
about the product and up-to-date vehicle specific applications
Tuotetiedot
| Merkki: | AXESS |
| Kategoria: | Ei luokiteltu |
| Malli: | AXAC-CH3 |
Tarvitsetko apua?
Jos tarvitset apua merkille AXESS AXAC-CH3 esitä kysymys alla ja muut käyttäjät vastaavat sinulle
Ei luokiteltu AXESS Käyttöohjeet

26 Helmikuuta 2025
26 Helmikuuta 2025
26 Helmikuuta 2025
26 Helmikuuta 2025
26 Helmikuuta 2025
26 Helmikuuta 2025
26 Helmikuuta 2025
26 Helmikuuta 2025
26 Helmikuuta 2025
26 Helmikuuta 2025
Ei luokiteltu Käyttöohjeet
Viimeisimmät Ei luokiteltu Käyttöohjeet
9 Huhtikuuta 2025
9 Huhtikuuta 2025
9 Huhtikuuta 2025
9 Huhtikuuta 2025
9 Huhtikuuta 2025
9 Huhtikuuta 2025
9 Huhtikuuta 2025
9 Huhtikuuta 2025
9 Huhtikuuta 2025
9 Huhtikuuta 2025