Quoizel Dury RDY1717AWH Käyttöohje
Lue alta 📖 käyttöohje suomeksi merkille Quoizel Dury RDY1717AWH (2 sivua) kategoriassa Helpotus. Tämä opas oli hyödyllinen 20 henkilölle ja sai 4.2 tähden keskimäärin 4 käyttäjältä
Sivu 1/2
1of2
6CORPORATEPARKWAY
GOOSECREEKSC29445
wwwquoizelcom
,.
..
2018QuoizelInc.
AssemblyInstructionSheet#IS-RDY1717AWH
ForStyleRDY1717AWH
ReleasedDate:2018-01-31
ThankyouforpurchasingaQuoizelproduct.
Needassistancewithpartsorassembly?CallQuoizelcustomerserviceat1-800-645-3184
orvisituson-lineatwww.quoizel.com
Pleasegotoforproductcleaningtips.Gototheselection.
(4)B10CandelabraBasebulbs60WMaximum.
30-45minutes
Identifyandinspectallpartsbeforebeginninginstallation.Checkpackagecontentlistanddiagramsbelowtobesureallpartsare
present.Ifanypartsaremissingordamaged,donotattempttoassemble,install,oroperatethefixture.Contactcustomerserviceforreplacement
parts.
www.quoizel.comCare+Maintenance
LightSource:
EstimatedAssemblyTime:
Preparation:
ToolsRequired:Flatheadscrewdriver,Phillipsscrewdriver,pliers,wirecutters,wirestrippers,electricaltape,safetyglasses.
WarningsandCautions
Turnoffelectricityatcircuitbreakerormainfuseboxbeforeinstallation.Consultalicensedelectricianifindoubt.
Theseinstructionsareprovidedforyoursafety.Itisveryimportantyoureadthemcompletelybeforeinstallingthefixture.Westrongly
recommendthatalicensed,professionalelectricianperformtheinstallation.
Disconnectfixturefrompowersourcebeforereplacingbulbs.Makesurebulbsaregivensufficienttimetocoolbeforeremoval.
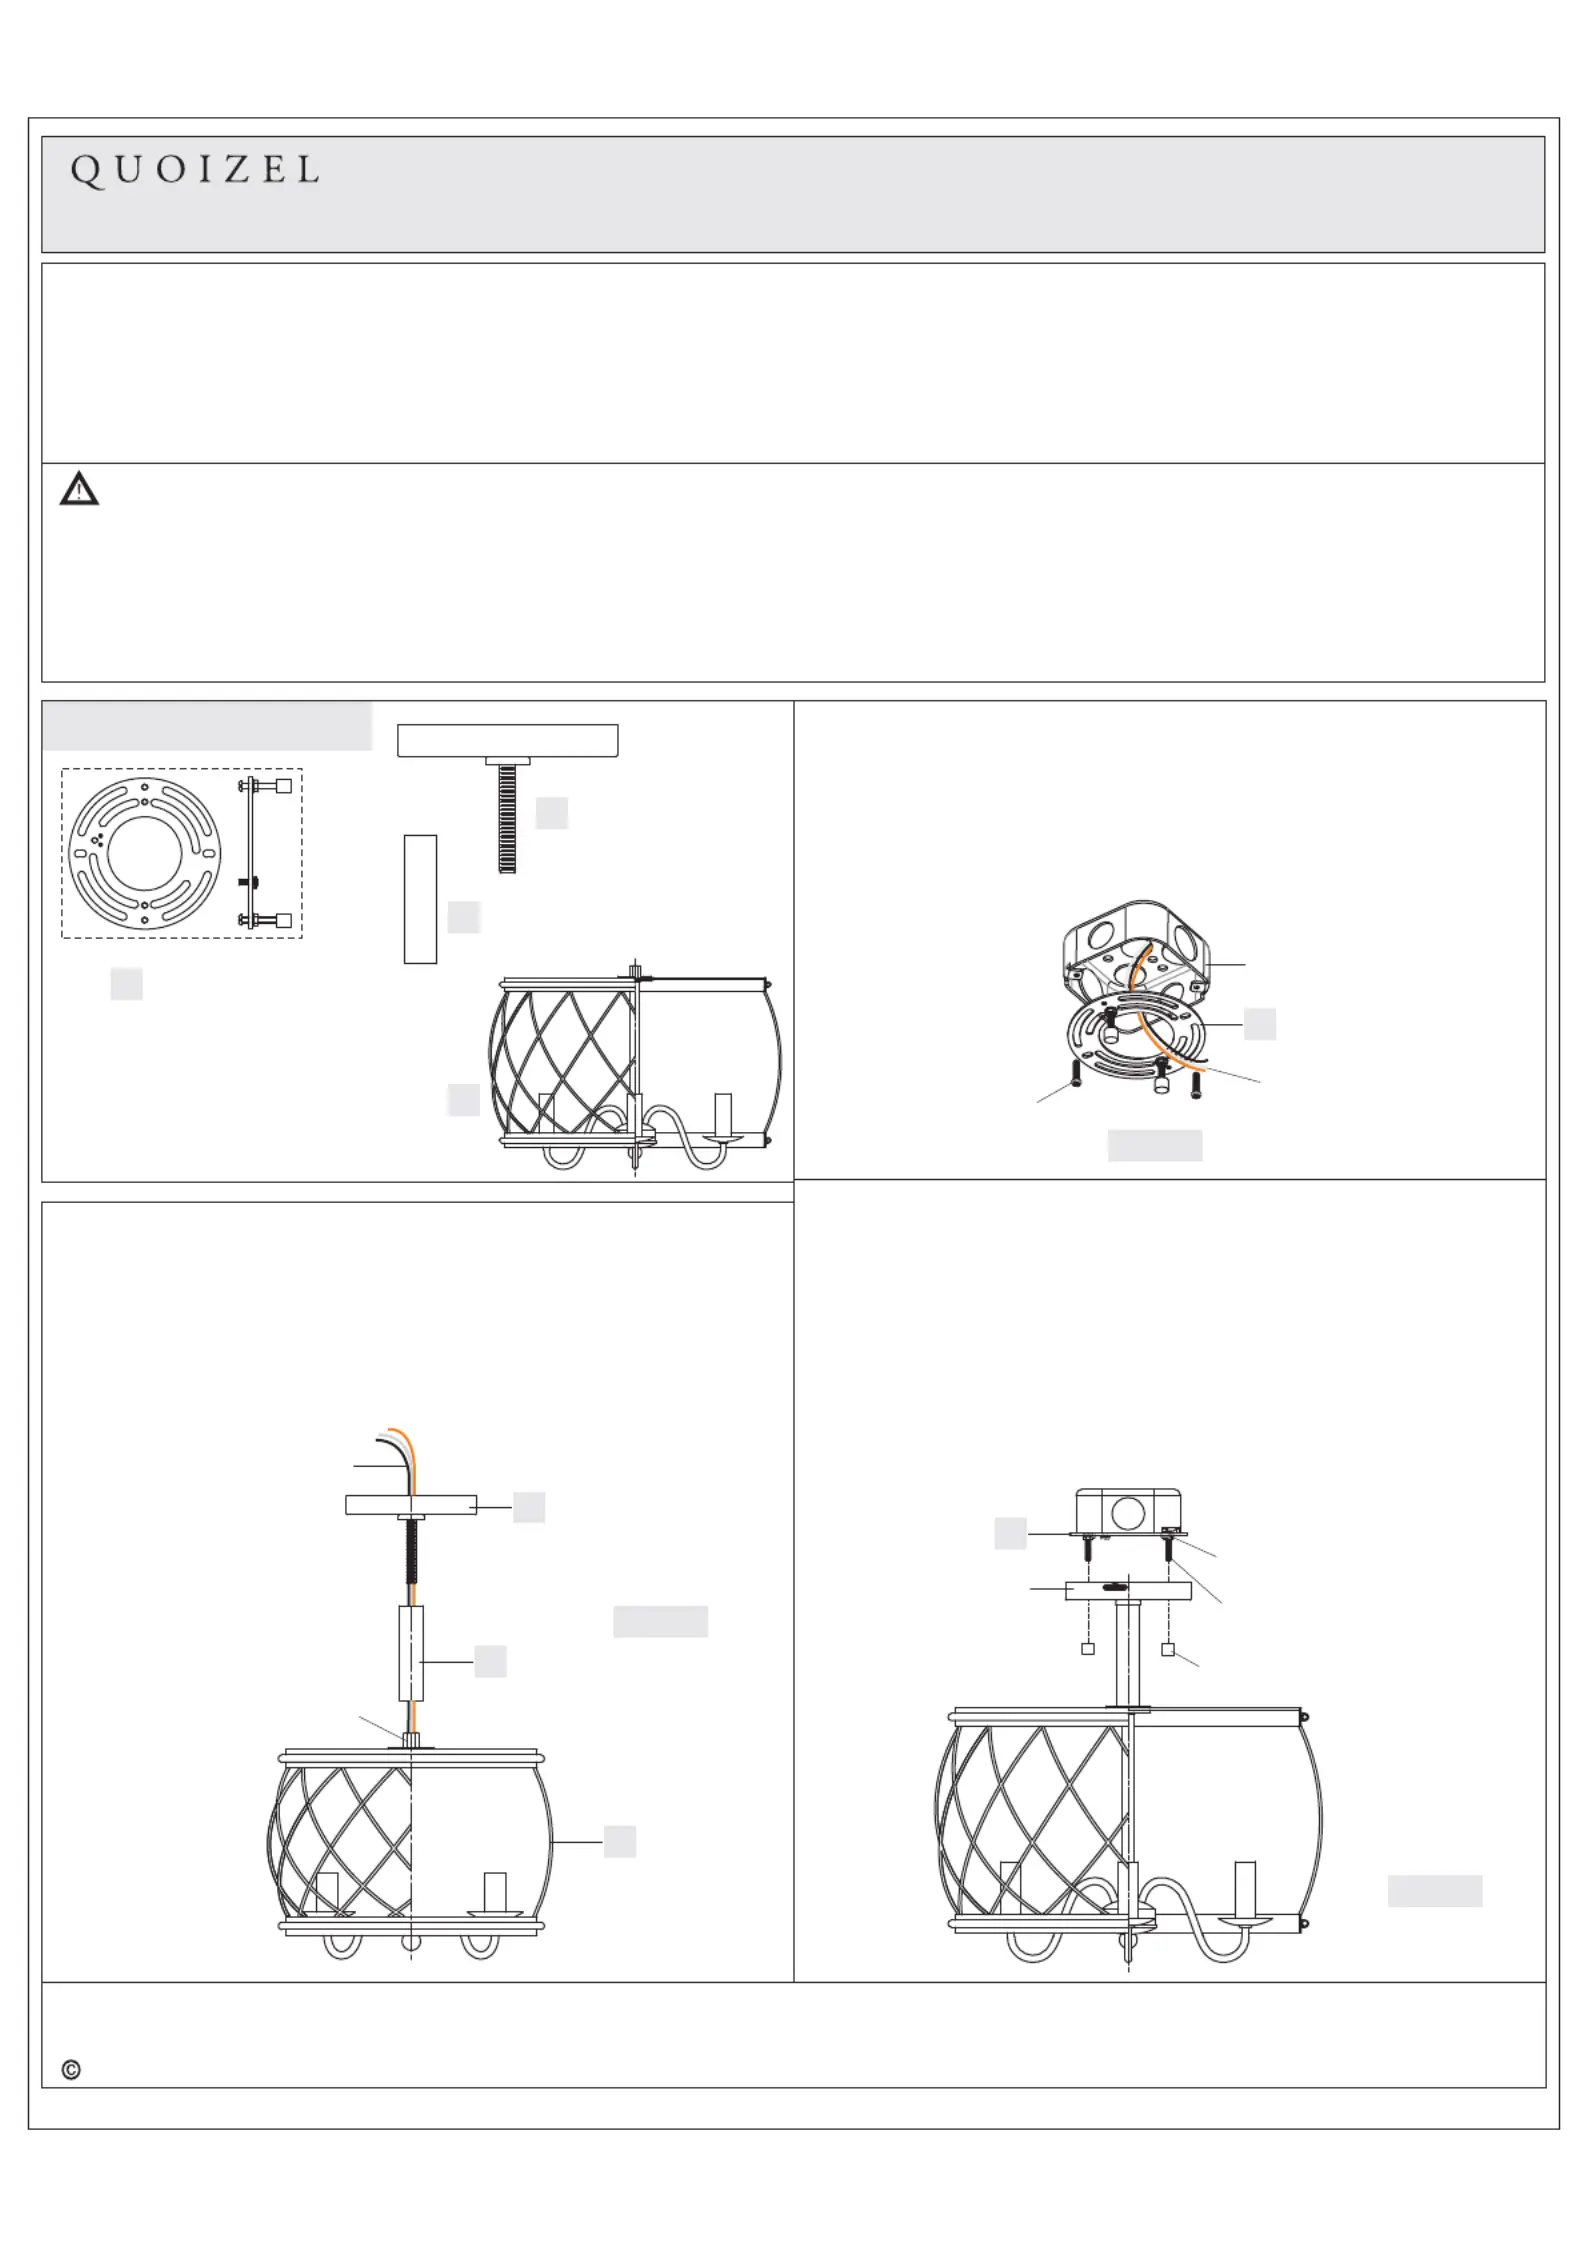
PackageContents
A
Crossbar
Assembly
x1
B
Fixture
Body
x1
C
CeilingCanopy
withNipple
x1
D
SpacerTube
x1
STEP1InstallSpacerTubeandCeilingCanopy-
A.Passthesupplywiresandgroundwirefromfixturethroughthe
SpacerTube(C)andtheCeilingCanopywithNipple(B)inturn.
PlacethenippleoftheCeilingCanopywithNipple(B)throughthe
SpacerTube(C)andthreadthenippleontothehexcouplingonthe
topcenteroftheFixtureBody(D).Handtightenuntilsnug.
Figure1
STEP2-InstallingtheCrossbarAssembly
A.Passthesupplywireswithgroundwirefromoutletboxthroughthe
CrossbarAssembly(A).AttachtheCrossbarAssembly(A)tothe
OutletBoxwiththeheadoftheGreenGroundScrewfacingyou.
SecuretheCrossbarAssembly(A)withOutletBoxScrews(not
included).Tightenuntilsnug.
SupplyWires
withGroundWire
Figure2
B
C
D
HexCoupling
OutletBoxScrews
(notincluded)
OutletBox
A
SupplyWires
withGroundWire
STEP3-TestFittheCeilingCanopytotheCrossbarAssembly
A.RemovethemountingballsfromtheCrossbarAssembly(A).Place
theceilingcanopyontotheCrossbarAssembly(A)andsecurewith
mountingballs.Note:Theceilingcanopyshouldbesnugagainstthe
ceilingandheldtightwiththemountingballs.Ifitisnot,adjustthe
lengthofthemountingscrewsontheCrossbarAssembly(A)by
unscrewingthepreassembledhexnutandlockwasherandthen
screwingthemountingscrewsinoroutofthecrossbaruntilthe
correctlengthisachieved.Oncetheceilingcanopyissecure,
removethemountingballandfixtureandproceedtoStep4.
MountingScrew
HexNutand
LockWasher
MountingBall
A
Figure3
CeilingCanopy
Tuotetiedot
| Merkki: | Quoizel |
| Kategoria: | Helpotus |
| Malli: | Dury RDY1717AWH |
Tarvitsetko apua?
Jos tarvitset apua merkille Quoizel Dury RDY1717AWH esitä kysymys alla ja muut käyttäjät vastaavat sinulle
Helpotus Quoizel Käyttöohjeet

1 Huhtikuuta 2025
25 Lokakuuta 2024
16 Lokakuuta 2024
16 Lokakuuta 2024
16 Lokakuuta 2024
16 Lokakuuta 2024
16 Lokakuuta 2024
16 Lokakuuta 2024
16 Lokakuuta 2024
16 Lokakuuta 2024
Helpotus Käyttöohjeet
Viimeisimmät Helpotus Käyttöohjeet
9 Huhtikuuta 2025
8 Huhtikuuta 2025
8 Huhtikuuta 2025
8 Huhtikuuta 2025
8 Huhtikuuta 2025
7 Huhtikuuta 2025
5 Huhtikuuta 2025
5 Huhtikuuta 2025
5 Huhtikuuta 2025
5 Huhtikuuta 2025