Kidde FA110G Käyttöohje
Lue alta 📖 käyttöohje suomeksi merkille Kidde FA110G (2 sivua) kategoriassa Sammutin. Tämä opas oli hyödyllinen 54 henkilölle ja sai 4.6 tähden keskimäärin 4 käyttäjältä
Sivu 1/2
• Mount using a ¼ inch Concrete block, cement and tile walls:
toggle or masonry screw expansion anchor of suitable length.
Secure using multiple #10 expansion anchor screws. On tile walls
locate anchors within a joint if possible.
• : Special tools and fasteners are required for Steel post or beams
proper mounting and should be performed by a professional fire
extinguisher service company.
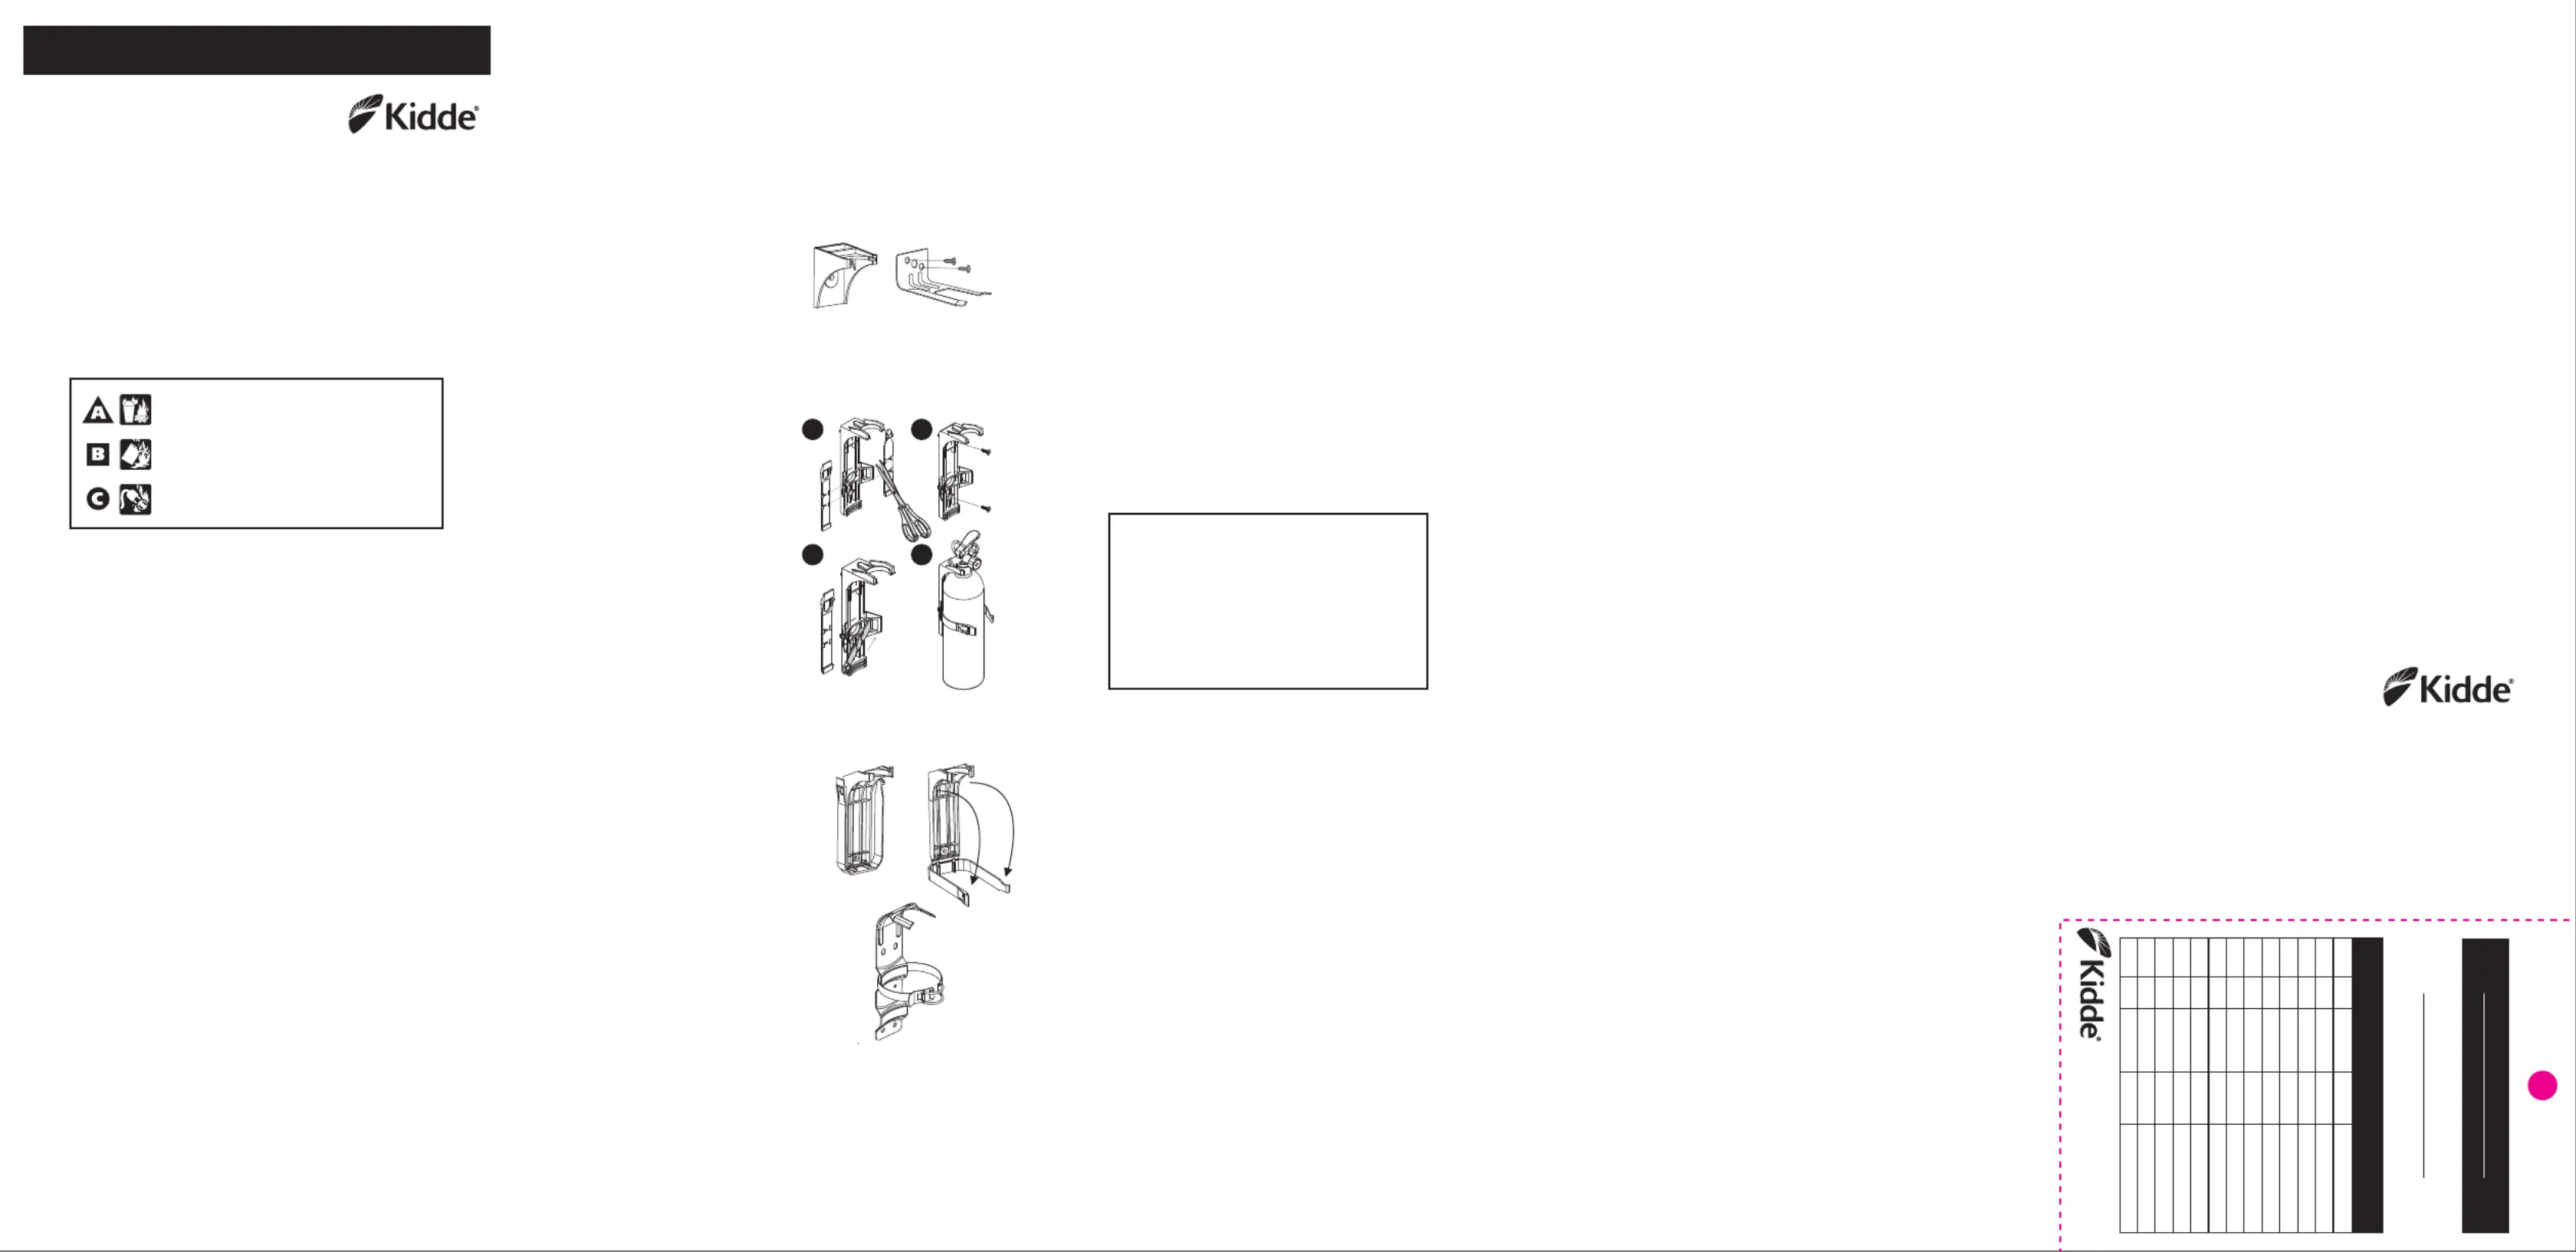
SUPPLIED HANGAR / BRACKET — MOUNTING
INSTRUCTIONS
A. Wall hangar
1. Fasten hangar to wall with
two screws (not included)
as suggested in general
installation guidelines.
2. Place extinguisher into hangar.
B. Plastic strap retainer with detachable straps: (models 366325
and 294706)
1. Remove straps from retainer
with scissors.
2. Fasten retainer to wall with
two screws (not included) as
suggested in general
installation guidelines.
3. Push rectangular ends of
straps through rectangular
slots on retainer. There are
circles on the body of each
strap – the circles must face
outward.
4. Place extinguisher into
retainer. Buckle straps
together to lock in place.
C. Plastic strap retainer with fold-down straps or (model 322057)
steel extinguisher strap bracket (model 896698) :
1. Fasten bracket to suitable
surface, as suggested in
general installation
guidelines, using a screw (not
included) in the upper
bracket mounting hole.
2. If your extinguisher was
shipped with a separate
metal strap: use another
screw (not included) to
mount the metal strap in the
lower bracket mounting hole.
If a separate metal strap was
not included: Install a second
screw in the lower bracket
mounting hole and proceed
to step 3.
3. Place extinguisher into bracket. Buckle straps together to
lock in place.
If your extinguisher has a hose and was shipped with a hose strap:
Slide the hose strap over the bottom of the cylinder, and secure
the nozzle end of the hose into the hose strap before placing your
extinguisher in service.
OWNER’S MANUAL:
DISPOSABLE FIRE EXTINGUISHER
DRY CHEMICAL MODELS
(Manual P/N: 21028186B)
Extinguishers should be selected and installed in accordance with
the National Fire Protection Association’s Standard for Portable
Fire Extinguishers Pamphlet NFPA-10. ( www.nfpa.org )
SELECTION
Symbols on the re extinguisher nameplate help explain and
indicate some of the acceptable types of situations, materials and
res that they can be used to address.
NFPA Fire Classication Symbols
INSTALLATION & MOUNTING
Mount extinguisher in manufacturer’s supplied hangar, retainer
or bracket.
Select a protected area to mount re extinguisher that is in plain
view and readily accessible in the event of a re.
Locate extinguisher within an area meeting the recommended
operating temperature limitations specied on nameplate.
For extinguishers weighing less than 40 lbs, the recommended
maximum mounting height from top of the re extinguisher to
oor must be less than 5 feet. Allow a minimum 4 inch clearance
from oor to help promote proper air circulation and avoid
potential corrosion.
Ensure the re extinguisher mounting hardware selected and used
is of the type, quality and size to properly secure unit onto the
surface. Mounting hardware should never be exposed where it can
contact the cylinder surface and present any potential rubbing or
wear issues.
Seek professional advice when addressing boat, vehicle or other
mobile mounting applications. Proper USCG marine mounting
bracket is listed on nameplate. Marine approvals are only valid
when the designated marine bracket is utilized.
SUGGESTED GENERAL INSTALLATION GUIDELINES
• Use quality #10 x 1-¼ inch Walls where wood studs are located:
or longer wood screws.
• Mount a ¾ inch back board of a size Sheet rock and dry wall:
extending 2 inches beyond the actual dimensions of the
extinguisher as a back support. Use multiple 3/16” inch toggle
bolts to properly secure the backboard support. The fire
extinguisher hangar or bracket can then be mounted onto the
back board using # 10 x 1 inch long wood screws.
CAUTIONS & WARNINGS
• Never incinerate a fire extinguisher.
• Never attempt to modify, alter or recharge a disposable fire
extinguisher model.
• Never attempt to test an extinguisher by partially discharging it.
This will cause loss of pressure, promote leakage and will
prevent the fire extinguisher from operating properly.
• Never intentionally discharge a fire extinguisher directly into a
person’s face. The velocity of discharged agent may cause injury.
• Never misuse or allow children to play with fire extinguishers.
• Fire extinguishers are pressurized mechanical devices that
require periodic care and service to remain safe and operable.
• Under certain fire and heat conditions, the dry chemical powder
in ABC type extinguishers will cause damage or prove extremely
difficult to remove from oven surfaces, including self-cleaning
models. Do not use self-cleaning feature to remove ABC powder.
OPERATION AND USE
Read and familiarize yourself with the re extinguisher nameplate
operating instructions immediately after purchase. Additional
instruction and training on the proper use of re extinguishers is
recommended and available from various sources.
DETAILED USE INSTRUCTIONS
1. Call the fire department/sound the alarm.
2. Get everyone out and have a plan for safe retreat.
3. Pull and remove ring pin, breaking the inspection/tamper seal.
4. Transport fire extinguisher to safe upwind position from fire, for
best visibility, and to avoid smoke and heat being produced.
5. Properly position yourself away from the fire, referencing the
proper minimum starting distance specifically identified on the
fire extinguisher nameplate operating instructions. Never
position yourself so that the fire blocks your escape route.
6. Remove hose from retainer band (if equipped).
7. Hold and keep the fire extinguisher in a vertical/upright position
and aim the discharge nozzle at the base of the fire.
8. Firmly squeeze the operating lever fully and with a side-to-side
sweeping motion, to avoid splashing or spreading of fire, apply
the extinguishing agent to the base of the flames.
9. Attempt to work the fire from the front edge to the back edge.
Avoid positioning any part of your body over, or stepping into a
fuel area during re ghting or after extinguishment. Caution
should be exercised after extinguishment, as some re situations
may re-ash.
AFTER USE
After any use or discharge, ensure your re extinguisher is
promptly replaced. Even only a momentary discharge will cause
leakage and the extinguisher to later not operate.
After re hazard has cooled and been properly removed, the
prompt clean up of any extinguishing agent residue is
recommended.
MONTHLY VISUAL INSPECTION
Fire extinguisher inspections should be performed upon initial
placement into service and at regular periodic intervals not to
exceed 31 days.
Visual inspection instructions:
1. Ensure the fire extinguisher is visible and access is unobstructed.
2. Ensure the fire extinguisher is properly mounted and secure.
3. Ensure the front nameplate operating instructions face outward
and are legible. Relocate extinguisher or clean nameplate as
required.
(Correct and resolve any discrepancies observed in steps 1, 2, and 3)
4. Ensure pull pin and/or original visual inspection tamper seal is
installed and still intact. (Replace extinguisher if broken or
missing)
5. Ensure pressure gauge needle reads within green operable area.
(Replace extinguisher if discrepancy observed)
6. Ensure the discharge nozzle and/or hose assembly is
unobstructed and securely attached. (Wipe obstruction clear or
replace extinguisher)
7. Closely examine all external extinguisher components for any
signs of damage, impact, wear, leakage or corrosion. (Replace
extinguisher if any type of discrepancy is observed)
8. Heft or weigh fire extinguisher to ensure it is properly charged.
Total charged extinguisher weight (gross weight) is indicated on
the product label/nameplate. (Replace extinguisher if used or
weight is outside tolerance)
9. Date and initial fire extinguisher inspection tag/record.
NOTE: Anytime an equipment related discrepancy described in
steps 4 through 8 is observed during an inspection procedure, the
re extinguisher must be discarded and replaced.
NOTE: Annual maintenance requirements include verication of
the re extinguisher weight at least annually and that the year of
manufacture stamped on the bottom of the cylinder is within the
designated 12 year maximum shelf life.
Some local jurisdictions require special annual maintenance tags.
ANNUAL MAINTENANCE
If you have purchased this re extinguisher to comply with local
re code occupancy requirements, the local re prevention
authorities may require annual maintenance examinations that
must be performed by properly trained and certied persons in
accordance with the National Fire Protection Association (NFPA)
and the manufacturer’s recommendations. Contact your local re
department or Fire Marshal’s ofce if you are unsure of these
requirements.
SIX OR TWELVE-YEAR* LIMITED WARRANTY
TERMS
For six (6) or twelve (12) years from date of purchase, Kidde will
repair or replace this product to the original owner free of charge,
if defective in material or workmanship. Date of purchase is
determined by proof of original purchase or by date stamp on
bottom of cylinder. This warranty does not apply to normal wear
of parts and damage resulting from accident, alteration, abuse, or
failure to follow instructions supplied. Kidde, at its option, may
refund the purchase price in lieu of replacement or repair. ANY
AND ALL IMPLIED WARRANTIES, INCLUDING ANY WARRANTY OF
MERCHANTABILITY OR FITNESS FOR A PARTICULAR PURPOSE
SHALL BE LIMITED TO A PERIOD OF SIX (6) OR TWELVE (12) YEARS
FROM DATE OF PURCHASE. Kidde, its dealers and distributors shall
not be responsible or in any way liable for any special or
consequential damages for breach of any warranty or implied
warranty. This warranty gives you specic legal rights, and you
may also have other rights which vary from state to state or
jurisdiction.
*Twelve-year warranty applies only to these models: KD57W-5BC,
KCD57W-5BC, MAR5, MAR5C, MAR10, MAR10C, MAR110,
MAR110C, MAR210, MAR210C, MAR340 and MAR340C
Company Contact:
Kidde
1016 Corporate Park Drive
Mebane, NC 27302
www.Kidde.com
Product Support: 800-880-6788
CLASS A: Onary Combustiblesrdi
Paper, cloth, wd, upholstery, bber, plaics.oorust
CLASS B: Flammable Liquids and Gases
Paper, cloth, wd, upholstery, bber, plaics.oorust
CLASS C: ergized Electrical SituationsEn
Fire sittions invoing rgized electricity.ualvene
ENGLISH
1
7
2
34
6
1016 Corporate Park Drive
Mebane, NC 27302, EE.UU.
800-880-6788 | www.kidde.com
Date By Pressure Weight Physical Condition
TAG INSPECTION RECORD
REGISTRO DE INSPECCIÓN DE ETIQUETAS
FASTEN TAG TO EXTINGUISHER
BEFORE MOUNTING UNIT
DO NOT REMOVE
OR ALTER THIS TAG
NO QUITE
NI MODIFIQUE
ESTA ETIQUETA
To use a re extinguisher,
remember the phrase
PASS
:
1. Pull the pin
2. Aim at the base of the re
3. Squeeze and hold the lever
4. Sweep from side to side
FIJE LA ETIQUETA AL EXTINTOR
ANTES DE MONTAR LA UNIDAD
Fecha Por Presión Peso Estado físico
Tuotetiedot
| Merkki: | Kidde |
| Kategoria: | Sammutin |
| Malli: | FA110G |
Tarvitsetko apua?
Jos tarvitset apua merkille Kidde FA110G esitä kysymys alla ja muut käyttäjät vastaavat sinulle
Sammutin Kidde Käyttöohjeet

4 Joulukuuta 2024
4 Joulukuuta 2024
4 Joulukuuta 2024
4 Joulukuuta 2024
4 Joulukuuta 2024
4 Joulukuuta 2024
4 Joulukuuta 2024
4 Joulukuuta 2024
4 Joulukuuta 2024
4 Joulukuuta 2024
Sammutin Käyttöohjeet
Viimeisimmät Sammutin Käyttöohjeet
8 Tammikuuta 2025
29 Joulukuuta 2024