Extron ZipClip 400 Käyttöohje
Extron Ei luokiteltu ZipClip 400
Lue alta 📖 käyttöohje suomeksi merkille Extron ZipClip 400 (2 sivua) kategoriassa Ei luokiteltu. Tämä opas oli hyödyllinen 33 henkilölle ja sai 4.6 tähden keskimäärin 2 käyttäjältä
Sivu 1/2
1
IMPORTANT:
I
I
I
IM
M
M
MP
P
P
PO
O
O
ORT
RT
RT
RTA
A
A
AN
N
N
NT:
T:
T:
T:
Go to www.extron.com for the
complete user guide, installation
instructions, and specifications.
ZipClip400/ZipCaddy400 • Installation Guide
w
w
w
w
w
w
w
w
w
w
e
e
e
e
e
e
e
e
e
e
ZipClip 400ZipCad 400dy
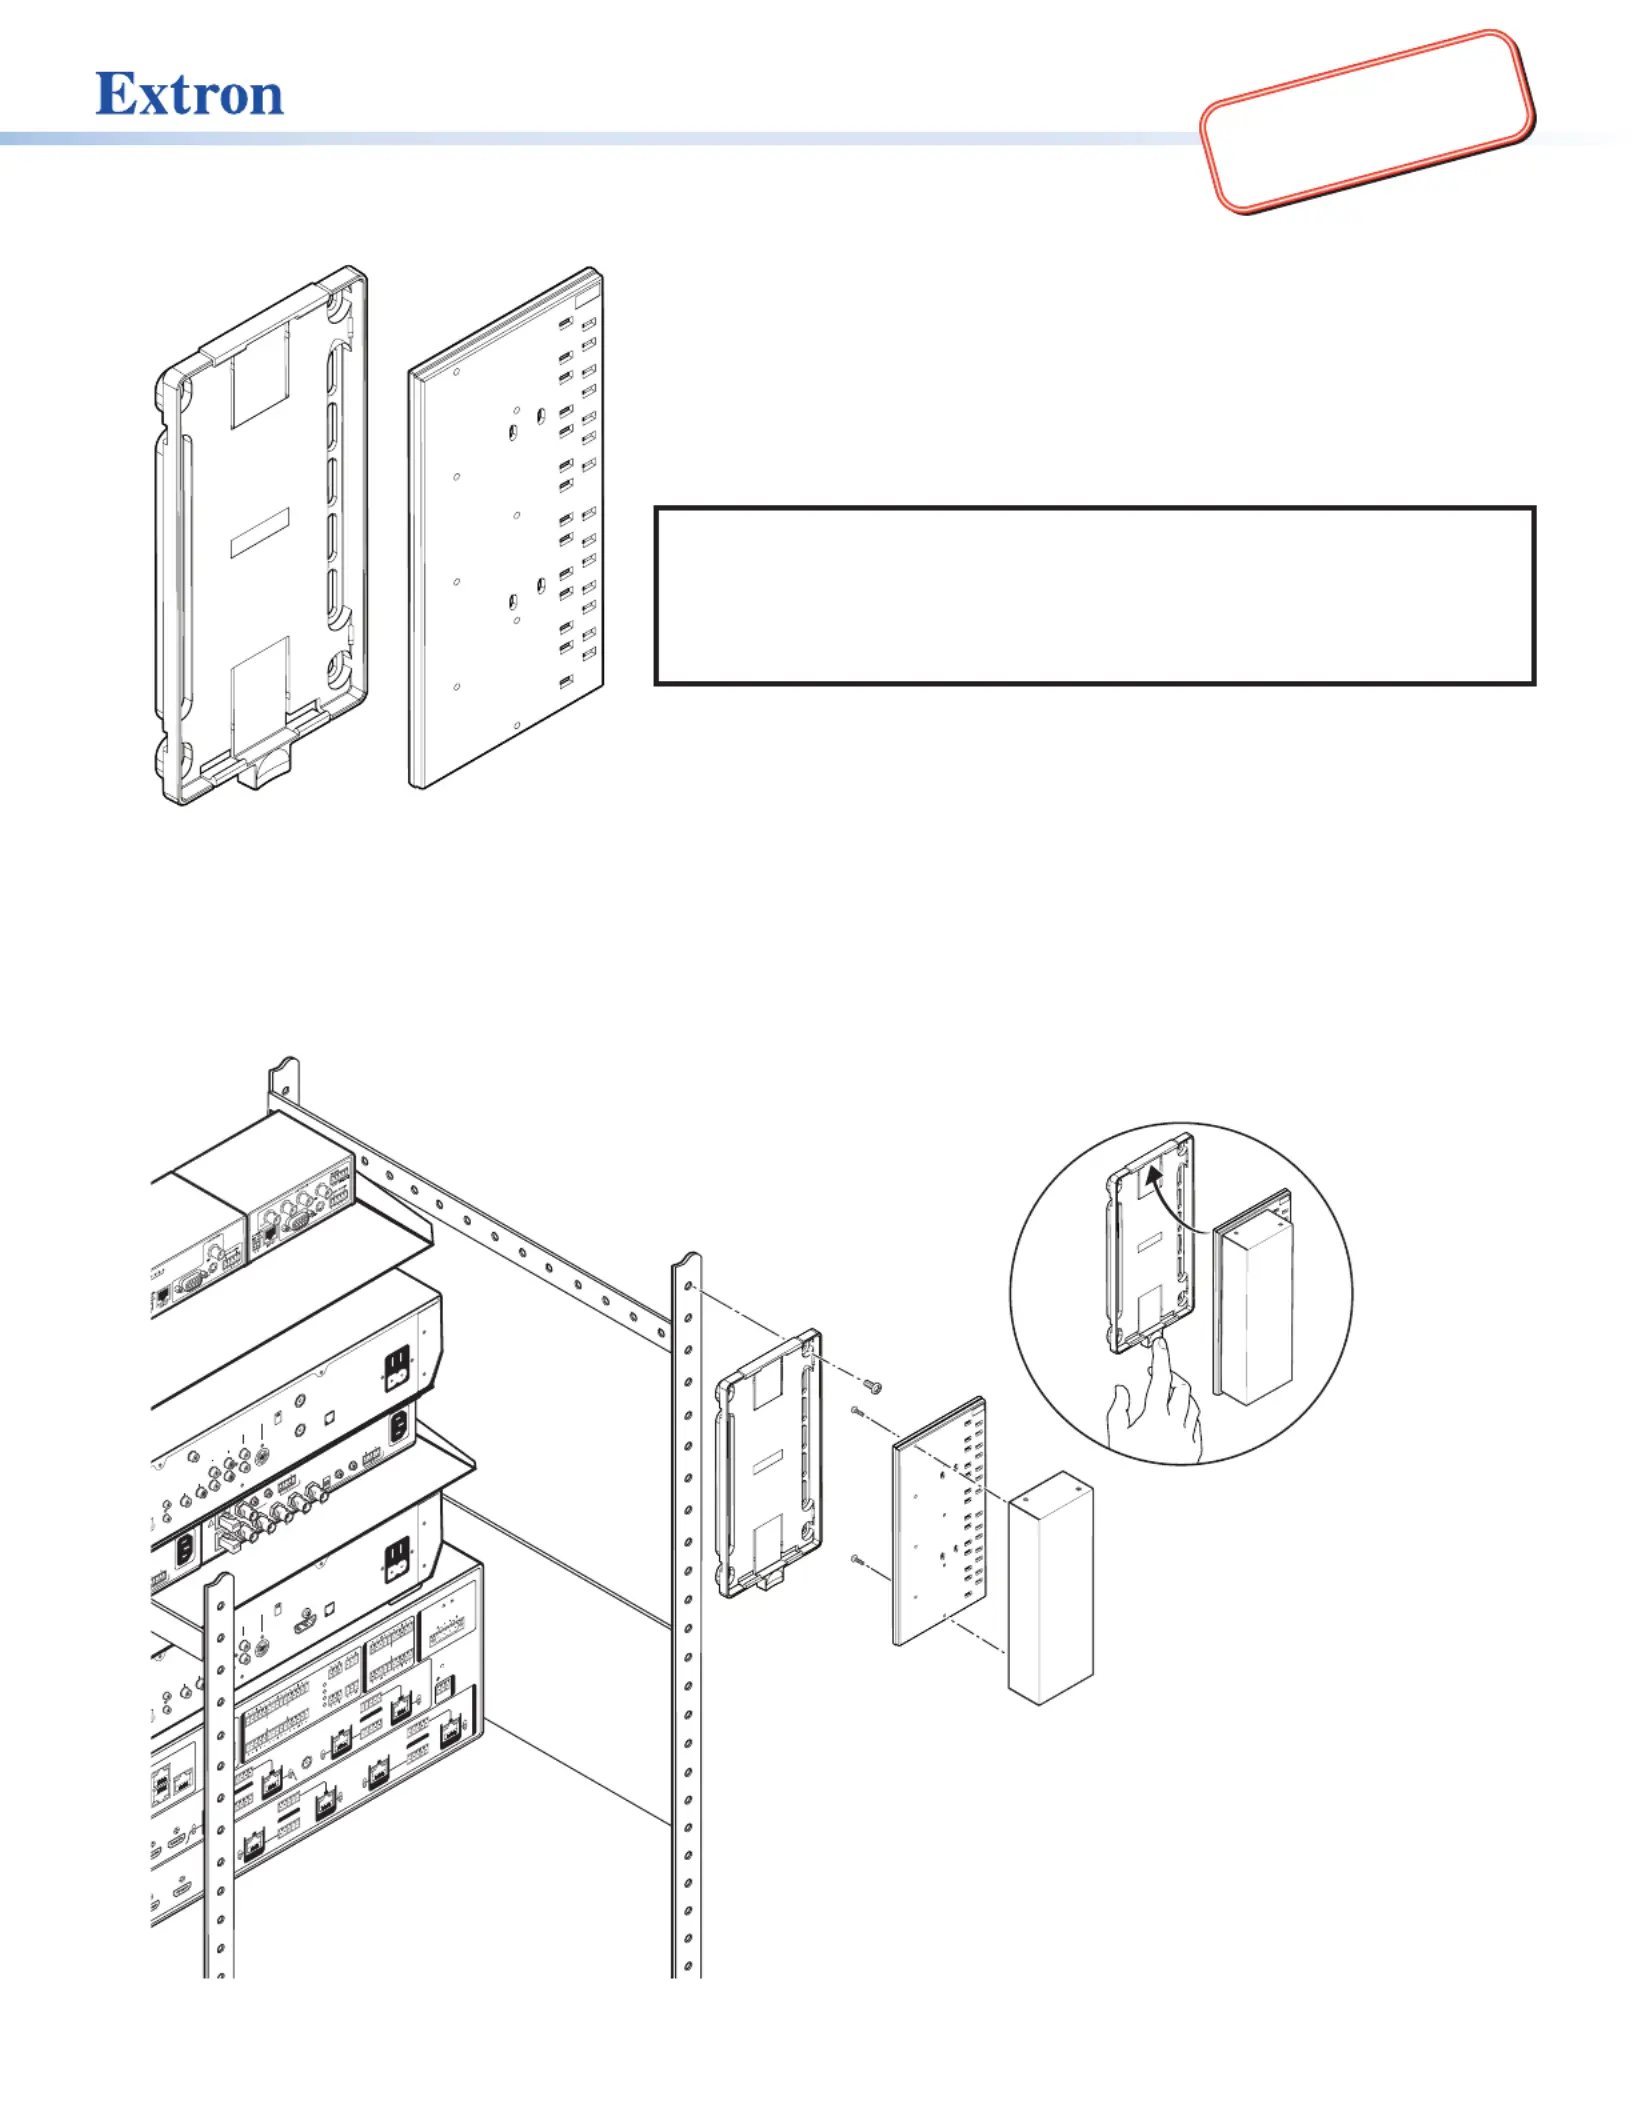
Figure 1. Front and Side View of the
ZipClip 400/ZipCaddy 400
The ZipClip400/ZipCaddy400 mounting kit is a plastic mounting kit allowing
1/2, 1/4, and 1/8 rack width, 3 inches (76 mm) or select 6 inches (152 mm) deep
Extron enclosures and select small form factor PCs to be securely and easily
mounted to various surfaces, such as under a table, on a rack rail system (side or
back), or in a lectern.
The ZipCaddy400 has two sides with a step groove to allow the edges to snap
into the ZipClip400. The ZipCaddy400 disengages with a press of the lever tab
on the ZipClip400.
NOTES:
• A 1/2 rack product takes up the entire ZipCaddy400 plate. Multiple 1/4
and 1/8 products fit onto the ZipCaddy400 side-by-side.
• Included cable ties are used to secure cables to the ZipCaddy400 (see
figure5 on page2).
Included Parts:
• (1) ZipClip400
• (1) ZipCaddy400
• (4) Cable tie wraps
• (4) Product mounting #4-40 screws
• (4) ZipClip mounting #12 wood screws
• Installation guide
Installing Device Onto a Rack
1
LR
5A6A
XTP
RS-2
32 IR
TxRxTxRx
G
Tx
RxG
RESET
XTP
DTP
XTP
DTP
+48V
MIC/LINE
113
24
2
3
4
LAN 2
LAN 1
LAN 3
DTP
HDBT
578
4
CLASS 2 WIRING
8/
OVER TP
REMOTE
SIG
LINK
IN
SI
G
L
IN
K
IN
AUDIO INPUTS
AUDIO OUTPUTS
AMP OUTPUT
INPUTS
RS-232 IR
TxRxTxRx
G
RS-232 IR
T
xRxT
xRx
G
XTP
DTP
XTP
DTP
910
OVER TP
S
I
G
LIN
K
IN
SIG LINK
IN
RS-232 IR
TxRxTxRxG
1
LR
1
LR
3
LR
3
LR
5
LR
2
LR
4
LR
2
LR
4
LR
6
LR
S
I
G
LI
NK
OUT
6B6
RS-
232 IR
xRxTxRx
XTP
S/PDIF
OUT
DTPHDBT
G
RS-232 IR
xRxT
xRx
G
OVER TP
XTP
DTP
HDBT
SIG LINK
OUT
SIG LINK
OUT
78
RS-232 IR
TxRxTxRx
XTP
DTP
HDBT
G
RS-232 IR
TxRxTxRx
G
OVER TP
CONTROL S
IN
OUTO)
VIDEOS VIDEO
TEL LINE
HDMIAC IN
AC OUT
A
AUDIO 3
OUT
LR
B O
RGB INP
AUDIO
VDEO
HV
A
AUDIO
LRB
A
LRB
ISOGC SYNC
50/60 Hz
B
50/60 Hz
CONTROL S
IN
OUT(MONO)
LR
AUDIOVIDEOS VIDEOCH 3
CH 4
VHF/UHF
VHF(SAT)/UHF
IN
OUT
TEL LINE
AC IN
AC OUT
A
RF REMOTE
AUDIO 3
OUT
LR
e
e
e
e
e
e
e
e
e
e
w
w
w
w
w
w
w
w
w
w
e
e
e
e
e
e
e
e
e
e
w
w
w
w
w
w
w
w
w
w
Back of Rack
ZipClip 400
ZipCaddy 400
1
2
3
1/2-rack product
shown
Figure 2. Installation onto the Back of a Rack.
1. Install the ZipClip400 to the rack (see figure2,
1
). Rack screws are
not provided.
2. Secure the rack product, products, or small PC to the ZipCaddy400
with the provided #4-40 product mounting screws (
2
).
3. To install, insert the ZipCaddy400 onto the ZipClip 400 and click
into place (
3
).
To remove, press down on the ZipClip400 tab.
Tuotetiedot
| Merkki: | Extron |
| Kategoria: | Ei luokiteltu |
| Malli: | ZipClip 400 |
Tarvitsetko apua?
Jos tarvitset apua merkille Extron ZipClip 400 esitä kysymys alla ja muut käyttäjät vastaavat sinulle
Ei luokiteltu Extron Käyttöohjeet

2 Huhtikuuta 2025
2 Huhtikuuta 2025
2 Huhtikuuta 2025
2 Huhtikuuta 2025
12 Maaliskuuta 2025
10 Maaliskuuta 2025
25 Helmikuuta 2025
25 Helmikuuta 2025
25 Helmikuuta 2025
25 Helmikuuta 2025
Ei luokiteltu Käyttöohjeet
Viimeisimmät Ei luokiteltu Käyttöohjeet
9 Huhtikuuta 2025
9 Huhtikuuta 2025
9 Huhtikuuta 2025
9 Huhtikuuta 2025
9 Huhtikuuta 2025
9 Huhtikuuta 2025
9 Huhtikuuta 2025
9 Huhtikuuta 2025
9 Huhtikuuta 2025
9 Huhtikuuta 2025