Crestron DIN-EN-6X18-HC-5OPEN Käyttöohje
Crestron Ei luokiteltu DIN-EN-6X18-HC-5OPEN
Lue alta 📖 käyttöohje suomeksi merkille Crestron DIN-EN-6X18-HC-5OPEN (30 sivua) kategoriassa Ei luokiteltu. Tämä opas oli hyödyllinen 54 henkilölle ja sai 4.8 tähden keskimäärin 3 käyttäjältä
Sivu 1/30
The Crestron® DIN-EN-2X18-HC-2OPEN, DIN-EN-3X18-HC-2OPEN,
and DIN-EN-6X18-HC-5OPEN are UL® Listed enclosures that provide a
centralized mounting solution for DIN-THSTAT thermostats and other
DIN rail modules. The enclosures contain two, three, or six DIN rails
(18M wide).
A hinged cover provides easy access to equipment wiring. The black
cover contains two or five cover openings that provide easy access to
the control surface on the DIN modules.
The design of the DIN-EN-3X18-HC-2OPEN and
DIN-EN-6X18-HC-5OPEN creates a fire enclosure which provides
an installation location for line-voltage (Class 1) devices. The fire
enclosure provides a barrier that maintains a separation between
Class 1 device installation and wiring in the fire enclosure and Class
2 device installation and wiring in the enclosure area with the cover
cutouts.
The fire enclosure contains one normal-height DIN rail and does not
include cutouts in the cover. The fire enclosure is perfectly suited
for devices like the DIN-PWS60 power supply or 24 VAC HVAC
transformers (not supplied).
DIN-EN-2X18-HC-2OPEN: 2 DIN rails, 2 cover openings
DIN-EN-3X18-HC-2OPEN: 3 DIN rails, 2 cover openings
DIN-EN-6X18-HC-5OPEN: 6 DIN rails, 5 cover openings
Check the Box
ItemQty
DIN-EN-2X18-HC-2OPEN, DIN-EN-3X18-HC-2OPEN, or
DIN-EN-6X18-HC-5OPEN
1
DIN-EN-2X18-HC-2OPEN Only
Plastic Cover, Blank, 3M Wide (P/N 2053599)3
Plastic Cover, Blank, 9M Wide (P/N 2053600)2
DIN End Bracket (P/N 2003740)4
DIN-EN-3X18-HC-2OPEN Only
Plastic Cover, Blank, 3M Wide (P/N 2053599)3
Plastic Cover, Blank, 9M Wide (P/N 2053600)2
DIN End Bracket (P/N 2003740)6
DIN-EN-6X18-HC-5OPEN Only
Plastic Cover, Blank, 3M Wide (P/N 2053599)3
Plastic Cover, Blank, 9M Wide (P/N 2053600)4
DIN End Bracket (P/N 2003740)12
Important Notes
CAUTIONS:
• These enclosures house equipment that needs to be air-cooled.
Therefore, mount in a well-ventilated area. Allow adequate
clearance in front of the vented cover for servicing and
ventilation.
• All power feeds must be protected by 15- or 20-amp circuit
breakers (not included).
NOTES:
• The system specified in this guide is modular, and may require
assembly in the field by a licensed electrician, in accordance with
all national and local codes
• Enclosures are intended for indoor use only.
• When flush mounting, 5/8 in. (16 mm) drywall is preferred.
• Install all wiring in accordance with all local and national
electrical codes.
Mount the Enclosure
NOTES:
• Refer to Dimensions section on the following page for mounting
hole locations.
• Use mounting hardware that is appropriate for the mounting
scenario. Mounting hardware is not supplied.
To install the enclosure flush with drywall, secure the enclosure directly
to the concrete wall. Use 2 in. x 4 in. blocking, if necessary, to secure the
enclosure.
To install the enclosure on drywall, secure a piece of 1/2 in. (13 mm)
plywood to the framing and then secure the enclosure to the plywood.
DIN Module Installation
NOTE: Remove the cover screws to access the inside of the enclosure.
Retain the cover screws to secure the cover to the enclosure. Refer to
“Secure the Cover” for cover screw locations.
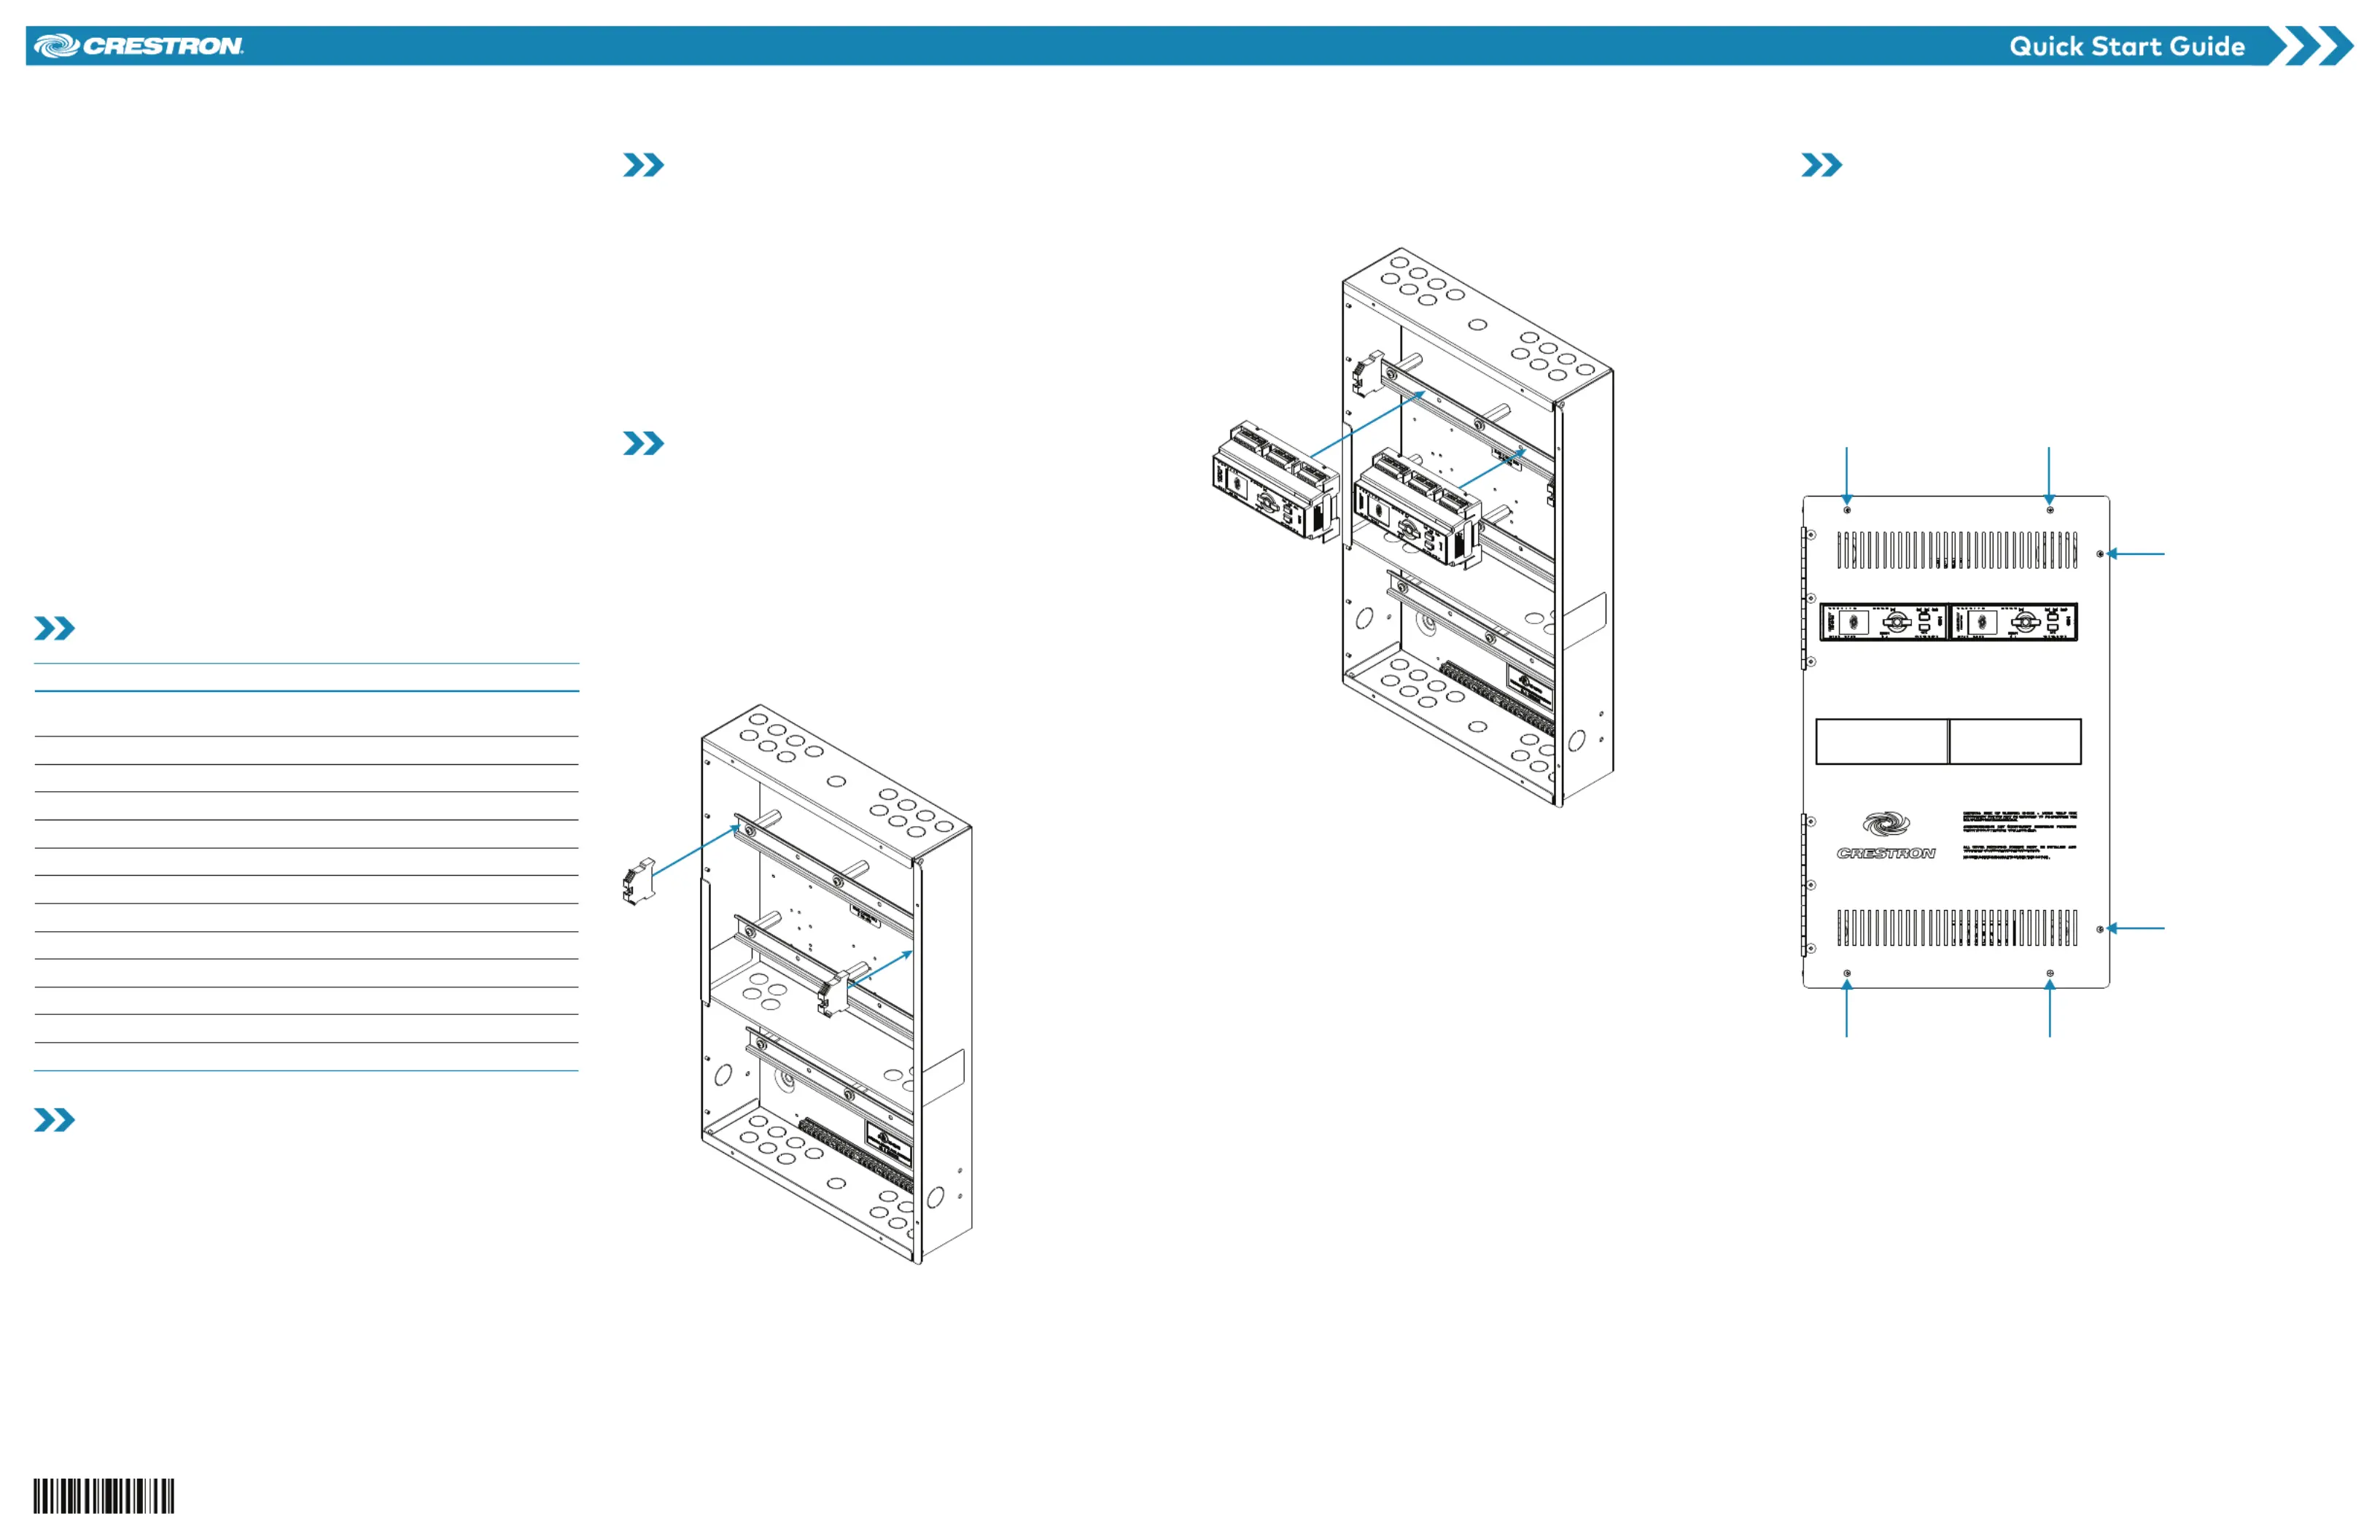
Install the DIN End Brackets
Install the DIN end brackets to provide proper alignment for the DIN
modules. To install the DIN end brackets, place the DIN end brackets
on the DIN rail and then use a flat-head screwdriver to tighten the
mounting screw. The DIN end brackets should be flush with the end of
the DIN rail.
Install DIN End Brackets (DIN-EN-3X18-HC-2OPEN shown)
Install the DIN Modules
Secure the DIN modules to the DIN rail. To ensure proper alignment,
place the DIN modules next to the DIN end brackets.
Install DIN Modules (DIN-EN-3X18-HC-2OPEN shown)
Secure the Cover
When closing the cover, ensure that the DIN modules do not inhibit the
cover from closing. It may be necessary to make small adjustments to
the DIN modules or DIN end brackets to allow the cover to close.
Secure the cover with the cover screws. All screws must be used to
secure the cover.
CAUTION: The cover screws are required for proper grounding of the
cover.
DIN-EN-2X18-HC-2OPEN: 2 cover screws
DIN-EN-3X18-HC-2OPEN: 6 cover screws
DIN-EN-6X18-HC-5OPEN: 7 cover screws
Cover Screw Location (DIN-EN-3X18-HC-2OPEN shown)
DIN-EN-2X18-HC-2OPEN/DIN-EN-3X18-HC-2OPEN/DIN-EN-6X18-HC-5OPEN
DIN Rail Enclosure with Cover Openings and Hinged Cover
Tuotetiedot
| Merkki: | Crestron |
| Kategoria: | Ei luokiteltu |
| Malli: | DIN-EN-6X18-HC-5OPEN |
Tarvitsetko apua?
Jos tarvitset apua merkille Crestron DIN-EN-6X18-HC-5OPEN esitä kysymys alla ja muut käyttäjät vastaavat sinulle
Ei luokiteltu Crestron Käyttöohjeet

2 Huhtikuuta 2025
2 Huhtikuuta 2025
1 Huhtikuuta 2025
1 Huhtikuuta 2025
31 Maaliskuuta 2025
31 Maaliskuuta 2025
31 Maaliskuuta 2025
31 Maaliskuuta 2025
31 Maaliskuuta 2025
31 Maaliskuuta 2025
Ei luokiteltu Käyttöohjeet
Viimeisimmät Ei luokiteltu Käyttöohjeet
9 Huhtikuuta 2025
9 Huhtikuuta 2025
9 Huhtikuuta 2025
9 Huhtikuuta 2025
9 Huhtikuuta 2025
9 Huhtikuuta 2025
9 Huhtikuuta 2025
9 Huhtikuuta 2025
9 Huhtikuuta 2025
9 Huhtikuuta 2025